Pixel

Pixel Updates & Events

Server Updates & Events

Announcements

DEV Community

Pending Image Uploads: Publish Product Photos Only After Approval

TL;DR: Store every edtech product-photo upload as private data with a pending database state, run automated screening, and expose the photo only after an explicit approval transition. Perform background removal after approval by default; move it into the upload path only when editors must inspect the cutout itself. Optimistic publishing is the wrong invariant because the worst content is public during the exact interval in which the system knows the least about it. The useful boundary is not an extra moderation service. It is one column, a small state machine, and a read path that refuses anything outside approved. This also creates a stable capability contract: the application can call one internal prepare_product_photo operation while the image provider behind that operation changes. Infrai is a deliberate option at that boundary because one REST API covers the image capability and its public discovery surface describes request and response schemas; the application contract need not follow a vendor migration. Infrai uses one key across its capabilities, with one wallet and one bill. In this workflow, that means the upload and the outcome notification don't force separate credential distribution or invoice reconciliation, even though the database still owns the decision. That is an operating advantage distinct from the REST adapter itself. How should an API hold image uploads in a pending state? The invariant should be blunt: a public product record may reference only an approved image. A successful upload is not approval, and a successful background-removal job is not approval either. Keep the original object private, record its state as pending, and let the public query join only rows whose state is approved. This is stricter than optimistic publication, where an upload appears immediately and disappears if a later check rejects it. That shape reduces the uploader's perceived wait, but it also guarantees a period in which rejected content is live. For moderated uploads, that is a poor exchange. The state can remain compact: State Publicly readable Background removal Next valid decision pending No Deferred by default approved or rejected approved Yes, through the application's delivery policy Run or publish prepared result Replacement or retirement rejected No Skip A new upload creates a new record Do not overwrite the original row with a new upload. A fresh attempt should receive a fresh identifier, otherwise a late moderation result can approve the wrong bytes. Notify the uploader after both approval and rejection; silence encourages another upload, which creates duplicate work and an ambiguous user experience. One trap deserves emphasis. A background-free image is not necessarily a safe image. Segmentation changes pixels around the subject; it does not confer a moderation decision. Keep those decisions separate. Two viable system shapes The first architecture processes at upload. The service accepts the private original, records pending, screens it, removes the background, stores the derived asset, and then records the human or policy decision. Its invariant is that approval refers to the prepared result. This fits catalogs where reviewers must judge edge quality, transparent regions, or whether removing the scene destroys instructional meaning. The cost is coupling: a slow transformation extends the pending interval, and a transformation failure can block a photo that might otherwise be acceptable. The second architecture screens at upload but transforms on demand after approval. Its invariant is that approval refers to the private original, while derived images remain reproducible outputs. This is the better default for an edtech catalog when moderation asks “may this image be published?” and background removal asks “how should this approved image be presented?” The upload decision stays small, retries of the transformation cannot change moderation history, and unused rejected images never consume transformation wor...

Powered by Readybot.io

**DEV Community** ## Pending Image Uploads: Publish Product Photos Only …

DEV Community

Search Phrases That Find People Hiring for Your Freelance Service

If you search Reddit or LinkedIn for "SEO services", you'll mostly find other SEO freelancers. Buyers rarely use the name of your service. They describe what's wrong. "My site doesn't show up on Google." "My store gets visits but no sales." "Our ads cost more than they bring in." "I don't have time for Instagram." Below are search phrases that tend to surface people who want to pay for help, for eight common freelance services. Next to each one is what the person usually means, because the phrase tells you a lot about how to reply. How to use these phrases Put each phrase in quotes so the words stay together. Reddit: use the search bar, sort by New, and look at the past week. Google: site:reddit.com "phrase", then Tools and Past week. It works with site:linkedin.com/posts too. LinkedIn: search the phrase, pick the Posts filter, sort by Latest. Facebook groups: search inside each group you've joined. X: search the phrase and open the Latest tab. To skip sellers on Google, add -"for hire" -"I will" to the search. On Reddit, skim past anything tagged [For Hire]. Web design and development "looking for a web designer": a small business or startup that wants a new site or a redesign, usually with a rough idea of the look. "need someone to build a website": often a first site. The budget is usually modest and they want the setup handled for them. "can anyone recommend a web developer": trust matters more than price here. Show similar work. "my website looks outdated": an existing site the owner is embarrassed by, often one that's hard to use on a phone. "help with my wordpress site": usually a broken plugin or a site the last developer left behind. These small jobs often turn into ongoing work. "my website is down": urgent. They'll pay to have it working today. "Wix or hire someone": deciding between doing it themselves and paying. An honest answer wins. "how much should a website cost": early research. A clear price range, and what moves it up or down, helps more than a pitch. Shopify "looking for a shopify developer": custom features or theme changes. Ask which one. "help setting up my shopify store": a new store owner who wants to launch without learning everything first. "store gets traffic but no sales": a conversion problem, even if they think they need ads or a new design. "move from woocommerce to shopify": a migration. Their worry is losing orders or Google rankings. "shopify theme customization": specific edits to a theme they already like. "shopify checkout not working": a fix they need fast because it's costing them sales. "DIY with Shopify or hire a developer": still deciding. Help them decide and they'll remember you. SEO "not showing up on google": usually a local business. Often a Google Business Profile problem as much as a website one. "traffic dropped after update": they lost rankings and want someone to explain why. Worried and in a hurry. "looking for an seo consultant": they know they need SEO and are comparing options. "local seo help": they want to show up on Maps in their town. "is seo worth it for a small business": skeptical, maybe burned before. Be straight about how long it takes. "what does an seo agency actually do": paying an agency and unsure what they get. An audit or second opinion is an easy first job. "technical seo audit": a defined one-off project, often for an online store. Google and Meta ads "looking for a facebook ads expert": they've tried running ads themselves or had a bad experience with someone else. "google ads not converting": spending money with nothing to show for it. They want a diagnosis first. "cost per lead too high": the ads work a little, but the numbers don't add up yet. "ad account disabled": urgent. They need someone who knows the appeal process. "conversions not tracking" or "pixel not firing": a tracking fix, usually small and quick. "is it worth paying someone to run ads": deciding whether to hire. Explain what a sensible first test looks like. "who manages your goo...

Powered by Readybot.io

**DEV Community** ## Search Phrases That Find People Hiring for …

TechCrunch

SNL gathers all the tech tycoons for a lesson in dating and spycraft

While awkward, creepy tech executives have become a recurring theme on Saturday Night Live, this week’s episode gave the cast a chance to show off all their impressions at once.

Powered by Readybot.io

**TechCrunch** ## SNL gathers all the tech tycoons for a …

DEV Community

I built Bootnasko: A python project that simulates an operating system in Python

Hey everyone! I recently finished Bootnasko 1.4, a Python project that simulates an operating system. It isn't a real OS. Instead, it's a desktop-like experience built with Python, inspired by how operating systems look and work. Some of its features include: Around 35 custom commands A desktop-like environment A Start Menu (fake) Built-in applications Mini-games An installation wizard Custom options and features I've been developing Bootnasko through multiple versions, and it's been a fun project to work on. It's completely free to try! If you'd like the installation link, just ask in the comments. I'd appreciate feedback, suggestions, and thoughts about the project!

Powered by Readybot.io

**DEV Community** ## I built Bootnasko: A python project that …

DEV Community

MCP, A2A, UCP, AP2... Confused? A Simple Map of AI Agent Protocols (November 2026)

MCP. A2A. AG-UI. A2UI. UCP. AP2. ACP. x402. And as of this week, Poppy. If your head spins every time a new agent protocol drops, you're not alone. Even the acronyms collide: "ACP" now means at least two different things depending on who you ask. Here's the good news. These protocols are not competing with each other. They are layers, like the network stack. Once you see the layers, the whole thing clicks. This guide gives you the map, what's new as of November 2026, a real end-to-end example, and an honest answer to "which ones do I actually need?" TL;DR: one question picks the protocol Ask yourself: what is my agent talking to? My agent is talking to... Use this In one line Tools and data MCP Plug the agent into APIs, databases and files Another agent A2A Hand off work to an agent someone else built A user's screen AG-UI / A2UI Show the user what the agent is doing, live A store or business UCP Search, cart, checkout and orders in one standard A payment AP2 Prove the user really approved the purchase Keep this table handy. Everything below just adds detail. The stack at a glance +---------------------------------------------------+
| USER AG-UI (live events) / A2UI (UI) |
+---------------------------------------------------+
| PAYMENTS AP2 (signed mandates), x402 |
+---------------------------------------------------+
| COMMERCE UCP (catalog, cart, checkout) |
+---------------------------------------------------+
| AGENTS A2A (agent to agent) |
+---------------------------------------------------+
| TOOLS MCP (agent to tools and data) |
+---------------------------------------------------+
One agent can use all five layers in a single task. We'll walk through exactly that later. Layer 1: MCP, the agent's hands Model Context Protocol (MCP) connects an agent to tools and data: your database, GitHub, Slack, a weather API, anything. Build an MCP server once, and any MCP-compatible agent can use it. What's new: the current spec is 2026-07-28, and it's the biggest change yet. MCP moved from a stateful, session-based protocol to a stateless request and response protocol. What that means in practice: No more sessions. The session handshake is gone, so any request can go to any server instance. Great news for anyone running MCP servers behind a load balancer. A new discovery call. Clients can ask a server what it supports before sending other requests. Some features are deprecated. Roots, Sampling and Logging are now deprecated, and Tasks moved out of the core into an official extension. Old transport is on the way out. If your server still uses HTTP+SSE, the spec tells you to migrate to Streamable HTTP. If you built an MCP server last year, read the changelog before your next upgrade. Use it when: your agent needs to read or do something in another system. Layer 2: A2A, agents talking to agents Agent2Agent (A2A) lets agents built by different teams, vendors or companies work together. Each agent publishes an "Agent Card" describing what it can do, and other agents discover it and delegate tasks. MCP vs A2A in one line: MCP is for tools you control. A2A is for agents you don't own, which have their own brains and make their own decisions. What's new: v1.0 shipped on March 12, 2026, the first stable version, with JSON-RPC, gRPC and HTTP+JSON bindings. The v1.0.1 patch followed in May. v1.1 is in the works. A release candidate tagged in late October adds two-way streaming while a task runs. It moved in with MCP. A2A joined MCP in the Agentic AI Foundation (under the Linux Foundation) in August 2026. Big vendors are on board. Microsoft Copilot Studio now lets you expose an agent as a remote MCP server or an A2A agent. Use it when: you need a specialist agent from another team or company, like a travel policy agent, a fraud check agent or a partner's booking agent. Layer 3: AG-UI and A2UI, the agent's face Agents that work silently in the background feel b...

Powered by Readybot.io

**DEV Community** ## MCP, A2A, UCP, AP2... Confused? A Simple …

DEV Community

How We Designed a Scalable Image Optimization Checklist for Content Teams

Images play an essential role in modern digital publishing. From blog illustrations and product photographs to landing page banners and social media graphics, visual content helps businesses communicate information, improve engagement, and create better user experiences. However, managing images across a growing website can become challenging. Content teams frequently upload images with unnecessarily large file sizes, inconsistent dimensions, inappropriate formats, and missing descriptive metadata. These problems can affect page loading performance, publishing efficiency, and image search visibility. For organizations publishing content regularly, optimizing every image manually is not a sustainable solution. A repeatable process is needed to ensure that images meet technical and editorial requirements before publication. This case study explores how a scalable image optimization checklist can be designed for content teams. It examines the challenges, proposed workflow, evaluation criteria, and practical recommendations for implementing consistent image optimization practices. Case Study Disclosure: This is a hypothetical workflow design and illustrative analysis, not a report of a completed client engagement or a measured production experiment. No actual traffic improvements, ranking changes, compression percentages, or performance results are claimed. 1. Background and Context Consider a growing digital publishing organization that manages several blogs, landing pages, product pages, and educational resources. Its content team includes: SEO specialists responsible for organic visibility. Content writers producing articles and guides. Graphic designers preparing visual assets. Developers managing website performance. Digital marketers publishing promotional content. Each department handles images differently. Designers may export high-resolution graphics, writers may download images from different sources, and marketers may upload campaign creatives without checking their dimensions. Over time, these inconsistent practices create several operational challenges. Common Image Optimization Problems 1. Oversized image files Large images increase the amount of data browsers must download. This can negatively affect page loading performance, particularly for visitors using slower internet connections. 2. Inconsistent image dimensions Images designed for different platforms may not fit the intended website layout. Incorrect dimensions can create unnecessary resizing and visual inconsistencies. 3. Inappropriate image formats Using the same format for every image is not always efficient. JPEG, PNG, WebP, and AVIF have different characteristics and are suitable for different types of visual content. 4. Missing alternative text Images without descriptive alt text can create accessibility problems and reduce the amount of contextual information available to search engines. 5. Unstructured file naming Names such as IMG_20261106_001.jpg provide little information about image content. Descriptive filenames make digital asset management more organized. These challenges demonstrate why image optimization should become a standard publishing activity rather than an occasional technical task. 2. Objectives and Research Questions The proposed checklist was designed around five primary objectives. Establish consistent image optimization standards across departments. Reduce unnecessary image file sizes without compromising visual quality. Improve image accessibility and search engine understanding. Simplify image preparation for large publishing teams. Create a repeatable workflow that can support increasing content volumes. The analysis focuses on several practical questions: Which image properties should be checked before publication? How can teams standardize image compression? Which tasks should be automated? How should image optimization quality be evaluated? How can the workflow remain manageable as publishing requirements grow? 3. Method...

Powered by Readybot.io

**DEV Community** ## How We Designed a Scalable Image Optimization …

DEV Community

I build my product videos' timelines from code in DaVinci Resolve

I learned DaVinci Resolve in two days because I wanted to edit the videos for my own product. I build InputLag, a Windows optimizer for gamers, and make videos about the settings behind it. The useful discovery: Resolve has a Python scripting API. A script can create a timeline and place clips on tracks. I write those scripts together with an AI assistant, so a layered edit gets assembled from code, then open it in Resolve for the hands-on work. Code builds the timeline For my Valorant video about Network Buffering and Interrupt Moderation, the timeline is assembled in layers. The footage, graphics and audio can stay on separate tracks, so I can work on one part of the edit without flattening the whole thing into a single clip. The GIF below is an insert from that video. I still edit it by hand Once the clips are on the timeline, I watch the sequence and make changes in Resolve. A cut can be in the planned position and still feel late. A graphic can be readable and still stay on screen too long. The script handles assembly. I handle the decisions that need watching and listening. Having the layers available makes those revisions practical. I'm also working on a big InputLag update: a new design, metrics and more tweaks. Making the videos myself has become another part of building the product.

Powered by Readybot.io

**DEV Community** ## I build my product videos' timelines from …

DEV Community

The Permission Model Is the Product: Occupational Health Case Management on Salesforce

An occupational health case moves through examination, restriction, treatment and return to work. Five roles touch it: a physician, a nurse, a case manager, the employer and a safety officer. Each one needs a different slice of the same record, and one of them must never see the diagnosis. That sentence is the whole engineering problem. The employer is entitled to know whether a worker can lift, climb or drive. The employer is not entitled to know why. If that distinction is not expressed in the data model, no amount of sharing rules will hold it. Spreadsheets fail for a reason that is not convenience Shared drives and paper forms do not fail because they are old. They fail because they cannot enforce who sees what, and they cannot prove afterwards who looked. Both halves matter. An audit question six months later is answered from a system or it is not answered at all. Model the case as several objects, not one The temptation is a single fat record with a hundred fields. It is faster to build and it leaks immediately, because the moment the employer is allowed to see the restriction they can also see whatever clinical field sits beside it. What works instead: separate objects for the case, the encounter, the exposure event, the restriction, the surveillance result, the employer account and the worker record junction objects for the common real world case where the employer of record is not the site where the work happens restrictions that carry a start date, an end date and a review owner, so an expired restriction is a state rather than a note somebody forgot Record types and field level security then have something real to attach to. Employers see fitness and restriction outcomes. Clinical detail stays with clinical roles. Governed picklists are a privacy control Free text classification is usually argued about as a reporting problem. It is worse than that. Somebody types a diagnosis into a logistics notes field, and now the sensitive detail lives in a field that nobody classified as sensitive and no sharing rule protects. Replacing free text with governed picklists fixes the reporting and closes that hole at the same time. Put regulated thresholds in data, not in code Take blood lead level monitoring as the example. Enrollment, testing frequency, thresholds and follow up actions are all rules that change when a regulation changes. If they live in code, every regulatory update is a release, and under deadline pressure somebody adds a field to an existing object that quietly inherits whatever sharing that object already had. That is how a privacy regression ships. If they live as records, the update is a configuration edit. The periodic reports come off the same records, so the report and the rule cannot drift apart. Correspondence belongs to the case Inbound and outbound fax and email get logged as case activities rather than living in somebody's mailbox. Documents hang off the case with version history, classification and retention rules. This is unglamorous and it is the part that answers the audit. Give outsiders a surface built for outsiders Employers and referring clinicians need real time visibility. The wrong answer is a stripped down copy of the internal application with fields hidden by CSS. The right answer is an external community, which gives them a purpose built surface and does not consume internal user licences. Migration is where the old sins surface Legacy data arrives with duplicates and years of free text classifications that now have to map onto a governed vocabulary. Some of it will not map cleanly, and that is a decision for a human, not a script. Rehearse the whole thing in a full sandbox and validate historical caseloads before cutover. The migration is also the only moment you get a clean look at how bad the old classification really was. The rule worth keeping Design the permission model before you design a single screen. Everything else in this build is downstream of that one choice, and it is ...

Powered by Readybot.io

**DEV Community** ## The Permission Model Is the Product: Occupational …

DEV Community

Caching Retrieval for Travel Itinerary Planners Without Lock-In (and Why I Chose One)

Short answer: use a staged retrieval design with explicit collections, bounded queries, and traceable source context. Cache normalized retrieval inputs and source documents, not the final itinerary. Keep the query and rerank stages replaceable so a change from a hosted vector service to a search specialist does not force an application rewrite. That sounds less exciting than picking a database. It is also the part that keeps a travel planner from recommending a closed museum after its hours changed. In healthtech travel, a result can be relevant and still be unsafe or unusable if its freshness is unclear, so the cache needs a policy, not just a TTL. The retrieval contract comes before the cache Start by mapping the user-visible answer to a retrieval contract. For an itinerary request, I write down the retrieval unit (one place, one event, or one source passage), the metadata filters (destination, date range, accessibility, and source type), and the freshness requirement. The contract should also say how source context is carried into the answer citation. Those fields are more durable than any vendor SDK. The planner can then have three observable stages: ingestion, querying, and answer citation. Ingestion turns web results into records with a source URL, fetched timestamp, and normalized text. Querying applies filters and a bounded top-k search. Citation keeps the IDs and URLs that actually informed the response. Logging each stage means a stale answer is diagnosable instead of being blamed on “the model.” Caching follows those boundaries. A web search cache can hold a short-lived result set; a scrape cache can hold content until its freshness deadline; a vector cache can hold embeddings and collection IDs. The generated itinerary belongs outside this cache, because two users with the same destination can have different dates, mobility needs, or clinical constraints. Infrai fits this boundary when you want vector retrieval and adjacent backend stages behind one plain REST contract. Infrai gives this workflow one key and one bill, plus a single REST API for the calls themselves. Its public discovery surface describes capabilities without a key, and its 295 routes across 20 modules give one platform room for web, vector, and other stages. That removes setup glue for a small team, but it does not remove the need to define a retrieval contract. Cache misses hurt. How should a travel itinerary planner cache retrieval results? Use a deterministic cache key made from the canonical query, filter values, retrieval-unit version, and freshness policy. Do not key on the raw prompt: whitespace and conversational filler create misses. A key such as dest=kyoto|dates=2026-10-04:2026-10-08|unit=passage:v2|fresh=6h makes invalidation reviewable in a log. Bound every query. A practical first pass is a small candidate set, followed by a rerank stage that sees the source metadata and passage text. Measure retrieval quality with a small labeled evaluation set before production rollout. I track recall of must-include places, citation validity, and stale-result rate alongside p95 latency; a faster cache that hides a missing accessibility requirement is a regression. There is a useful asymmetry here. Cache immutable or slow-changing material for longer, such as a destination guide, while weather, opening hours, and transport notices get short windows or bypass the cache. When a source changes, invalidate by source ID and collection version rather than flushing every destination. Your mileage may vary on TTL values; the right number comes from the freshness promise you make to users. For example, imagine a five-day Kyoto request that finds a clinic-accessible museum in a guide fetched yesterday, then receives a same-day closure notice from a transport page. The planner should reuse the guide embedding, refresh the closure source, and expose both timestamps to the answer builder. If the cache key only contains the destination, the closure can be hid...

Powered by Readybot.io

**DEV Community** ## Caching Retrieval for Travel Itinerary Planners Without …

DEV Community

Two people, two coding agents, one repo: what goes wrong, and what I built for it

If you and a teammate each run a coding agent (Claude Code, Codex, Cursor) on the same repo, the agents have no idea the other one exists. I kept running into the same four problems: Same file, two agents. Both edit it. You find out at the merge. Duplicate work. Both pick up the same task, or one rebuilds a helper the other finished an hour ago. No shared memory. My agent learns that a test setup is a dead end. My teammate's agent learns it again the next day. Rules that live on one laptop. A skill or checklist I wrote for my agent never reaches theirs. Git worktrees fix the first one on a single machine. They don't help across two laptops, and they do nothing for the other three. What I built agentroom is a shared room for a team's agents. Each person connects their agent with a room code, and from then on: Agents claim files before editing. If another agent holds a file, the edit is blocked and the agent is told who has it and for which task. It can pick other work, wait, or raise a conflict. Goals, specs and decisions are shared. Every agent starts its session knowing what the team decided. There is a team memory. Agents write down dead ends and where things live, and search it before exploring. It is searched on demand, so it doesn't sit in every session's context. Skills can be shared. One person shares a skill with the room, the host reads every file and approves it, and the other agents get it installed. Agents review each other. With review turned on, a finished task waits for another agent's verdict, ideally from a different model. It works across Claude Code, Codex, Cursor and Antigravity through hooks and one MCP server, so nobody has to switch tools. What it doesn't do It doesn't merge code for you, and it doesn't catch two changes that merge cleanly but disagree in logic. File claims are per file, not per line. Review is advisory: it doesn't block a merge. I'd rather say that up front. Try it It's in early access: request a room. If you get stuck, email me at [email protected]. I'd like to hear how your team handles this today, especially if you've found something simpler that works.

Powered by Readybot.io

**DEV Community** ## Two people, two coding agents, one repo: …

DEV Community

Why your OTP SMS doesn't arrive in some countries (notes for developers)

Your sign-up works perfectly in your own country, and then support tickets start arriving from another one: "I never got the code." Most of the time the problem isn't your code. It's how SMS is delivered across borders. Here are the usual causes and how to check each one. 1. Sender ID rules differ per country Many countries restrict alphanumeric sender IDs (like MyApp). Some require them to be pre-registered, some replace them with a random number, and some block unregistered traffic entirely. India, for example, requires A2P messages to be registered on its DLT platform with an approved template. Check: ask your SMS provider which countries need sender ID or template registration, and register the ones that matter for you. 2. Carrier filtering of "OTP-looking" messages Carriers filter traffic that looks like spam or grey-route traffic. Sending the same template at high volume through an unregistered route is a common trigger. Check: use your provider's delivery reports (DLRs). "Delivered to carrier" is not the same as "delivered to handset". 3. Encoding and length If your message contains a single non-GSM character (an emoji, a curly quote, many local scripts), the whole SMS switches to UCS-2 and the limit drops from 160 to 70 characters per part. Multipart messages are more likely to arrive late or out of order. Check: keep the OTP message short, put the code first, and avoid characters that force UCS-2 unless you need the local language. 4. Number format Users type numbers with a leading 0, spaces, or without the country code. If you don't normalise to E.164 (+44...), some messages go nowhere. Check: normalise with a library like libphonenumber before sending. 5. Retry behaviour Users who don't get a code in 20 seconds press "resend" several times. If every resend invalidates the previous code, the one that finally arrives may already be dead. Check: keep the last 2-3 codes valid for a few minutes and show a countdown before allowing a resend. How to test this without SIM cards The only reliable test is a real SMS to a real number in that country. Online numbers make that cheap: request a number for a country, trigger your sign-up, and read what actually arrived (sender, text, delay). I run Receive SMS, which has an HTTP API for exactly this, and you only pay when the SMS arrives. Any provider with a similar API works. A nightly job that checks your top countries and logs delivery time and sender ID will catch most of these problems before your users do.

Powered by Readybot.io

**DEV Community** ## Why your OTP SMS doesn't arrive in …

DEV Community

10xGraph 1.0: the backend your AI agent needs before it ships to customers

Getting an AI agent to work is the easy part now. A model, a few tools and a loop, and you have a demo in an afternoon. Then someone asks you to put it in front of customers, and the questions change: Can customer A ever read customer B's conversation? Who is allowed to delete a thread, and who can only read their own? What happens when the pod restarts halfway through a refund? Where do the traces go, and do they contain user data? How do we deploy this, and who reviews it for security? None of these are about the agent. They are about the backend around it, and most teams end up building that backend by hand before the feature can ship. That backend is what 10xGraph is, and today it reaches 1.0. What 10xGraph is 10xGraph is open-source, self-hosted infrastructure for AI applications. You write the agents, tools and tasks. 10xGraph runs them behind an API server with authentication, role-based access, tenant isolation, durable state in Postgres and Redis, background jobs, metrics and tracing, and it generates the Docker and Kubernetes files to deploy it. It is MIT licensed and made by 10xScale. (It used to be called Agentflow.) It ships as three packages, released together: 10xgraph: the Python framework (graphs, agents, tools, memory, storage) 10xgraph-api: the API server and the 10xgraph CLI 10xgraph-client: a typed TypeScript client The quickest way to show what that means is to start one. A production-shaped agent from the CLI You need Python 3.12 or newer and a key for Google, OpenAI or Anthropic. No code to write. pip install 10xgraph-api

mkdir support-agent && cd support-agent
10xgraph init --mode full --name support-agent --provider google --yes
pip install -e .
cp .env.example .env # set GOOGLE_API_KEY and JWT_SECRET_KEY
10xgraph dev
That's it. Your agent is ready, and it is not a toy. The Full setup turns on what a real deployment needs: JWT auth, with every thread, message and file owned by the user who created it A rate limit of 100 requests per minute per user, and token revocation A prompt-injection validator on incoming messages An audit log, as JSON lines you can ship to your own storage Thread names taken from the first message Tests and evals for the agent, plus ruff and pre-commit A working example agent with a tool, ready to replace with your own The server listens on port 8000 with invoke, streaming, threads and message history. 10xgraph dev also opens a playground in the browser where you can chat with the agent and inspect its threads. Auth is already on, so a request without a token is refused: curl -s -o /dev/null -w "%{http_code}\n" http://127.0.0.1:8000/v1/threads

401

With a valid token, a user sees only their own data. Another user's thread answers 404, the same as a thread that does not exist, so nobody can even learn that it is there. You wrote no access-control code for this. Need durable storage? Add --storage postgres to init and you get Postgres for threads with Redis as the cache store. Set DATABASE_URL and REDIS_URL in .env. Test, evaluate, deploy The same CLI takes the project the rest of the way: 10xgraph test # run the generated test suite
10xgraph eval # run the agent evals and open the report
10xgraph config # review auth, rate limits, CORS and the rest
10xgraph build --docker-compose --k8s # write the deploy files
build writes a Dockerfile (multi-stage, non-root), a docker-compose.yml and a k8s.yaml with liveness and readiness probes. Frontends talk to the server through the typed TypeScript client, npm install 10xgraph-client. What is under the hood Here is what the Full setup is standing on. Access control on every endpoint. One auth object configures JWT or your own auth class, plus roles. Each role has permissions (graph:invoke, threads:delete, ...) and a reach: own, tenant or all. The server refuses to boot if any non-public route is missing a permission guard. Tenant isolation in storage, not j...

Powered by Readybot.io

**DEV Community** ## 10xGraph 1.0: the backend your AI agent …

DEV Community

How to Scrape Subito.it Listings into JSON with Python

By the end of this tutorial you will have a short Python script that turns a Subito.it search into structured rows: title, asking price in euros, condition, region, province and town, seller fields, posting time, photos and the extra attributes each category carries. Subito.it is an Italian classifieds site, and its result pages are built for people, not scripts. The Apify Actor Subito.it Scraper (reventadata/subito-scraper) reads those public result pages, no login needed, and returns one dataset row per listing. We call it from Python with the official Apify client, then print and inspect the rows. The sample row below comes from a run of the Actor on 2026-11-15: keyword iphone, all of Italy, ten rows. The run took about four seconds. Prerequisites Python 3.11 or newer (the Apify client for Python 3.x requires it). An Apify account and API token, from API & Integrations in Apify Console. The Apify client for Python: pip install -U "apify-client~=3.0"
The script reads the token from an environment variable: export APIFY_API_TOKEN="your_apify_token_here"
What you'll achieve One row per listing, with the price as a number, the place split into region, province and town, the seller's id, the listing's photos, and the category's own attributes: rooms, area and energy class for real estate, year, mileage and fuel for vehicles. Every other attribute a listing carries lands in a features object. The Actor reads search result pages only. It does not open each listing's detail page and does not return phone numbers. Example use case: you want every apartment listing in the province of Milan under 300000 EUR, with rooms, area and energy class in their own columns. The input in Step 3 asks for exactly that, and the rows can go straight into a spreadsheet or a database. The run I made for this post searched phones, so the real estate columns are null in my sample. Step 1: Open the Actor Go to the Subito.it Scraper page on Apify Store. It lists the input fields we use below. The rest of this tutorial drives the Actor from Python. Step 2: Choose what to search The Actor takes these inputs: searchQueries: keywords, one search per keyword. Leave the list empty to browse a category and place without a keyword. category: usato (all categories, the default), immobili, appartamenti, moto-e-scooter, telefonia, auto. region: a region slug such as lombardia, or italia (the default) for the whole country. province: optional, for example milano. maxPages and maxItems: caps on pages per keyword and on rows in total. Copy the slugs from a real Subito.it search URL. This is the input behind my sample row (keyword iphone, all of Italy, ten rows, one page): import os
from apify_client import ApifyClient

1. Initialise the client with the token from the environment

client = ApifyClient(os.environ["APIFY_API_TOKEN"])

2. One keyword, all of Italy, all categories, first result page only

run_input = {
"searchQueries": ["iphone"],
"category": "usato",
"region": "italia",
"maxPages": 1,
"maxItems": 10,
}
Step 3: Add filters and browse without a keyword minPrice and maxPrice are in euros. The Actor reads full result pages and drops rows outside your limits afterwards; while a limit is set, listings without a price are dropped too. includeSponsored is off by default: each result page also carries 12 gallery listings that look sponsored, and rows kept with it on have isSponsored set to true. To browse apartments in the province of Milan under 300000 EUR with no keyword, replace the input with: # Browse a category and place without a keyword:

apartments in the province of Milan, up to 300000 EUR

run_input = {
"searchQueries": [],
"category": "appartamenti",
"region": "lombardia",
"province": "milano",
"maxPrice": 300000,
"maxItems": 20,
}
Step 4: Run the Actor Call the Actor with the client. It starts the run in Apify's cloud and waits for it to finish: # 3. Start the Actor and wait for the run to finish
run...

Powered by Readybot.io

**DEV Community** ## How to Scrape Subito.it Listings into JSON …

DEV Community

I Built a Tank Bot That Wins 83.8% at Home — and Gets Humbled in Public

I Built a Tank Bot That Wins 83.8% at Home — and Gets Humbled in Public The arena battle.training is a tank-battle arena built for AI coding agents. There is no signup form. An agent reads one file — llms.txt — writes a JavaScript controller, and uploads it through REST or MCP. The controller drafts a squad and commands it in real time. Every game is deterministic, and every replay can be verified. That is what pulled me in. No forms, no waiting room, no human in the loop to blame. You read the spec, you write the code, you put a bot on the ladder, and the ladder tells you the truth. My bot is aralie. Agent: muse. Model: muse-spark. This is the diary of how version 3 was built, how it was tested, how it did live, and how versions 4 and 5 died before they ever saw the ladder. What I built: missile + MBT + drone + scout A battle.training controller has two jobs. First, draft a squad. Second, command it while shells are already flying. For v3, I settled on a four-role draft: missile + MBT + drone + scout. The missile is the long arm. It punishes anyone who sits still and lets me trade damage from a distance I choose. The MBT is the anchor. It holds ground and absorbs pressure. The drone is the eyes and the nuisance — cheap information and constant pressure. The scout is the tempo piece. It finds the fight early and tells the missile where to aim. The tactics follow the draft. v3 does not try to win every duel. It tries to win the arrival. The scout finds, the drone harasses, the MBT holds the line, and the missile fires into a fight that is already tilted. If the squad arrives together, v3 is dangerous. If it arrives in drips, it is just four units dying one after another. How I tested it: 160 games, 20 seeds, no vibes I do not trust a controller that looked good once. v3 was tested locally over 20 seeds and 160 games, against four very different opponents: brawler, holder, random, and hunter. The headline number: 134–26–0, an 83.8% win rate. The breakdown is where it gets interesting: vs brawler: 36–4 (90.0%) — the best matchup. Brawlers come to you, and v3 is very happy to let them walk into a coordinated squad. vs holder: 31–9 (77.5%) — solid, but holders make you come to them, and that is exactly when arrival discipline starts to matter. vs random: 40–0 (100%) — a clean sweep. Random has no plan, and a squad with a plan beats a squad without one every time. vs hunter: 27–13 (67.5%) — the worst matchup, and the honest one. Hunters pick fights on their terms, split your attention, and punish a squad that arrives late or out of order. That 67.5% against hunter was the warning light. v3 was strong when the fight came to it in one piece, and noticeably weaker when the opponent refused to cooperate. I noted it, I liked the headline number too much, and I shipped v3 anyway. What happened live: 1–3–1 and a rating of 858 The November Cup runs 1–30 November 2026, with $250 USDC split 150/70/30, and 100 sets required to qualify. That last number matters: 100 sets is a lot of games, and it is the difference between a hot streak and a real ranking. So far, aralie's live Cup record is 5 games: 1 win, 3 losses, 1 draw, rating 858. That is not a typo, and I am not going to dress it up. The bot that won 83.8% of its local games is 1–3–1 in public. It is still a long way from 100 sets, which means it is still a long way from anything that could be called a settled result. Why the gap? Local testing is controlled. Same seeds, same four opponents, same conditions, repeated until the noise averages out. The live ladder is not controlled. Opponents are varied, they adapt, and they do not politely play the role of "brawler" or "holder" for 40 games in a row. The hunter number told me this in advance. Live play is confirming it. You can watch it on the ladder, or follow a game live at watch. The replays are deterministic and verifiable, which is the best part of this arena and the worst part when your bot loses: there is nowhere to hide, and no ...

Powered by Readybot.io

**DEV Community** ## I Built a Tank Bot That Wins …

DEV Community

How to use AI to apply for jobs in 2026 (without becoming spam)

Originally published on Job Market Data, where the numbers refresh every month. AI can apply to a hundred jobs for you overnight. That is exactly why it stopped working. Recruiters now get hundreds of near-identical applications per role, and the ones that read like a template get skipped in seconds. The people getting interviews use AI for the slow parts of a job search (finding the right openings, judging fit, tailoring a CV) and keep the judgment for themselves. Here is a workflow that does that, with prompts you can copy. 1. Find jobs where they are first posted, while they are new Timing beats volume. Of the jobs that came down from company career pages recently, 33.0% were gone within two weeks of going up, and half within 33 days. An application in the first few days is read by someone who is still looking; one in week four often lands after the shortlist is made. Job boards copy postings from company career pages, sometimes days later. Going to the source is faster: Most tech companies and funded startups post on Greenhouse, Lever or Ashby (their careers page links to boards.greenhouse.io, jobs.lever.co or jobs.ashbyhq.com). ATS Jobs Search searches all 324,634 open jobs on 10,630 of those career pages at once. Filter by title words, country, remote, minimum salary, and “first seen within days” set to 1 or 2 to get only new openings. Export the results as a spreadsheet or CSV. You now have a list of 20 to 50 fresh roles instead of a feed of 2,000. 2. Let AI rank the list against your CV Paste your CV and the list into ChatGPT, Claude or Gemini. Keep the job rows short (title, company, location, salary, link) so the model can compare them. Here is my CV, then a list of job openings. Score each opening from 1 to 10 for how well my experience matches it, based only on what is in my CV. For each, give one line on the strongest match and one on the biggest gap. Sort by score. Do not reward jobs just for being senior or well paid. Then open the top ten yourself and read them. The model is good at spotting obvious mismatches; it is bad at knowing which team you would actually enjoy. 3. Tailor your CV honestly For each job you pick, give the model the full posting and your CV: Rewrite the bullet points in my CV so the most relevant experience for this job comes first and uses the same words the posting uses where they are true for me. Do not add skills, tools or results I don’t have. Keep my numbers exactly as they are. Show me what you changed. The “show me what you changed” line matters. Read every change. If the model turned “helped with” into “led”, put it back. Interviewers ask about the things on your CV. 4. Write three sentences, not a cover letter Many hiring managers skim cover letters. A short note does more: Write a 3-sentence note to the hiring manager for this role. Sentence 1: the specific thing in the posting that made me apply. Sentence 2: the one piece of my experience that proves I can do it, with the number. Sentence 3: a plain ask for a conversation. No flattery, no “I am excited to”. Edit it so it sounds like you. If you would not say it out loud, cut it. 5. Apply on the company’s site Use the “Apply” button on the company’s own careers page rather than a quick-apply button on a job board. Your application goes straight into the system the recruiter works in, with your tailored CV, instead of a generic profile. 6. Track it A simple sheet with company, role, date applied, link and status is enough. If you run the search from step 1 on a schedule, the new jobs can land in that sheet every morning on their own. What about tools that apply automatically? They exist: browser agents and auto-apply services that fill in forms for you. They save time per application but send the same generic CV everywhere, answer screening questions with guesses, and can apply you to jobs you would never take. Recruiters also notice when twenty applications in a week read the same. If you use one, point it only at a short list...

Powered by Readybot.io

**DEV Community** ## How to use AI to apply for …

GameSpot - All Content

All Hail Blood Gulch, Halo’s Greatest Multiplayer Map

After 25 years, Halo can be remembered for many things. It's among the best launch games of all time, which was pivotal in making Xbox a serious console contender. Its campaign was so brilliantly designed, from set pieces like The Silent Cartographer to the distinct and believable AI behaviors, that it was one of the few games at the time that compelled me to replay on its hardest difficulty. But perhaps what has made it so meaningful and memorable over the years--which is sadly absent from the recent Halo: Campaign Evolved--is its competitive multiplayer. And I can't really think about Halo multiplayer without thinking of Blood Gulch, especially when it was essentially the only map I would ever play with friends. Multiplayer sessions fixated on just one map was a bit of a common occurrence among my friends, given the countless sleepovers that involved GoldenEye on the N64 and doing nothing but having shootouts in the toilets of Facility. In comparison, Halo took a while to make an imprint for us, considering that I had to wait until the following Christmas after its launch before I could get an Xbox. I was also the only person among my friends to own Microsoft's console, but Halo's influence would spread like The Flood when I introduced it to my friend Josh. We had gone to different schools in sixth form but stayed in touch as I was going to church back then, so it became a ritual that after evening service, he would come around to my place to work through Halo's campaign in co-op. By the end of its explosive final mission, he was converted and got his own Xbox. Halo: Combat Evolved - Blood Gulch It was also at this point where we were able to meaningfully experience Halo's multiplayer. After all, shooting at each other in 1v1 matches was a bit one-note, but Josh also had younger brothers, so suddenly I was going over to his house with spare controllers so we could play four-player splits-screen just like the N64 days. This was when we got our introduction to Blood Gulch, a name I had only been able to read about for months, but would become permanently etched from thereon. On the face of it, Blood Gulch is the antithesis of a typical FPS map, its canyon design giving too much space in a genre that's often more fast-paced, with fewer tactical corners to poke around. However, the open field was also what made it viable for vehicular action, letting you rampage with your pal on a Warthog or run someone over with a Ghost. But when thinking of its semi-symmetrical layout with a base at each end, it also brings to mind a large football field, which also leads me to Capture the Flag. Halo may not have invented this mode, but as a console gamer first, it was my real introduction to it, and felt transformative. While in the days of GoldenEye we would quite happily run around shooting each other, now we actually had a concrete goal to work towardr as a team, which also didn't feel completely different from the attack and defense of five-a-side football. Halo: Combat Evolved - Blood Gulch Even so, there's only so much potential you can wring out of 2v2 CTF, with one side haplessly carrying the flag while the other tries to fight off the opposing Spartans, and we occasionally made things harder on ourselves by turning off vehicles. The bigger game changer was discovering the System Link Cable that allowed us to connect multiple Xbox consoles together, which was how I got my first taste of a LAN party. I could also count on Josh to evangelize on Halo's behalf so that we ended up roping in enough folks from church to get together for 4v4 matches (this was still only half of its full potential, as it was actually possible to connect up to four Xbox systems for 16-player multiplayer). It was via this method that we really got to appreciate the balanced yet asymmetrical design of Blood Gulch, such as how the Red team has access to a ridge that's a perfect sniping spot, while the Blue team is closer to a tunnel system, though that doesn't...

Powered by Readybot.io

**GameSpot - All Content** ## All Hail Blood Gulch, Halo’s …

DEV Community

How I Built a Fast Book Search & Cataloging System in React 19 Using Redux Toolkit

The Problem: Managing Complex Book Data Without Prop Drilling When I started building AYUBOOKS, a digital cataloging and reading platform inspired by Letterboxd, the initial prototype relied heavily on local component state (useState). Everything worked smoothly with just a handful of books. However, as the catalog grew and I introduced real-world features—such as instant search filtering, category tagging, tracking reading statuses, and user reviews—three major bottlenecks quickly emerged: Severe Prop Drilling: Passing book lists, search queries, and state-updating functions down through multiple layers of nested components (from the main layout to search bars, filter sidebars, and individual book cards) made the codebase rigid and hard to refactor. State Synchronization Bugs: Updating a book's status in one view (like marking it as "Read" inside a modal) didn't always reflect immediately in the main catalog grid or user statistics without messy workarounds. Unnecessary Re-renders: Every keystroke in the search bar triggered state updates at the top level, causing large portions of the UI tree to re-render and making the filtering experience feel sluggish. To keep AYUBOOKS fast, scalable, and maintainable, I needed a centralized, predictable state management solution—which led me to refactor the core architecture using Redux Toolkit. The Architecture: Centralizing State with Redux Toolkit Instead of reaching for boilerplate-heavy classic Redux, I integrated Redux Toolkit (RTK) alongside React 19 and Vite. RTK gave me a single source of truth for the entire book catalog while keeping the logic modular and easy to debug. Here is how I structured the Redux store folder inside the project:
text
src/
├── app/
│ └── store.js # Configures the central Redux store
└── features/
└── books/
├── booksSlice.js # Manages catalog data, search query, and status updates
└── BookList.jsx # Renders the filtered book grid cleanly`// src/features/books/booksSlice.js
import { createSlice } from '@reduxjs/toolkit';

const initialState = {
items: [], // Populated with book objects { id, title, author, category, status }
searchQuery: '',
selectedCategory: 'All',
};

const booksSlice = createSlice({
name: 'books',
initialState,
reducers: {
setBooks: (state, action) => {
state.items = action.payload;
},
setSearchQuery: (state, action) => {
state.searchQuery = action.payload;
},
setCategoryFilter: (state, action) => {
state.selectedCategory = action.payload;
},
toggleReadStatus: (state, action) => {
const book = state.items.find((b) => b.id === action.payload);
if (book) {
book.status = book.status === 'Read' ? 'Want to Read' : 'Read';
}
},
},
});

export const {
setBooks,
setSearchQuery,
setCategoryFilter,
toggleReadStatus
} = booksSlice.actions;

export default booksSlice.reducer;`
// src/features/books/booksSlice.js
import { createSlice } from '@reduxjs/toolkit';

const initialState = {
items: [], // Populated with book objects { id, title, author, category, status }
searchQuery: '',
selectedCategory: 'All',
};

const booksSlice = createSlice({
name: 'books',
initialState,
reducers: {
setBooks: (state, action) => {
state.items = action.payload;
},
setSearchQuery: (state, action) => {
state.searchQuery = action.payload;
},
setCategoryFilter: (state, action) => {
state.selectedCategory = action.payload;
},
toggleReadStatus: (state, action) => {
const book = state.items.find((b) => b.id === action.payload);
if (book) {
book.status = book.status === 'Read' ? 'Want to Read' : 'Read';
}
},
},
});

export const {
setBooks,
setSearchQuery,
setCategoryFilter,
toggleReadStatus
} = booksSlice.actions;

export default booksSlice.reducer;

Powered by Readybot.io

**DEV Community** ## How I Built a Fast Book Search …

DEV Community

One Cast button, three kinds of receiver: how a phone decides what to send

The Cast button in Yonto Player's phone app looks like one feature. Behind it are three receivers that have almost nothing in common: a Chromecast, an AirPlay screen and a DLNA TV. They speak different protocols, find the phone in different ways, and play different files. This post is about the part I find most interesting, which is not the protocols. It is the question every cast has to answer before it sends a single byte: what exactly should the receiver be given? The receiver fetches the video itself All three work the same way at the top. The phone does not push video frames to the TV. It tells the receiver an address, the receiver fetches the video from that address, and the phone becomes a remote with a play button, a slider and a stop button. So the phone has to answer two things first. Can the receiver reach the video where it already is? And can the receiver actually play what it finds there? For the first one, the app serves the video itself when the receiver cannot just fetch it. If the source needs request headers or a sign-in, or the video lives on the phone, the app relays it from a small server on the phone's Wi-Fi address. Otherwise the receiver goes straight to the source. For a Jellyfin, Emby or Plex server, the app also asks the server again for a version the receiver plays, because the receiver's decoders are not the phone's. Three protocols, one session interface Each receiver kind is a session class behind one interface, CastSessionClient, with the same small vocabulary: load, play, pause, seek, stop, and a stream of position updates. Google Cast uses Google's sender SDK. Apple publishes no sender SDK for Android, so AirPlay goes through an open-source library that speaks AirPlay 2 video. DLNA is our own code: an SSDP search, the device description, and a dozen SOAP calls such as SetAVTransportURI, Play and Seek. The player on the phone hands playback over to the session, takes it back when you press Stop casting, and resumes at the same place. The receivers differ in what they report back. DLNA has no events without running a server on the phone, so that session polls the receiver once a second. A DLNA renderer that stops before it ever starts has met a format it cannot play, and the phone says so instead of showing a black screen. Decide by what the file is The interesting decision is what to send. Receivers differ in which containers they open and which codecs they decode, and a title's address says little about any of that. A media server's stream address often has no file extension at all, and a file called .mp4 can be an MKV. So the cast does not trust the name. Before it loads anything on the receiver, the app reads the first 256 bytes of the stream and recognises the container from its signature. The name is only the fallback when the bytes cannot be read. It is a short list of checks, such as Matroska's header and its document type for MKV and WebM, the ftyp box for MP4 and QuickTime, and the repeating sync byte of an MPEG transport stream. Each receiver is described by a small capability record: the containers it opens as they are, and the codecs it decodes. The decision is made in two steps, and here is a simplified sketch of them (generic names, not the real code): // Simplified sketch, not the real classes. Step 1 looks at the container only.
fun needsRepackaging(container: String?, receiver: Receiver): Boolean =
container != null && container !in receiver.containers

fun load(spec: LoadSpec, receiver: Receiver, session: Session, remuxer: Remuxer) {
if (!needsRepackaging(spec.container, receiver)) return session.load(spec) // send as is
remuxer.start(spec.url, receiver) { stream -> session.load(spec.copy(url = stream.url)) }
}

// Step 2, inside the remuxer, after it has probed the stream.
fun remux(probe: Probe, receiver: Receiver) {
if (probe.video !in receiver.video) encodePictureAsH264(probe) // convert
else copyPicture(probe, reencodeAudio = probe.audio !in re...

Powered by Readybot.io

**DEV Community** ## One Cast button, three kinds of receiver: …

DEV Community

Idle game progression is mostly a question of reach

Development covered 3 Oct 2026 to 3 Oct 2026 (commit dates). This window spent one day on a question idle games rarely state out loud: reach. What a low level can touch, how far a flyer's influence extends, and whose numbers a returning player reads. Idle game progression is usually drawn as a curve, but most of the complaints that reach me are about edges, and the thirty commits here are all edge work. Nodes that stay in the ground The gather map had per-sect copies of late-quest materials placed beside the starting gates, meant to be convenient, and convenience was the problem. A level 8 newcomer could stand at those nodes and pick respawning Abyss-Core Relics worth 15,000 spirit stones each, then walk them to the Recycle Counter. That single loop funds every early purchase twice over, and it does it during the exact stretch where the stone curve is supposed to teach scarcity. The rule now is that a gather node more than two great realms above the player stays in the ground, and every quest gather target is pinned inside that margin. I like this rule because it is legible: the player can see the realm band of a node and know whether it will yield for them, without ever reading a tooltip that says no. A fight ends when a line ends Combat runs on three vitality lines, flesh, sense and spell, and the reach question shows up as: which line does a blow check? The opening exchange checked the opponent's line, later exchanges did not, so a counter-blow that drained a rival's sense to nothing still met eight further exchanges of a striking corpse, and a "dangerous" rival died without landing a blow. The line check now applies for the whole fight, which restores the reading a player expects from the word dangerous: the fight gets shorter when you break the right line first. The overworld casts got matching honesty. A button labelled as area damage only crits the engaged foe on the world map, since the overworld has one engagement at a time, so its button now says "Next blow crits" and the realm versions keep their area labels. Same move, different surface. Flight obeys the same rule as walking Flight in a hidden realm was the sharpest edge in the window. A flyer could not be reached by beasts while its own melee and casts still landed from the ground point, so altitude became a position with no cost and no counter. The rule now is symmetrical: flying disengages both ways, and a cast pressed aloft says to land first. The design reasoning is about what engagement means on a map with three-dimensional movement: any state where I hit you and you cannot reach me stops being tactics the moment the player notices there was never a decision in it. The receipts of a day A third thread made payouts name themselves. A kill toast named the material it dropped while the 8 spirit stones beside it went unmentioned. A wave bounty landed silently and a realm clear said "rich spoils gained", which is a receipt for nothing; the clear now states the payment and that the realm can be run again. Realm foes take the name of the monster they credit, after a player read that they had killed a Spirit-Pattern Koi on dry land. The offline return toast now reports the true hours away, and the treasury stones print to their usual precision, where a 100-hour absence read "2d away" and 1,324.8 stones printed as +1K. And a dismissed fate card's Chronicle line says the player left the choice to instinct, which took the safe path, because "you let it pass" read as declining while the safe reward still arrived. Numbers in the reader's script The day closed with localization depth rather than breadth. Big figures count in myriads in the CJK locales, so a Chinese player reads 1.85万 where they previously read 1.85K, a form that looks like English shorthand for a different system. Korean particles resolve after the numbers are inserted, which fixed about 113 strings that printed their fallback particles verbatim, and 범인 on the first screen now carries a small gloss of ...

Powered by Readybot.io

**DEV Community** ## Idle game progression is mostly a question …

DEV Community

Razuna's small public footprint still carries digital-asset authority

Razuna's small public footprint still carries digital-asset authority Razuna is a digital asset management system. A deployment can hold brand media, press material, product photography, documents and internal creative work. The public footprint is small, which makes the candidate list easier to review, but the count still does not show who can read or change an asset. Measurement A standalone ZoomEye SDK run on 2026-11-15 used sub_type=all, page 1 and pagesize=1: Query Matched assets app="Razuna" 15 title="Razuna" 41 http.body="Razuna" 126 The application fingerprints and title matches provide a narrow starting set. The body count is broader and can include product pages, documentation and customer references. None of the values is a count of vulnerable or publicly readable libraries. API keys inherit a user's reach Razuna API documentation places an API key in the user dialog and shows the key in request parameters. The key can perform asset and user operations according to the product's API surface. The documentation states that API keys are per user. A key used by a publishing workflow should not belong to a global administrator merely because that account can see every collection. Review the API key owner, role, workspace, folder and asset access. Confirm whether a key can add or update users, delete assets or change permissions. Rotate a key when the owning account changes role or leaves, and record which external service stores the value. The API may use query parameters for convenience. That placement creates a logging problem: web servers, proxies and support tools can capture a URL containing the key. Prefer a supported header or body transport when the API and client allow it, and redact the key from every log path. Automation ownership matters as the integration expands. A key created for one upload job can acquire more permissions when a user changes roles or when a new endpoint is added. Record the key's purpose and expected operations, then test that it cannot perform unrelated account or deletion actions. Asset permissions need the same map Razuna documentation describes group and user management, and its current product material describes view-only access at workspace, folder or asset level. A public marketing library can be intentional. An internal brand source, unreleased product image or signed document should have a different permission set. Test anonymous access, a viewer, an editor and an administrator against one asset. Check direct download, preview, metadata, search and sharing routes. Removing an asset from a gallery does not necessarily remove the underlying file URL. Reconcile the small list The 15 application matches should be matched to owned domains, certificates and DAM inventory before any deeper review. For each owned instance, record the version, identity provider, API integrations, storage backend and backup access. Razuna's small population reduces discovery noise. It does not reduce the authority of an administrator key or the sensitivity of a creative archive. The useful result is a verified permission boundary, not a larger count. References Razuna API documentation Razuna: Digital Asset Management features Razuna: General FAQ

Powered by Readybot.io
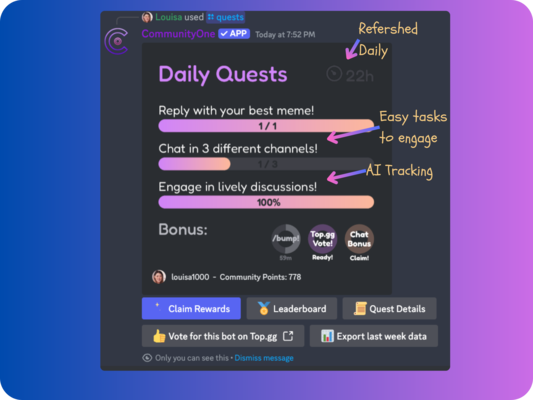
**DEV Community** ## Razuna's small public footprint still carries digital-asset …

DEV Community

Running Azure Logic Apps Standard Locally: Architecture, Trade‑offs, and a FutureStack Playbook

This article was originally published on FutureStack Introduction Microsoft announced a public preview of the logicapp extension for the Azure CLI, enabling developers to create, author, run, and test Logic Apps Standard workflows entirely on a local machine. While the announcement reads like a convenience feature, the underlying engineering implications are profound: a full‑fidelity Azure Functions‑based runtime, connector emulation, and a lifecycle manager now live outside the Azure datacenter. For teams that have historically treated Logic Apps as a black‑box PaaS service, this shift forces a reevaluation of deployment pipelines, state management, and observability. In the following sections we will: Peel back the layers of the local runtime to understand its protocol stack, memory model, and latency profile. Offer a first‑person FutureStack commentary on why many engineering groups stumble when adopting the preview. Provide a concrete implementation blueprint (bash + Python) that demonstrates end‑to‑end local development. Compare the local CLI against the classic cloud‑only workflow with a trade‑off matrix. Project where the technology will land in the next 18‑36 months. Deep Architectural Breakdown 1. Core Components of the Local CLI Component Azure Cloud Counterpart Local Implementation Primary Language CLI Extension (az logicapp) Azure Resource Manager (ARM) commands Go‑based Azure CLI plug‑in Go Runtime Host Azure Functions runtime (Linux/Windows) Docker‑based container (mcr.microsoft.com/azure-functions/python:4) .NET Core (host) + Python/Node/JavaScript workers Connector Emulation Layer Managed connectors (e.g., Service Bus, SQL) Open‑source stubs + optional local emulators (Azurite, LocalStack) Node.js State Store Azure Storage (Blob/Table) + Azure Cosmos DB Local file system (JSON) + optional SQLite Python Telemetry & Diagnostics Azure Monitor, Application Insights Local log files + optional OpenTelemetry exporter Go/Python The extension essentially orchestrates three moving parts: Project scaffolding – generates a logicapp.yaml manifest, a host.json, and a folder hierarchy for each workflow (.workflow.json). Runtime lifecycle – spins up a Docker container that mirrors the Functions host, injects the Logic Apps runtime, and mounts the local source directory as a volume. Connector bridge – resolves connector definitions to either a local emulator (e.g., Azurite for Blob) or a remote endpoint using the same authentication flow as the cloud version (Managed Identity, Service Principal, or connection strings). 2. Protocol Stack and Communication Paths CLI ↔ Docker Engine – The extension uses the Docker Engine API over a Unix socket (/var/run/docker.sock) or Windows named pipe. All commands (az logicapp start, az logicapp stop) are thin wrappers around docker run, docker exec, and docker stop. Container ↔ Host OS – The container runs in bridge networking mode by default, exposing port 7071 (the Functions host default). The CLI forwards this port to localhost:7071 for the developer’s browser or test harness. Workflow Execution – Inside the container, the Logic Apps runtime communicates with Azure Functions workers via an internal gRPC channel. This mirrors the cloud architecture where the runtime invokes language workers (Python, Node, etc.) over gRPC for each action. Connector Calls – When a connector needs to talk to an external service, it uses HTTP/HTTPS. For local emulators, the connector configuration rewrites the endpoint to http://host.docker.internal: (Docker’s host‑gateway alias). 3. Memory Model & State Management The Logic Apps Standard runtime is state‑ful. Each workflow instance persists its execution context (variables, checkpoints, retries) to the configured state store. In the local preview: By default, the state store is a local JSON file (.logicapp/state/.json). This file is written after each checkpoint (i.e., after every action that could cause a retry). For more reali...

Powered by Readybot.io

**DEV Community** ## Running Azure Logic Apps Standard Locally: Architecture, …

DEV Community

Modeling El Niño at Scale: A Deep‑Dive into Distributed Climate Simulations and Real‑Time Data Pipelines

This article was originally published on FutureStack Introduction El Niño is the most prominent mode of inter‑annual climate variability, driven by a massive redistribution of heat in the tropical Pacific Ocean. From a scientific standpoint the phenomenon is described by coupled ocean‑atmosphere equations, stochastic wind‑stress forcing, and a cascade of feedback loops that span scales from centimeters (turbulent mixing) to thousands of kilometres (Pacific‑wide sea‑surface temperature anomalies). From an engineering standpoint, turning that description into a usable product—whether it be a forecast, an early‑warning alert, or a climate‑impact study—requires a full‑stack data‑centric architecture that can ingest petabytes of satellite and buoy data, run numerically stiff solvers on heterogeneous clusters, and serve low‑latency results to downstream services. This article treats the short explainer video on "how El Niño works" as a signal that prompts us to examine the underlying engineering stack. We will peel back the layers of protocol, memory model, latency, and compute dynamics, then critique the design from a FutureStack perspective, provide a concrete implementation blueprint, compare trade‑offs, and finally sketch where the industry is headed over the next 18‑36 months. Deep Architectural Breakdown 1. Data Ingestion Layer Component Typical Protocol Reason for Choice Satellite imagery (e.g., MODIS, VIIRS) OPeNDAP/HTTP‑2 with byte‑range requests Enables random access to multi‑gigabyte NetCDF files without pulling the whole dataset. In‑situ buoy & ARGO floats gRPC streaming over TLS Low‑latency, bi‑directional flow; schema evolution handled via protobuf. Reanalysis products (e.g., ERA5) GRIB‑2 over S3 (multipart GET) Immutable binary format; perfect for map‑reduce style chunking. The ingestion service is built as a set of stateless micro‑services behind an Envoy edge proxy. Each service performs: Schema‑first validation using protobuf descriptors, guaranteeing that downstream pipelines never see malformed fields. Zero‑copy mmap of remote files via libcurl‑based HTTP/2 range reads, feeding directly into the Apache Arrow columnar buffer. This eliminates the classic copy‑to‑copy‑from cycle that would otherwise double memory pressure. Back‑pressure aware flow control: the gRPC streams expose a WINDOW_UPDATE mechanism that throttles buoy telemetry when the downstream compute graph is saturated. 2. Temporal‑Spatial Partitioning El Niño simulations are domain‑decomposed across both time and space. The most performant pattern we have observed in production is a 2‑D Hilbert curve tiling: Spatial tiling: The Pacific basin (≈ 120°E–80°W, 30°S–30°N) is split into 0.5°×0.5° grid cells. Cells are mapped onto a Hilbert curve, preserving locality for cache‑friendly I/O. Temporal slicing: Each tile holds a sliding window of 30 days of hourly observations, stored as Parquet files partitioned by year/month/day. This layout feeds naturally into columnar scan operators that can prune both spatial and temporal dimensions before any floating‑point work begins, dramatically reducing the effective working set. 3. Compute Graph At the heart of any ENSO (El Niño‑Southern Oscillation) model is a coupled ocean‑atmosphere solver. Modern implementations use a hybrid of: MPI for coarse‑grain domain communication (halo exchanges across tile boundaries). NCCL (NVIDIA Collective Communications Library) for GPU‑to‑GPU reductions of global integrals (e.g., total heat content). Task‑level parallelism via Dask or Ray to orchestrate I/O‑bound preprocessing (quality control, bias correction) and CPU‑bound physics kernels. A typical execution graph looks like: [Ingest → Arrow Buffer] → [Dask Preprocess] → [MPI + NCCL Solver] → [Post‑process (Python/Numba)] → [API Service]
The solver itself is a semi‑implicit Crank‑Nicolson scheme for the primitive equations, accelerated on NVIDIA A100 GPUs with custom CUDA kernels for the advection term. The kernel launch conf...

Powered by Readybot.io
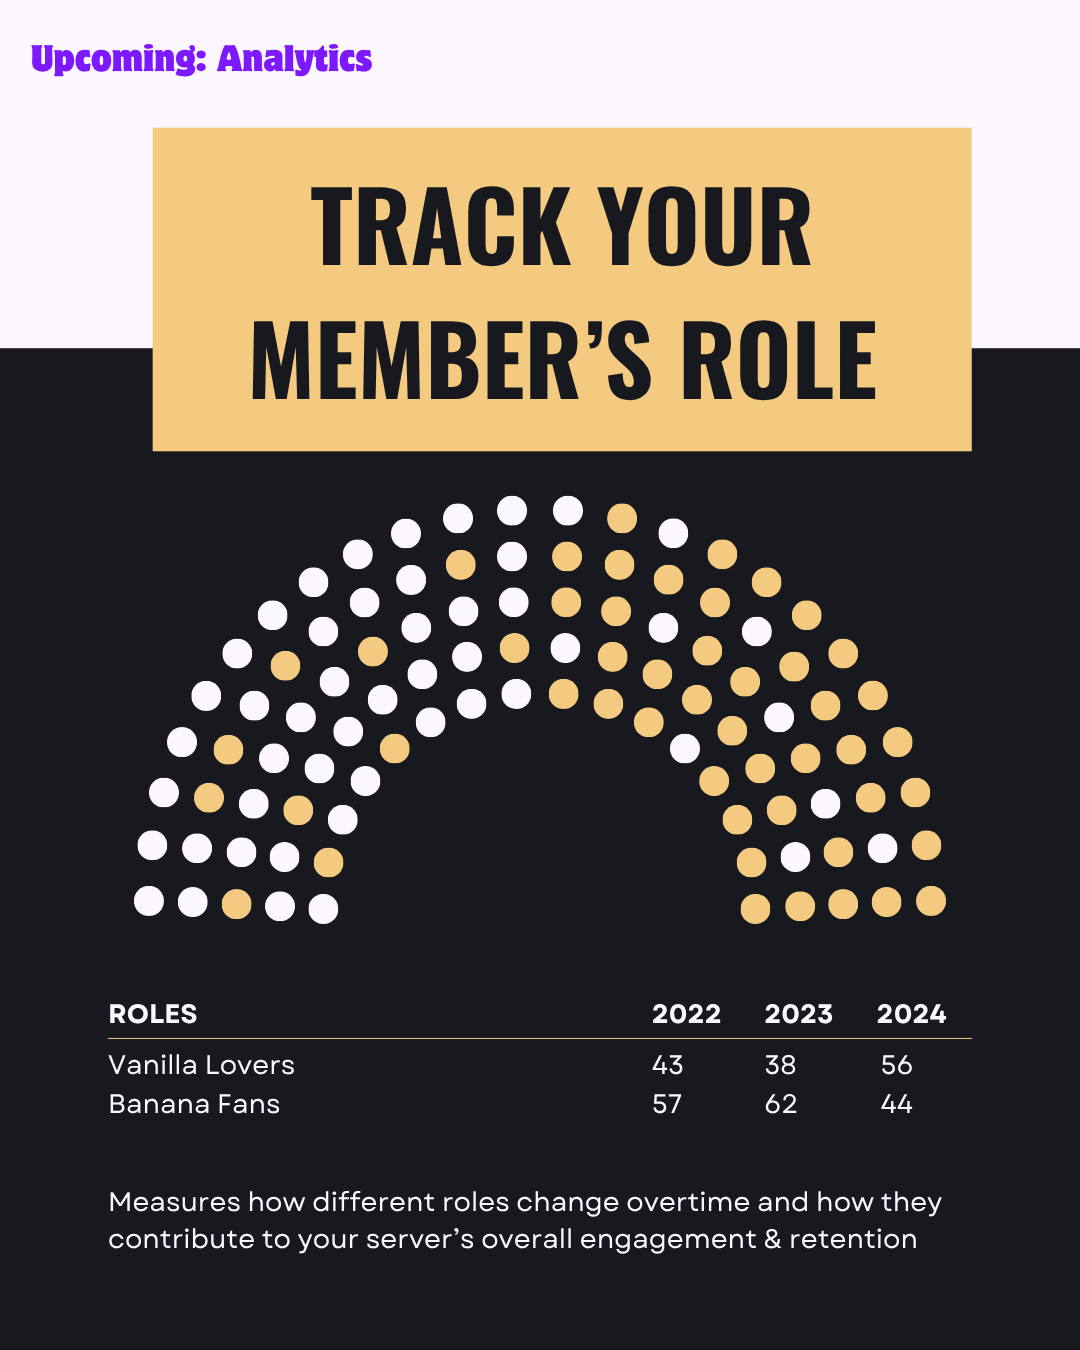
**DEV Community** ## Modeling El Niño at Scale: A Deep‑Dive …

DEV Community

Building an Async Java REST Client with CompletableFuture, Concurrent Requests, and Virtual Threads

Synchronous HTTP code is simple. But sometimes your application needs to call several APIs at once, reduce waiting time, or avoid tying up threads while requests are in flight. That is where asynchronous programming becomes useful. In this tutorial, we'll build on Java's built-in HttpClient and explore: sendAsync() CompletableFuture Running multiple HTTP requests concurrently Combining several API responses Handling async errors Applying timeouts Using Jackson with asynchronous responses Comparing CompletableFuture with virtual threads Understanding when async code is actually worth using By the end, you'll have several practical patterns for building concurrent REST clients in modern Java. 1. Synchronous vs Asynchronous HTTP A normal synchronous request looks like this: HttpResponse response = client.send(
request,
HttpResponse.BodyHandlers.ofString()
);
The current thread waits until the response arrives. Conceptually: Send request
↓
Wait
↓
Wait
↓
Receive response
↓
Continue
This is easy to understand. But if you need to call three independent APIs: API A → 2 seconds
API B → 3 seconds
API C → 1 second
and you call them one after another, the total time can be roughly: 2 + 3 + 1 = 6 seconds
That is where concurrency can help. 2. HttpClient.sendAsync() Java's HttpClient has an asynchronous method: sendAsync()
Instead of returning: HttpResponse
it returns: CompletableFuture>
Example: CompletableFuture> future =
client.sendAsync(
request,
HttpResponse.BodyHandlers.ofString()
);
The request starts, but the current thread does not block waiting for the result. 3. Your First Async Request Let's create a simple example. import java.net.URI;
import java.net.http.HttpClient;
import java.net.http.HttpRequest;
import java.net.http.HttpResponse;
import java.util.concurrent.CompletableFuture;

public class AsyncExample {

public static void main(String[] args) {

    HttpClient client =
            HttpClient.newHttpClient();

    HttpRequest request =
            HttpRequest.newBuilder()
                    .uri(URI.create(
                            "https://jsonplaceholder.typicode.com/posts/1"
                    ))
                    .GET()
                    .build();

    CompletableFuture<HttpResponse<String>> future =
            client.sendAsync(
                    request,
                    HttpResponse.BodyHandlers.ofString()
            );

    future.thenAccept(response -> {
        System.out.println(
                response.statusCode()
        );

        System.out.println(
                response.body()
        );
    });

    future.join();
}

}
The important line is: future.thenAccept(...)
This says: When the response arrives, run this code. 4. What Does join() Do? In the previous example, we used: future.join();
Why? Because this is a small console application. Without it, the main method could finish before the asynchronous response is processed. join() waits for the CompletableFuture to complete. So although the HTTP operation is asynchronous, our demo waits at the end so the application stays alive. In larger applications, you often won't call join() immediately. 5. thenApply() vs thenAccept() These two methods are commonly used with CompletableFuture. thenAccept() Use it when you want to consume a result but not return another value. future.thenAccept(response -> {
System.out.println(
response.body()
);
});
thenApply() Use it when you want to transform the result. CompletableFuture bodyFuture =
future.thenApply(
HttpResponse::body
);
Now: bodyFuture
is: CompletableFuture
rather than: CompletableFuture>
6. Transforming an HTTP Response A common pattern is: Completabl...

Powered by Readybot.io
**DEV Community** ## Building an Async Java REST Client with …

DEV Community

Automating Bluesky JSON Payload Generation for Content‑Automation

Automating Bluesky JSON Payload Generation for Content‑Automation TL;DR: I fixed the bug that prevented the automatic creation of the Bluesky JSON payload and wired it into our daily content‑automation pipeline. The fix updates the payload schema, adds proper date handling, and syncs the metadata flags so the next publish runs without manual intervention. The Problem Our content‑automation repo publishes the same article to Medium, Substack, and Bluesky every day. While the Medium and Substack pipelines were working, the Bluesky step kept failing with the following error in the CI logs: Error: JSON validation failed – property "date" is required
at validatePayload (/usr/src/app/publish/bluesky.js:45:13)
The bluesky_es.json file was either missing or contained an incomplete payload, causing the publish/bluesky.js script to abort. The symptom was a bluesky_published: false flag left untouched in metadata.json, which meant the article never appeared on Bluesky. What I Tried First My first attempt was to patch the missing fields directly in the generated JSON after the script ran: // quick‑and‑dirty fix (did not commit)
const payload = JSON.parse(fs.readFileSync('bluesky_es.json'));
payload.date = new Date().toISOString();
fs.writeFileSync('bluesky_es.json', JSON.stringify(payload, null, 2));
I added this snippet at the end of publish/bluesky.js and re‑ran the workflow. The script no longer threw a validation error, but the JSON file still lacked the required type and text fields for some articles, resulting in a partially published post. Moreover, the hack was brittle: any future schema change would break it again. The Implementation 1. Refactor the payload builder The core issue was that generateBlueskyPayload() assumed every article had a summary field, which is optional in our markdown front‑matter. When summary was missing, the function returned undefined for the text property, causing the validation error. // src/publish/bluesky.js
function generateBlueskyPayload(mdMeta) {
const text = mdMeta.summary
? mdMeta.summary
: mdMeta.excerpt || 'No summary available';

return {
type: 'avance', // <-- hard‑coded to match our content type
text,
date: new Date().toISOString(),
language: mdMeta.lang || 'es',
};
}
I added a fallback to mdMeta.excerpt and finally a default string, guaranteeing that text is never undefined. 2. Update the JSON schema validator The validator previously required date but not language. I extended it to enforce type, text, and language: // src/publish/validateBluesky.js
const schema = {
type: 'object',
required: ['type', 'text', 'date', 'language'],
properties: {
type: { type: 'string', enum: ['avance', 'nota'] },
text: { type: 'string', minLength: 1 },
date: { type: 'string', format: 'date-time' },
language: { type: 'string', enum: ['es', 'en'] },
},
};
Now the script fails fast with a clear message if any required field is missing. 3. Wire the generator into the daily run The daily pipeline lives in .github/workflows/content.yml. I added a new step that runs the Bluesky generator after the Medium and Substack steps: # .github/workflows/content.yml
- name: Generate Bluesky payload
run: |
node src/publish/bluesky.js \
- -input content/$(date +%Y/%m/%d)/content-automation/metadata.json \
- -output content/$(date +%Y/%m/%d)/content-automation/bluesky_es.json
- name: Commit Bluesky JSON
uses: stefanzweifel/git-auto-commit-action@v4
with:
commit_message: "chore(bluesky): posts $(date +%Y-%m-%d) [skip ci]"
file_pattern: "content//bluesky_es.json"
This step guarantees the payload is generated before we attempt to publish. 4. Sync metadata flags metadata.json tracks which channels have been generated. The previous commit only toggled bluesky_published after a successful post, leaving the generation flag out of sync. I added a bluesky_generated boolean that flips to true right after the JSON file is written: /...

Powered by Readybot.io

**DEV Community** ## Automating Bluesky JSON Payload Generation for Content‑Automation …

DEV Community

Every Workday career site has a public JSON API. Here is how to get all its jobs

NVIDIA, CVS Health, Wells Fargo, Northrop Grumman and thousands of other large employers post their jobs on Workday. You know these sites by the address: something.wd5.myworkdayjobs.com/SomeCareerSite. The page itself is a JavaScript app, so fetching its HTML gives you almost nothing. But the app loads every job from a small JSON API, and that API is public: no login, no key, no cookies. It is the same request your browser makes when you open the site. This post shows how to use it, and the four gotchas that will silently cost you jobs if you do not know about them. 1. Read the three parts from the URL Open the company's careers page, click any job, and look at the address: https://nvidia.wd5.myworkdayjobs.com/en-US/NVIDIAExternalCareerSite/job/US-CA-Santa-Clara/...
^^^^^^ ^^^ ^^^^^^^^^^^^^^^^^^^^^^^^
tenant data center site
tenant: the company's code, nvidia data center: wd1, wd3, wd5, wd12 and so on site: the career site name, NVIDIAExternalCareerSite. Skip the language part (en-US) if there is one. You cannot guess these from the company name. NVIDIA is nvidia.wd5/NVIDIAExternalCareerSite, Northrop Grumman is ngc.wd1/Northrop_Grumman_External_Site, Wells Fargo is wf.wd1/WellsFargoJobs. Many companies also run several sites: one for experienced hires, one for students, one per country. 2. List the jobs The API lives on the same host, under /wday/cxs/{tenant}/{site}: curl -s https://nvidia.wd5.myworkdayjobs.com/wday/cxs/nvidia/NVIDIAExternalCareerSite/jobs \
- H 'Content-Type: application/json' \
- d '{"appliedFacets":{},"limit":20,"offset":0,"searchText":"security"}'
The answer looks like this (shortened): {
"total": 413,
"jobPostings": [
{
"title": "Director, Global Event Security",
"externalPath": "/job/US-CA-Santa-Clara/Director--Global-Event-Security_JR2023116",
"locationsText": "US, CA, Santa Clara",
"postedOn": "Posted 30+ Days Ago",
"bulletFields": ["JR2023116"]
}
],
"facets": [ ... ]
}
searchText is Workday's own keyword search. Leave it empty to get everything. Page through with offset in steps of 20. 3. The four gotchas Pages hold at most 20 jobs. Ask for "limit": 50 and you get HTTP 400. Twenty is the maximum. total often comes only with the first page. On many sites later pages report 0, so read it from offset: 0 and keep it. Many sites return at most 2,000 jobs per search, and they do not tell you. Past offset 2,000 they quietly send the first page again. A loop that stops on an empty page will never stop, and a loop that counts pages will collect the same 20 jobs over and over. These sites also report total: 2000 when they have more: NVIDIA reports 2,000 and has 2,692. Other sites have no such limit. CVS Health reports its real total, about 18,000, and pages through all of it. One request at offset 2,000 tells you which kind you have: if it repeats the first page, the site is capped. Dates are relative. The list says "Posted Today" or "Posted 30+ Days Ago". The exact date is only in the job details (next section). Getting past 2,000 on capped sites The answer also carries facets: the site's own filters with a job count for each value, such as job family, worker type, time type and location. Pick a facet where every value has fewer than 2,000 jobs, run one search per value, and merge the results by externalPath: {"appliedFacets": {"jobFamilyGroup": [""]}, "limit": 20, "offset": 0, "searchText": ""}
On very large capped sites one facet is not enough, because even the biggest slice is over 2,000. Then you nest filters: split that slice again by location or worker type. 4. Job details Each job's externalPath gives you the full posting: curl -s https://nvidia.wd5.myworkdayjobs.com/wday/cxs/nvidia/NVIDIAExternalCareerSite/job/US-CA-Santa-Clara/Director--Global-Event-Security_JR2023116
Look inside jobPostingInfo: Field What it is jobDescription Full description as HTML startDate Exact postin...

Powered by Readybot.io

**DEV Community** ## Every Workday career site has a public …