Pixel

Pixel Updates & Events

Server Updates & Events

Announcements

DEV Community

Fezola in Grok: connect your mailboxes and accounts as a custom connector

To use Fezola in Grok, open grok.com/connectors, choose Add a custom connector, name it Fezola, paste https://api.fezola.com/mcp, leave the header empty and authorize on Fezola's consent screen. After that, a Grok chat can use your connected mailboxes and accounts through Fezola's tools. We tested this path on 15 November 2026 with a real Grok account, and the details below come from that test, from xAI's documentation and from Fezola's code. What you need A Grok account. xAI's documentation says connectors are available to all Grok users. On Business and Enterprise, an administrator has to provision the connector first. A Fezola account with at least one source added. Fezola is free with 2 sources: see how Fezola connects your accounts. The server URL: https://api.fezola.com/mcp. Connect Fezola to Grok, step by step Open grok.com/connectors. Choose Add a custom connector. Enter the name Fezola and the URL https://api.fezola.com/mcp. Leave the header empty. Fezola does not need one. Grok finds the sign-in settings by itself and opens a window on Fezola's consent screen, which reads that Grok asks for access to your Fezola sources. Choose the sources Grok may use, then click Authorize. You land back on Grok's connectors page, with Fezola listed. If Grok shows "A problem occurred while connecting to this MCP server", try again from step 2. We hit that message during our test, found that our own server was refusing Grok's return address, and fixed it the same day, so the flow described here works. What Grok can do with it In a new chat, Grok lists Fezola's tools and calls them when your question needs them. In our test, Grok listed tools such as the profile, recent messages and Telegram chats, and called the account listing to see which sources were connected. You can ask, for example: "Which accounts are connected through Fezola?" "What arrived in my inbox today, all mailboxes included?" "Find the email from my accountant and draft a reply." Each search result carries its account, so you know which mailbox a message came from. A few things to know about what Fezola does: Drafts, not sending. Fezola creates drafts in the mailbox that received the message. Direct sending is off by default. You can switch it on for a given mailbox in Fezola, and only then does Grok get a send tool. Telegram and Google Chat are read-only. Third-party text is data. The content of an email never counts as an instruction for the assistant. Why use Fezola rather than one connector per account A Grok connector holds one server URL. Fezola puts every mailbox, calendar and account behind that single URL, Gmail, iCloud, Outlook and IMAP included, so you add one connector instead of one per account. The same URL works in other assistants that accept custom connectors: see how to add a custom connector to Claude. Remove or change access You can remove the connector from grok.com/connectors, and you can revoke Grok's access from the Fezola app. To change which sources Grok sees, adjust it in Fezola: see choose which tools an AI assistant sees. Next step Create a free Fezola account, add your first source, then follow the steps above. Pro adds unlimited sources, with a 7-day free trial. FAQ How do I connect Fezola to Grok? Go to grok.com/connectors, choose Add a custom connector, name it Fezola, paste https://api.fezola.com/mcp, leave the header empty and save. Fezola then opens its consent screen: pick the sources Grok may see and click Authorize. Do I need an API key or a header? No. The connector is added without any header. You sign in through Fezola's own consent screen, which is a standard OAuth flow, so there is nothing to copy or paste. Which Grok plan do I need? xAI's documentation says connectors are available to all Grok users. On Business and Enterprise, xAI says an administrator must provision the connector first. Check your own account, as plans change. Can Grok read my mail through Fezola? Yes. After the connection, Grok lists Fezola's tools ...

Powered by Readybot.io

**DEV Community** ## Fezola in Grok: connect your mailboxes and …

DEV Community

Why is my Claude API bill so high? 9 things to check

Originally published at neverpaytwice.pages.dev. Short answer: the usual causes are thinking tokens you never see but pay for as output, a prompt cache that silently never hits, the whole conversation being sent again on every turn, and paying a premium you didn't need (fast mode, a bigger model, real-time instead of batch). Every response tells you exactly what you paid for in its usage block. Save those blocks, and the free script below shows where the money went, which requests skipped the cache, and which ones it can't price. 1. Thinking you never see is billed as output On current models thinking is on by default, and on Claude Opus 5.5 it can't be switched off. The thinking happens and is billed the same whether or not you display it, and on the newest models the default display shows nothing, so it is easy to miss. Thinking tokens are counted inside output_tokens, at the output price, which is five times the input price. usage.output_tokens_details.thinking_tokens tells you how much of the output was thinking. Fix: use the effort setting (output_config.effort). It controls how deeply the model thinks and how many tokens it spends overall. Simple tasks such as classification or short chat often do fine at low. Measure quality on real requests before and after. More on thinking costs. 2. The prompt cache never hits Caching works on an exact prefix: any change anywhere early in the prompt makes everything after it miss. A timestamp or request ID in the system prompt, JSON written with keys in a different order, or a tool list that changes between calls will each stop the cache from ever hitting, without any error. Prompts shorter than the model's minimum cacheable length (between 512 and 4,096 tokens, depending on the model) are not cached either. Check: if cache_read_input_tokens stays at zero on requests that share a long beginning, something is changing the prefix. Put stable content first and anything that varies after the last cache breakpoint. The caching break-even math shows when caching pays off. 3. Every turn sends the whole conversation again The API keeps no memory between requests, so a chat or agent loop sends the full history every time. Turn 30 pays for turns 1 to 29 again as input. Without caching, the cost of a long conversation grows much faster than its length. Fix: cache the conversation so earlier turns are read from the cache at a fraction of the price, keep tool results short, and start fresh conversations when the old context no longer matters. 4. Cache writes cost more than plain input Writing to the cache costs 1.25 times the input price for the 5-minute cache and 2 times for the 1-hour cache. If you write a lot to the cache and rarely read it back, caching costs you more than it saves. The 1-hour cache only pays off when the same prefix is read at least twice. 5. Fast mode doubles the price Fast mode on Claude Opus 5.5 costs $8 per million input tokens and $40 per million output tokens, twice the standard rate. If usage.speed says "fast" on requests where nobody is waiting, you are paying double for speed you don't need. 6. Work that could wait isn't batched The Message Batches API runs requests asynchronously at half the price. Nightly summaries, bulk classification, evaluations and backfills rarely need an answer in seconds. Batch prices and limits. 7. A bigger model than the job needs Claude Opus 5.5 costs $4 / $20 per million input / output tokens; Claude Sonnet 5.5 costs $2 / $10, half as much; Claude Haiku 5.5 costs $0.10 / $0.50. But judge cost per finished task, not per request: a cheaper model that needs more retries or turns isn't cheaper. Lowering effort on the model you already use is often worth trying first. 8. Long prompts on Haiku 5.5 Claude Haiku 5.5's $0.10 / $0.50 price covers prompts up to 100,000 tokens. Above that it is $0.50 / $2.50, five times as much. A pipeline that occasionally sends a huge document to Haiku can cost far more than expected. 9. Paying twice for the ...

Powered by Readybot.io

**DEV Community** ## Why is my Claude API bill so …

DEV Community

We Scanned 370k+ Websites for AI Readiness: Here’s Why Most Fail (and How to Fix It)

As search behavior shifts from traditional Google 10-blue-links toward AI answer engines (Perplexity, ChatGPT Search, Claude), how autonomous agents read web pages has become a critical technical consideration. Most AI agents and crawlers (such as PerplexityBot, ChatGPT-User, or ClaudeBot) do not browse like desktop Chrome. They optimize for cost, latency, and token efficiency—which introduces failure modes that standard Lighthouse or SEO audits completely miss. After analyzing over 370,000 domains with AI-Primed, here are the three most common technical reasons websites silently fail when AI agents visit. 1. The Headless JS Trap (Blank HTML Shells) Many modern SPAs rely on client-side hydration. While Googlebot has a headless rendering queue that eventually evaluates JavaScript, most AI retrieval agents and retrieval-augmented generation (RAG) pipelines perform fast HTTP fetches without executing JavaScript. If your critical content, pricing, or product descriptions require React/Vue/Angular hydration to appear in the DOM: The crawler receives an empty

. The assistant falls back to hallucination or reports that your site has no relevant information. The Fix: Ensure primary identity, value propositions, and key documentation are present in the server-rendered HTML or static build output. 2. Firewall & WAF False Positives Cloudflare, AWS WAF, and Akamai frequently classify AI bot user-agents under generic "automated scraper" or "bot mitigation" rules. We routinely observe sites that pass normal browser checks but return an immediate 403 Forbidden or a Cloudflare Turnstile / CAPTCHA challenge when an AI user-agent queries them. Because the agent cannot solve challenges, it drops the domain entirely. The Fix: Check your WAF rules and robots.txt. If you want search engines and answer assistants to cite your site, verify that designated bots (ChatGPT-User, PerplexityBot, ClaudeBot) are explicitly allowed through your security layer. 3. Lack of Structured Machine Endpoints (llms.txt) LLMs have finite context windows and high inference costs. When an agent has to parse complex multi-megabyte HTML full of navigation headers, SVG icons, and tracking scripts, the relevant signal is often lost. The emerging standard to solve this is /llms.txt—a markdown-formatted file at your domain root that cleanly outlines what your project does, along with direct links to documentation or key resources. Check Your Domain We built AI-Primed as a free diagnostic engine to help developers inspect their site through an AI agent's eyes: Tests actual bot reachability and firewall headers Inspects semantic markup and JSON-LD structured data Evaluates raw HTML extractability without client-side script execution Includes a free llms.txt generator Run your domain through the scanner and let me know in the comments what score you got or if you hit unexpected edge cases!

Powered by Readybot.io

**DEV Community** ## We Scanned 370k+ Websites for AI Readiness: …

IGN India Pc

EA Adds 'Don't Delete' Message to Madden NFL 27 in Bid to Keep Players From Making Room Ahead of GTA 6

Hail Mary. EA has added a "don't delete" pop-up message to Madden NFL 27, and players can't help but feel the company is begging them not to make room for Grand Theft Auto 6. Reports of the new in-game notice began cropping up over the weekend, with CharlieIntel …

Powered by Readybot.io

**IGN India Pc** ## EA Adds 'Don't Delete' Message to …

DEV Community

Your "went dark" alert is probably a coverage hole: sizing the missed-window rule for AIS

If you watch ships through a free AIS feed, sooner or later you'll want an alert for "this vessel stopped transmitting". The obvious rule is something like not received for 3 consecutive windows. We shipped roughly that, measured it, and it was wrong a lot of the time. How much of the traffic does one window see? Terrestrial AIS from community receivers is patchy even in busy water. We took 2-minute windows from a free stream and, for each window, looked at vessels we knew had been underway nearby during the previous hour. On 6 November 2026 a single window caught about 36% of them in the English Channel and 54% in the Strait of Gibraltar. So "missing from the last window" is the normal state for a large share of ships. What a fixed rule does with that If a ship is received in any given window with probability p, and windows are roughly independent, the chance a perfectly ordinary ship is missed n windows in a row is: P(false alarm) = (1 - p) ** n
With n = 3 and p = 0.36, that's 0.64³ ≈ 0.26. About one ordinary ship in four "goes dark" in the Channel. Sizing n from the local receive rate Pick the false-alarm rate you can live with (we use 1%) and solve for n: import math

def min_missed_windows(p: float, false_alarm: float = 0.01, floor: int = 3) -> float:
"""Consecutive missed windows needed before flagging, given local receive rate p."""
if p <= 0:
return math.inf # nothing is received here: never flag
if p >= 1:
return floor
return max(floor, math.ceil(math.log(false_alarm) / math.log(1 - p)))

for p in (0.2, 0.36, 0.54, 0.8):
n = min_missed_windows(p)
print(f"p={p:.2f} n={n} fixed-3 false alarm={(1 - p) ** 3:.1%}")
p=0.20 n=21 fixed-3 false alarm=51.2%
p=0.36 n=11 fixed-3 false alarm=26.2%
p=0.54 n=6 fixed-3 false alarm=9.7%
p=0.80 n=3 fixed-3 false alarm=0.8%
The useful part is that p isn't a global constant. We estimate it per alert, near where the ship should be: p = vessels received within 25 km in this window / vessels seen within 25 km in the last hour
Low p means you need to wait longer before saying anything; p = 0 means you have no basis for an alert at all. The other three checks The window count is only one of four conditions we require: It was moving at its last fix: over 1 knot and not reporting "at anchor" or "moored" (nav status 1 or 5). Parked ships drop out for boring reasons. We know where to look. Dead-reckon from the last fix (speed × elapsed time along course), capped at 6 hours. Past that the estimated position is fiction. Others are being received there. At least 5 other vessels received within 25 km of the estimate in the current window. Otherwise it's a hole in coverage, not a quiet ship. Enough missed windows, sized as above, never fewer than 3. We apply it to class A transponders only; class B reception is too irregular for this to mean much. What the alert can and can't say Even with all four conditions, the honest wording is no AIS reception despite apparent coverage. A dead transponder, a power fault or a bad antenna look identical to a deliberate switch-off. The alert tells you where to spend analyst time next: a same-day Sentinel-2 pass if the sky is clear, Sentinel-1 radar if it isn't. Where the formula is optimistic Windows aren't fully independent: a receiver that goes offline takes out several in a row. That makes the fixed rule even worse than the formula says, and our n slightly optimistic. The 25 km radius is a judgment call. Too small and you rarely have 5 neighbours; too large and you count ships a different receiver is hearing. This is the logic behind the vessel watch in TRACEZ, the investigation tool we build at NO-DO. If you run something similar and picked different thresholds, we'd like to compare notes in the comments.

Powered by Readybot.io

**DEV Community** ## Your "went dark" alert is probably a …

DEV Community

How to Optimize Images for the Web: Formats, Sizes, and Loading

How to Optimize Images for the Web: Formats, Sizes, and Loading Images are an important part of modern websites, but they can also become a major source of slow page loading. A large image may look great on a desktop screen but create unnecessary download time on a mobile connection. Using the wrong image format, uploading oversized files, or skipping responsive image techniques can affect website performance. The good news is that image optimization does not require complicated techniques. A few practical improvements to image formats, dimensions, compression, and HTML loading behavior can make a noticeable difference. In this guide, we'll explore how to optimize images for websites using modern formats and standard HTML techniques. 1. Choose the Right Image Format The first step in image optimization is selecting an appropriate file format. Different image formats serve different purposes. Format Best use Main advantage JPEG Photographs Good compression PNG Screenshots and transparent graphics Lossless compression WebP General website images Good quality-to-size balance AVIF Modern web images Efficient compression SVG Icons and simple illustrations Scales without pixelation WebP WebP is a modern image format that supports both lossy and lossless compression. It also supports transparency and animation. It is a practical choice for many website images because it can reduce file sizes while maintaining good visual quality. AVIF AVIF is another modern format that can provide highly efficient compression. It supports features such as transparency, high color depth, and animation. However, providing a fallback format can still be useful when supporting different browsers and environments. JPEG and PNG JPEG remains useful for photographs and images where lossy compression is acceptable. PNG is better suited to screenshots, diagrams, logos, and graphics where sharp edges, transparency, or exact reproduction matter. The correct format depends on the image itself, not simply on which format is newest. Reference: MDN Image File Type and Format Guide. 2. Resize Images Before Uploading One common mistake is uploading images that are much larger than their actual display dimensions. For example, imagine a website displays a product image at 400 pixels wide, but the uploaded image is 3000 pixels wide. The browser may download significantly more image data than the displayed area requires. A better approach is to prepare images close to their intended display size and provide multiple versions when necessary. Consider these examples: Small thumbnail: 300 × 200 pixels Blog image: 800 × 600 pixels Large desktop image: 1600 × 1000 pixels These are illustrative dimensions, not universal requirements. Choose dimensions based on the actual layout and screen sizes. 3. Use Responsive Images in HTML Responsive images allow browsers to select an appropriate image based on the available layout space and device requirements. The srcset and sizes attributes help browsers choose between different image versions. Example: <img
src="image-800.jpg"
srcset="
image-400.jpg 400w,
image-800.jpg 800w,
image-1600.jpg 1600w
"
sizes="(max-width: 600px) 100vw, 800px"
alt="A workspace with a laptop and notebook"
width="800"
height="500"

Here is what the attributes do: src: Provides a fallback image. srcset: Lists available image versions. sizes: Describes the expected display width. alt: Provides a text alternative. width and height: Help the browser reserve the correct layout space. The browser can select a suitable image instead of always downloading the largest available version. Reference: web.dev Responsive Images. 4. Use Modern Formats With Fallbacks You can use the HTML picture element to offer multiple image formats.
<source
srcset="product.avif"
type="image/avif"

<source
srcset="product.webp"
type="image/webp"

<img
src="product.jpg"
alt="Product displayed on a desk"
width...

Powered by Readybot.io

**DEV Community** ## How to Optimize Images for the Web: …

DEV Community

Python 3.12+ stdlib removals break unmaintained PyPI packages; updating dependencies prevents build and supply chain risks.

The Ghost Ship Dependencies: 100 Million Downloads on Dead Code The modern Python ecosystem runs on a vast, invisible infrastructure of abandoned codebases—ghost ships that continue to drift downstream long after their original crews have walked away. A deep scan of the public PyPI dataset hosted on ClickHouse (ClickPy) reveals an alarming structural failure: 544 unmaintained PyPI packages, each harboring hard-coded imports that catastrophically fail on Python 3.12 and 3.13, continue to accumulate over 100 million downloads every month. The mechanical root of this crisis lies in Python core's deliberate pruning of long-deprecated standard library modules. With Python 3.12 and 3.13, core developers officially excised 25 legacy modules—including distutils, imp, cgi, pipes, and telnetlib—to reduce attack surfaces and streamline the runtime. When an automated dependency resolver pulls a legacy package into a modern Python 3.12+ environment, the CPython interpreter attempts to load the module bytecode, executes the static import statement, and hits an empty symbol table entry. The interpreter immediately halts execution, throws an unhandled ModuleNotFoundError, and crashes the application initialization sequence before a single line of application logic can run. Our scan quantified the true extent of this latent systemic rot across the package index: 1,623 total projects still execute imports of removed standard library modules outside a protective try/except block. 852 of those broken projects sit squarely within the top 60,000 most-downloaded packages on PyPI, guaranteeing high downstream visibility. 544 of those 852 high-impact packages have not received a single code commit, patch, or release in over two years. This creates a dangerous supply chain illusion. Because download velocity remains high, automated packaging tools and CI/CD pipelines treat these packages as healthy, trusted components. Downstream developers inherit a ticking time bomb: their builds succeed on legacy Python 3.11 runtimes, but instantly fracture the moment infrastructure teams upgrade base container images to Python 3.12. Mitigation Decisions and Supply Chain Rules When engineering teams encounter build failures driven by ghost-ship dependencies, they typically choose between three remediation strategies: Pinning the runtime to Python 3.11: Effective short-term, but accumulates massive technical debt, blocks security patches in newer runtimes, and creates an eventual upgrade cliff. Blindly locking dependency versions: Fails because static lockfiles cannot inject missing standard library modules back into a modified CPython interpreter binary. Proactive AST auditing and package replacement or vendoring: The optimal operational choice, decoupling production environments from abandoned upstream artifacts. The Decision Rule: If an upstream dependency has been unmaintained for more than 24 months and imports a standard library module excised in Python 3.12+, do not attempt transitive patching. The mechanical cost of maintaining downstream compatibility forks for abandoned code exceeds the friction of immediate replacement or internal vendoring. Prune the package, rewrite the ingestion logic natively, and eliminate the ghost ship from your dependency tree before runtime memory maps the fatal crash. Anatomy of a Runtime Collapse: Python 3.12 and the Removed Standard Library When CPython initializes an application, it resolves static import statements during bytecode compilation and module loading. Python 3.12 and 3.13 excised 25 long-deprecated standard library modules—including distutils, imp, cgi, pipes, and telnetlib—to shrink the interpreter's attack surface and eliminate decades of accumulated technical debt. When an automated dependency resolver pulls a legacy package into a Python 3.12+ environment, the interpreter hits a hard-coded static import reference pointing to a module name that no longer exists in the standard library. Because the correspond...

Powered by Readybot.io

**DEV Community** ## Python 3.12+ stdlib removals break unmaintained PyPI …

DEV Community

Agentic AI Architectures: Building Deterministic Enterprise Systems Beyond Simple LLM Wrappers

The early wave of generative AI integrations across business software consisted almost entirely of "prompt-and-pray" wrappers: single-shot API calls to proprietary Large Language Models (LLMs) instructed via long system prompts to produce JSON payloads. For interactive conversational chatbots or drafting blog intros, this approach was acceptable. For mission-critical enterprise workflows—such as reconciling bank statements, automating procurement orders, provisioning cloud access, or mutating ERP databases—it proved catastrophic. LLMs are probabilistic token prediction engines; enterprise systems demand deterministic guarantees. When an autonomous agent is given access to transactional database write operations or financial APIs, a 2% hallucination rate is not an edge case—it is an unacceptable operational liability. At Palmate Solutions, our AI automation consulting focuses on engineering Agentic AI Architectures that treat foundation models not as unbounded decision-makers, but as probabilistic reasoning kernels constrained inside deterministic state machines and strict transactional boundaries. Here is the architectural blueprint for engineering multi-agent systems that survive real-world production environments. The Evolution: From Naive Chains to Constrained Multi-Agent Systems Understanding why early AI prototypes failed in enterprise production requires contrasting the four evolutionary tiers of AI integration: Architectural Tier Execution Paradigm Determinism Level Error Blast Radius Production Readiness for Transactions Tier 1: Single-Shot Wrapper Prompt in → Text out Non-deterministic Unbounded Unsafe for any database mutations Tier 2: Linear RAG Pipeline Vector Search + Retrieval Augmentation Semi-deterministic Hallucinations during context synthesis Safe for read-only FAQ lookup Tier 3: Autonomous ReAct Agent Unbounded loop (Thought → Action → Observation) Highly unpredictable Runaway token spend, infinite loops, cascading hallucination Unsafe without strict cycle limits and approvals Tier 4: State-Machine Agentic Mesh Directed Acyclic Graph (DAG) with schema-validated tool calling & human gates Deterministic envelope around probabilistic kernels Strictly isolated to current DAG node Enterprise-grade production standard If an agent is permitted to decide its own next step in an unbounded while (true) loop without rigid state validation, the system will eventually enter a reasoning loop, exhaust token budgets, or trigger duplicate external side-effects (e.g. charging a customer multiple times during a failed retry). Principle 1: The Orchestrator-Worker DAG Pattern Modern agentic systems must be designed as Directed Acyclic Graphs (DAGs). Instead of a single "super-agent" with 40 tool definitions in its context window, architecture should separate orchestration from execution: [ Inbound Event / Webhook ]
│
▼
┌─────────────────────────┐
│ Orchestrator Router │ ◄── Classifies intent & constructs execution plan
└──────────┬──────────────┘
│
┌─────┴──────────────┐
▼ ▼
┌──────────────┐ ┌──────────────┐
│ Data Worker │ │ Parser Worker│ (Narrow scopes, minimal tool sets)
└────┬─────────┘ └──────┬───────┘
│ │
▼ ▼
┌─────────────────────────────────┐
│ Schema Validator (Zod / JSON) │ ◄── Enforces strict type contract
└────────────────┬────────────────┘
│
▼
┌─────────────────────────────────┐
│ Human Approval Queue (If mutative)│
└────────────────┬────────────────┘
│
▼
┌─────────────────────────────────┐
│ Transactional Write to ERP / DB │
└─────────────────────────────────┘
The Orchestrator Agent: Receives the initial context, classifies intent, and constructs a static execution plan against pre-defined graph edges. It does not execute database writes or API transactions. Specialized Worker Agents: Each worker receives only the minimal...

Powered by Readybot.io

**DEV Community** ## Agentic AI Architectures: Building Deterministic Enterprise Systems …

DEV Community

API Integration Checklist for Businesses

Integrations fail in the gaps: nobody named a data owner, the sandbox token expired, pagination was “we’ll fetch page 1,” and webhooks were accepted without a signature check. This checklist is what Palmate Solutions walks through before and during API integration work. Use it to brief a vendor, audit an existing zap, or prepare for a build. For why this work is worth doing, see how API integration can automate business operations. For the failure modes this list is designed to prevent, see common mistakes when integrating third-party APIs. To bound scope before a workshop, run the API project estimator. It will not replace this checklist. It will stop you from estimating “the Shopify API” as if it were one flow. 1. Business ownership [ ] Each flow has a named operator (warehouse, finance, sales) who can answer mapping questions in a working day. [ ] You have written which system is the authority for each field (on-hand stock, customer email, invoice status). Dual writers are how loops start. [ ] Success is defined as behaviour (“oversell rate,” “time to tracking number”), not “API connected.” [ ] There is a pause switch: who can disable outbound updates during a vendor outage. If ownership is “IT will figure it out,” stop. Mappings are product decisions. 2. Inventory of systems and flows [ ] List systems, environments (sandbox/production), and whether each is source, destination, or both. [ ] List objects: orders, SKUs, packs, customers, payments, shipments, refunds. [ ] For each object, list events: created, updated, cancelled, partially fulfilled. [ ] Note volume and peaks (festival, month-end, marketplace sale windows). [ ] Note legal and tax fields that must survive the hop (GSTIN, HSN, place of supply) rather than disappearing into a notes field. The estimator is built around counting these. A spreadsheet of flows is a better RFP than a paragraph. 3. Contracts and samples [ ] Official docs, OpenAPI if it exists, and real sandbox payloads — not a blog screenshot. [ ] Sample JSON saved in version control. Validate and pretty-print with the JSON formatter so “almost JSON” does not waste a day. [ ] Field dictionary: your name, their name, type, nullability, enums. [ ] Pack and unit mapping (1 box = 6 units) written down before code. [ ] Error bodies: what a 4xx looks like, and whether 200 can still mean “accepted but not applied.” If the vendor cannot provide a sandbox, treat production-first as a risk item, not a flex. 4. Authentication and secrets [ ] Auth type: API key, OAuth2 (auth code vs client credentials), mutual TLS, signed requests. [ ] Token lifetime, refresh path, and clock skew tolerance. [ ] Where secrets live (not git, not a shared chat). Rotation procedure. [ ] JWT-shaped tokens inspected with the JWT decoder so claims, expiry, and audience are visible — decode in the browser, do not paste production secrets into random websites. [ ] Least privilege: a key that can only write what the flow needs. OAuth “we logged in once in Postman” is not a production design. Apps need refresh; cron jobs need a client-credentials path or a securely stored refresh token with alerting on failure. 5. Webhooks and inbound events [ ] Signature verification (HMAC or vendor-specific) with a secret that can be rotated. [ ] Idempotency keys or event IDs stored so retries do not double-decrement stock or double-email. [ ] Fast acknowledgement; slow work in a queue. [ ] Out-of-order and delayed events: do you apply last-write-wins, or version vectors, or “ignore if older than local”? [ ] Replay tool for operators after a mapping fix. Unsigned webhooks are an open write API on your public URL. 6. Pagination, filtering, and rate limits [ ] Pagination style documented (offset, cursor, Link headers) and a complete crawl tested, not page 1. [ ] updated_since or cursors for incremental sync; full snapshot only when required. [ ] Rate limits and backoff: status codes, Retry-After, daily caps. [ ] Burst behaviour during a sale: queue, don’...

Powered by Readybot.io

**DEV Community** ## API Integration Checklist for Businesses Integrations fail …

DEV Community

I offered 5% off to move shoppers off cash on delivery. The numbers surprised me

In Pakistan, cash on delivery isn't one payment option among many. On the store I run tech for, a bookstore, it's 655 of the last 855 orders. That's 77%. COD is expensive. Couriers collect the cash and pay it out later, refused parcels come back at your cost, and you hold stock for orders that may never be paid for. So I built the obvious fix: pay online and save 5%. The data was not what I expected. What I built The shopper ticks a toggle on the product page or in the cart drawer. Two Shopify Functions read that choice: An order discount (purchase.order-discount.run) that takes 5% off the order A payment customization (purchase.payment-customization.run) that hides COD, so nobody takes the discount and then pays cash anyway Both read one shared signal, a cart attribute: await fetch('/cart/update.js', {
method: 'POST',
headers: { 'Content-Type': 'application/json' },
body: JSON.stringify({ attributes: { prepay_discount: 'true' } }),
keepalive: true,
});
The toggle on the product page and the one in the cart drawer stay in sync through a single document event, so they never disagree. The bug that only shoppers found Tick the toggle, hit Buy Now straight away, and the page left before the /cart/update.js request finished. The box looked ticked, but checkout had no discount and still showed COD. keepalive alone didn't fix it. What did: keep the in-flight request as a promise, and hold the form's submit until it settles. form.addEventListener('submit', async (e) => {
if (!pending) return;
e.preventDefault();
await pending;
form.requestSubmit(e.submitter);
});
One more lesson: /cart/clear.js empties the items but keeps cart attributes. My first clean test passed only because an old attribute was still sitting in the cart. I retested in a brand-new browser profile. The numbers (last 30 days) Checkouts Started Completed Conversion Opted in to pay online 126 61 48% Everyone else 973 794 82% The shoppers I gave money to finished checkout far less often than the ones who paid cash. A second detail surprised me more. 98 orders were paid by card or wallet, but only 61 used the discount. So 37 people paid online and never took the 5%. The people happy to prepay weren't the ones the discount was moving. What I think is happening To be clear, this isn't an A/B test. It compares two groups that chose themselves. My guesses: Removing COD removes the safety net. At checkout, a shopper who opted in sees one option: the gateway. If a bank OTP fails or a wallet times out, there's no fallback, so they leave. 5% doesn't buy trust. For someone who has never ordered from you, paying first is a risk. A small discount doesn't cancel it. Abandoned checkouts include retries. Some of those 65 may have come back and paid COD in a fresh checkout. What I couldn't build The cleaner design is a discount that applies only when the shopper actually pays online, with COD still visible. That needs to know the chosen payment method, which needs checkout extensibility, which on a custom app needs Shopify Plus. This store isn't on Plus. So the opt-in toggle is the best version available. The store owner looked at the numbers and kept it, because 61 prepaid orders are 61 orders that can't be refused at the door. What I'm changing next This part is planned. It isn't live yet. The obvious fix is to stop hiding cash on delivery. Bank OTPs fail in Pakistan more often than anyone likes, and a shopper whose payment just failed should still have a way to finish the order. There's a catch, and it's the Plus limit from above: the discount can't see which payment method gets picked. With COD visible, someone can tick the toggle, take the 5%, and still pay cash. I don't know how many will. Nobody does until it runs. So the test looks like this: COD stays visible next to the toggle, with one line under it: "Payment didn't go through? Cash on delivery is still available." For a fixed window, I compare by payment choice: checkouts started, checkouts completed, ...

Powered by Readybot.io

**DEV Community** ## I offered 5% off to move shoppers …

DEV Community

Why your Claude Code token count is wrong (and how to get the real number)

Originally published at neverpaytwice.pages.dev. Short answer: Claude Code writes each AI response to its log several times, and every copy carries the full token count. If you add up every line, you count most responses two or more times. On the made-up sample log in our free scripts repo (30 responses, each logged 2 to 4 times, as Claude Code does), a plain sum says 5.3M tokens. The real figure is 1.8M. To get the right number, count each response once. Our free counter does that in your browser, or use the short script below. Where Claude Code keeps its usage logs Claude Code keeps a local log of every session. They live in a hidden folder in your home directory: System Folder Mac and Linux ~/.claude/projects Windows %USERPROFILE%.claude\projects Inside there is one folder per project, holding .jsonl files (mostly one per session). Each line is one JSON event. Lines for AI responses carry a usage block with four token counts: input_tokens: new input sent to the model output_tokens: what the model wrote back cache_creation_input_tokens: input written to the prompt cache cache_read_input_tokens: input read back from the cache (much cheaper than new input) Why adding up the logs gives the wrong answer It looks simple: add the usage numbers on every line. But three things in how the logs are written make that total too high. One response, several lines. A single response is written once per content block: thinking, text, and each tool call. Every one of those lines repeats the usage of the whole response. A response with a thinking block, some text and two tool calls can appear four times. Resumed sessions copy their history. When you resume a session, earlier lines can be copied into a new log file, so the same response shows up in more than one file. Early lines are incomplete. While a response streams, the first lines can carry a partial output count. Only the last one is final, so even picking "any one line" can under-count output. None of this means you were billed twice. Each response is one request to the API. The over-count only appears when you total the log lines yourself, for example to estimate spending or build a dashboard. How to count correctly Every response line carries a message.id and a requestId. Together they identify one response. So: Keep one record per (message.id, requestId) pair, across all files. For its output tokens, use the largest value seen for that pair (the final streaming count). Skip lines that are not real responses: "model": "" and API error messages. A short script to do it yourself This Python 3 script follows the rules above. It only reads your logs and prints three numbers. (Download it, or get it with the other scripts on GitHub.) import json, pathlib, sys

root = pathlib.Path(sys.argv[1]) if len(sys.argv) > 1 else pathlib.Path.home() / ".claude" / "projects"
best, plain = {}, 0

for f in sorted(root.rglob("*.jsonl")):
n = 0
for line in f.open(encoding="utf-8", errors="replace"):
try:
o = json.loads(line)
except ValueError:
continue
if not isinstance(o, dict):
continue
n += 1
m = o.get("message")
if o.get("type") != "assistant" or not isinstance(m, dict) or not m.get("usage"):
continue
if m.get("model") == "" or o.get("isApiErrorMessage"):
continue
u = m["usage"]
t = [u.get("input_tokens") or 0, u.get("output_tokens") or 0,
u.get("cache_creation_input_tokens") or 0, u.get("cache_read_input_tokens") or 0]
plain += sum(t)
if m.get("id") or o.get("requestId"):
key = (m.get("id") or "", o.get("requestId") or "")
else:
key = (str(f), n)
if key not in best:
best[key] = t
else:
best[key][1] = max(best[key][1], t[1]) # keep the final (largest) output count

real = sum(sum(t) for t in best.values())
print(f"{len(best):,} responses...

Powered by Readybot.io

**DEV Community** ## Why your Claude Code token count is …

DEV Community

How selfie search for event photos works, and what happens to the face data

After any big event (a wedding, a conference, a 10K race) someone ends up holding a folder of a few thousand photos. Everyone in those photos wants the handful they're in. The usual ways of handing them out are a shared Drive or Google Photos link, where everyone scrolls through everything and anyone with the link sees all of it, or a group-chat dump, where photos get buried and recompressed. Selfie search is the pattern a lot of event-photo tools have settled on: a guest takes one selfie, and the system returns only the photos that guest appears in. We build one of these tools, FotoNest. This post walks through how the flow works and, because it's what people actually ask about, what happens to the face data at each step. The guest flow From the guest's side there are five steps: Open the event. The host gets one QR code and one shareable link per event. A guest scans the code or taps the link, in the Android app or in any browser. Sign in with Google. One tap: no password, no OTP, no phone number. Tap "Find my photos" and take one selfie. See the matches. Only the photos you appear in, ranked by how strongly they match. Download. One at a time or in bulk, as the original full-resolution files. The photos arrive from the other direction. The host, the photographers and, depending on the event's privacy mode, the guests add them from a phone camera, a phone gallery, a public Google Drive link or desktop drag-and-drop. Several photographers can upload to the same event at once, and uploads resume if the connection drops. What happens between the selfie and the results Face search systems generally work in two halves. Cataloguing the gallery. When photos are added, each face in each photo is detected and turned into an embedding: a list of numbers that describes the face in a way that stays stable across lighting, angle and expression. Two photos of the same person produce embeddings that sit close together; photos of different people sit further apart. This happens once per photo, not once per search. Searching. The guest's selfie goes through the same process. The system compares that one embedding against the event's catalogue and returns the photos whose faces are closest, best match first. In FotoNest, the selfie becomes an encrypted face embedding, it's matched only against the photos of the event the guest joined, and the results come back ranked by match. A few behaviours follow from that: Group selfies work. If several faces are in one selfie, the search returns photos of any of them, combined. One selfie with your friends returns everyone's photos. Angles and small obstructions are fine. Side and profile shots match, and so do faces behind small sunglasses, a hat or light makeup. A face that's mostly covered won't. Low light, children and twins were all tested, and all work. No tagging, ever. Nobody labels faces by hand. Late photos aren't pushed. If more photos are added after you've searched, you re-run your selfie to pick them up. It's a retrieval flow for after the event, not a live feed during it. No match is an answer too. You get a "photos not found" state and can search again later. Matching quality is the number everyone asks for first. FotoNest's figure, from internal testing, is 99.8% match accuracy. Why sign-in is required Plenty of photo-sharing tools let anyone with the link browse. FotoNest requires Google sign-in for every guest on every event, with no exceptions. The reasoning: a gallery of people's faces shouldn't have anonymous visitors, so everyone inside one is a verified identity. Keeping it to one tap is what makes the requirement bearable at a wedding. Two other controls do similar work: Searching is selfie-only. You search with your own live selfie. You can't upload someone else's photo to find them. Event URLs are auto-generated, with no custom slugs, so nobody can guess a URL from an event's name. The three privacy modes The host picks a mode when creating the event, and it locks once the...

Powered by Readybot.io

**DEV Community** ## How selfie search for event photos works, …

DEV Community

Planos de saúde Sorocaba: dados estruturados e E-E-A-T num site na 1ª página do Google

No meu artigo anterior contei como levei um site HTML estático de 64 para 97 no PageSpeed. Desta vez o assunto é outro: como o Google sabe quem escreveu o seu conteúdo. Relembrando: não sou programador. Sou corretor de planos de saúde, sócio de uma corretora com seis consultores, e cuido dos nossos sites. Um deles, sobre planos de saúde em Sorocaba (SP), já aparece na 1ª página do Google para o termo principal. Eu achava que os dados estruturados dele estavam em ordem. Afinal, a home tinha um JSON-LD caprichado, com InsuranceAgency, FAQPage e até um Dataset com números do IBGE e da ANS. Resolvi conferir página por página. Descobri que 83 das 96 páginas não tinham nenhum dado estruturado. Transparência: fiz a auditoria e as correções com ajuda de IA (Claude). Os números são do meu site, e eu revisei cada decisão. Por que isso pesa mais num site de saúde O Google trata saúde e dinheiro como YMYL ("Your Money or Your Life"): assuntos em que uma informação ruim pode prejudicar a vida de alguém. Nesses temas, ele procura com mais rigor os sinais de E-E-A-T: experiência, especialidade, autoridade e confiabilidade. Na prática, o Google quer responder a perguntas simples sobre cada página: Quem escreveu isto? Essa pessoa tem habilitação para falar do assunto? Qual empresa responde pelo conteúdo? Quando foi atualizado? O leitor responde olhando a página. Os robôs (do Google e das IAs) respondem melhor quando você diz isso em JSON-LD, de forma explícita e igual em todas as páginas. Foi exatamente aí que o meu site falhou. A auditoria: 20 linhas de Python Baixei o site inteiro e rodei um script simples, que só conta o que existe em cada HTML: import glob, re

paginas = [f for f in glob.glob('*/.html', recursive=True)
if len(open(f, 'rb').read()) > 400] # ignora redirecionamentos

faltando = {'json-ld': 0, 'og:title': 0, 'canonical': 0, 'h1': 0}
ids_autor = set()

for f in paginas:
s = open(f, encoding='utf-8').read()
if 'application/ld+json' not in s: faltando['json-ld'] += 1
if 'og:title' not in s: faltando['og:title'] += 1
if not re.search(r'rel=\s"canonical"', s): faltando['canonical'] += 1
if '<h1' not in s: faltando['h1'] += 1
ids_autor |= set(re.findall(r'"@id":\s
"([^"]emerson[^"])"', s))

print(len(paginas), faltando)
print(ids_autor)
O resultado, em 96 páginas: Item Páginas sem ele JSON-LD (dados estruturados) 83 Open Graph (prévia ao compartilhar) 83 Tag canonical 63 H1 10 E a última linha do script mostrou outro problema: dois IDs diferentes para a mesma pessoa. Erro 1: o mesmo autor com dois IDs Nas poucas páginas que tinham dados estruturados, o autor era declarado assim: {
"@type": "Person",
"@id": "https://.../#emerson-lavieri",
"name": "Emerson Lavieri",
"url": "https://.../"
}
Já a página "Sobre a corretora" declarava assim: {
"@type": "Person",
"@id": "https://.../sobre-a-corretora/#emerson",
"name": "Emerson Lavieri",
"sameAs": ["https://www.linkedin.com/in/...", "https://....jusbrasil.com.br/"]
}
O @id funciona como a "chave" de uma entidade no grafo. Com dois IDs, o Google pode entender que são duas pessoas diferentes com o mesmo nome: uma sem nenhuma prova de quem é, e outra com LinkedIn e Jusbrasil. A autoridade fica dividida ao meio. A correção: escolhi um único ID, o da página Sobre (que é onde a pessoa é apresentada de verdade), e coloquei o mesmo nó completo em todas as páginas: {
"@type": "Person",
"@id": "https://.../sobre-a-corretora/#emerson",
"name": "Emerson Lavieri",
"url": "https://.../sobre-a-corretora/",
"jobTitle": "Corretor de seguros – SUSEP nº 201096017",
"identifier": {
"@type": "PropertyValue",
"propertyID": "SUSEP",
"value": "201096017"
},
"sameAs": [
"https://www.linkedin.com/in/...",
"https://....jusbrasil.com.br/"
],
"worksFor": { "@id": "https://.../#consult-vida" }
}
O identifier com o registro na SUSEP (o órgão que fiscaliza corretores de seguros no Brasil) é...

Powered by Readybot.io

**DEV Community** ## Planos de saúde Sorocaba: dados estruturados e …

DEV Community

Building a Safe-by-Design HTTP Telemetry Crate in Rust

Incidents are easier to investigate when you can see what happened inside your HTTP service: which route failed, how long it took, and what the request looked like. But logging request data can create new problems. Passwords and tokens may end up in logs. Large payloads can consume memory. And if telemetry export waits on a slow or unavailable backend, it can affect the request path. To address these tradeoffs, I built safe-http-telemetry, an open-source Rust crate for Axum and Tower applications. Its design goal is to make HTTP telemetry useful while keeping capture, resource use, and export behavior under the application’s control. Three design priorities Redact sensitive data before queueing When an application captures request data, it needs to consider credentials such as passwords, bearer tokens, and API keys. safe-http-telemetry applies capture limits and redaction before events enter the export queue. It supports configured sensitive-field matching in query parameters, headers, and supported structured body formats. JSON objects are traversed recursively, with limits on depth, visited nodes, and string size. Body capture is optional. It requires the body-capture feature and a route configured for the Detailed profile. Applications can also add field names specific to their own domain. Redaction is a safeguard, not a guarantee that every secret will be identified. I recommend starting with the Minimal profile, enabling richer capture only on reviewed routes, and limiting access to the telemetry backend. Keep the request path independent from Loki The middleware submits events to a bounded queue without waiting for a network export. Background workers can consume and batch events for asynchronous delivery to Grafana Loki. If the queue fills up, the default DropNewest policy rejects the incoming event and updates operational counters. This keeps queue memory bounded and avoids waiting for Loki to become available. The application can monitor these counters and configure limits to suit its workload. The event flow looks like this: HTTP request
│
▼
Axum / Tower middleware
│
▼
Route policy → bounded capture → redaction
│
▼
Bounded event queue ── full? ──► drop newest + update counters
│
▼
Background exporter workers
│
▼
Grafana Loki
The queue and exporter have separate responsibilities: the middleware prepares events, while the consumer handles delivery and shutdown. Make geolocation an explicit local option For applications that need it, the optional geolocation feature can look up country information using a local MMDB database. The database is supplied separately, loaded during setup, and is not downloaded by the crate. Lookups do not call an external geolocation API. The cache has configurable capacity and time-to-live limits. By default, the event includes country code and country name; the application can choose other supported fields. Geolocation depends on resolving the client IP correctly, so forwarded headers should only be trusted from configured proxy networks. A small Axum integration surface After creating a bounded queue and route policies, attach the layer to your router: let telemetry_layer =
axum_telemetry_layer(queue.clone(), policies, MiddlewareConfig::default())?;

let app = Router::new()
.route("/hello/{name}", get(handler))
.layer(telemetry_layer);
With Axum, register routes before applying the layer so the middleware can record normalized route templates. The crate leaves server setup, queue consumption, and shutdown sequencing to the application. What the benchmarks show I used Criterion to measure middleware overhead with tower::ServiceExt::oneshot. The recorded run compared a service without telemetry to three capture profiles: Baseline: 2.38 µs Minimal: 27.31 µs Standard: 60.16 µs Detailed: 71.58 µs These are estimates from a documented run on one machine, not universal performance guarantees. The benchmark does not measure networ...

Powered by Readybot.io

**DEV Community** ## Building a Safe-by-Design HTTP Telemetry Crate in …

DEV Community

Claude Code Skills Deep Dive (9): From Personal Folders to Team Plugins

TL;DR: Personal, project, plugin, and managed Skills are not four tiers of one inheritance stack. They are different distribution contracts. Personal Skills favor local iteration; project Skills travel with reviewed repository changes; plugins add a namespace, versioned packaging, and other components; managed Skills support organization-wide deployment. The Agent Skills format is portable, but each runtime still has its own dependencies and sharing rules. Update for current Claude Code: Skills enabled in a claude.ai account can now sync down into signed-in terminal and cloud sessions; locally authored Skills are not automatically uploaded back to claude.ai. Part 8: From Loading to Compaction followed a Skill through a session. This article takes the longer view: how does a workflow written in ~/.claude/skills/ today become something a team can maintain and install tomorrow? Copying a folder is easy: cp -r ~/.claude/skills/release-check teammate-machine/
But the copy raises new questions: Which copy is authoritative, and who updates it? How do same-named Skills avoid collisions? Which runtime does each script require? How do hooks, agents, and MCP configuration install together? How does a team review changes to the permission surface? Can the Claude Code version be used unchanged in the API or claude.ai? What you distribute is not merely a folder. You distribute a maintenance and trust relationship. Four distribution contracts Form Source of truth Update path Best fit Personal A user's local directory Individual edits Experiments, personal habits, private workflows across projects Project A repository's .claude/skills/ Commits and PRs Repository-specific capabilities shared by contributors Plugin A plugin package and version Install, upgrade, marketplace Multi-project or multi-team capabilities with multiple components Managed Organization-managed configuration Administrator deployment Organization-wide workflows and governance This is not a mandatory promotion ladder. A migration Skill tied to one repository may always belong in that project; a public tool may merit a plugin from day one. The useful questions are: Who authors it?
Who uses it?
Who approves updates?
How do users receive a new version?
What other components does it depend on?
Personal: the fastest place to experiment A personal directory is a good place to turn repeated work into a first Skill: ~/.claude/skills/release-check/
├── SKILL.md
└── scripts/
You can edit quickly, test a description across local projects, and observe when the Skill triggers without affecting teammates. But other contributors do not automatically have it. A new machine may not have it either. Local CLI tools, paths, credentials, and even the history of changes can remain invisible. A personal Skill should be treated as personal configuration, not a hidden project dependency. If team work fails without it, the distribution scope is wrong. Project: put the workflow under review Put the Skill in: repo/.claude/skills/release-check/
Commit it, and the workflow becomes part of the repository. A contributor can get it with the code, while changes become reviewable: Why did the release checklist change?
→ Read the commit or PR.

Who broadened allowed-tools?
→ Inspect the diff.

When did a new CLI become required?
→ Check repository history.
The important gain is not automatic copying; it is an auditable history. Project Skills fit capabilities coupled to repository facts. When the same Skill is copied into ten repositories and evolves independently, however, Git gives you ten forks—not one upgrade path. That is a reason to consider a plugin. Iterate standalone; productize as a plugin Standalone configuration is well suited to a single project, a personal workflow, or an unstable Skill or hook. A plugin becomes useful when the capability needs reuse across projects, independent versioning, team or community distribution, or installation alongside agents, hooks, and MCP servers. Re...

Powered by Readybot.io

**DEV Community** ## Claude Code Skills Deep Dive (9): From …

DEV Community

Leaked Keys: SaaS API Cost Attribution Explained Through Refusal Drills

A B2B SaaS leaked-key drill should end with an owner, an attributed usage record, and a decision about which traffic to refuse. Start with one key per cost centre and the platform's per-key usage figures. The bill contains accepted API work and retained accounting evidence; asking teams to reconstruct consumption afterward adds a dispute to the response process. TL;DR: Attribute API costs across teams using keys as cost centres, rather than self-reported usage. Keep the spend-ceiling decision separate: attribution explains accepted work, while admission policy determines refused traffic. A shared service still needs an allocation rule. Quantify the exposure before choosing a control. Accepted calls multiplied by their applicable costs make up the consumption term; retained bytes and their retention policy determine the evidence term. In an illustrative drill, 8 budget units already accepted against a 10-unit ceiling leave 2 units. Admitting a further 3-unit attempt crosses that ceiling. These are exercise inputs, not vendor prices or measured results. Refusing that attempt moves the consumption term; deleting evidence afterward does not undo accepted work. How should teams use keys for API cost attribution across shared services? The least complex useful change is to put ownership into the credential boundary before traffic starts. A shared credential makes attribution depend on a later join against application records; separate credentials give the platform's own numbers a cost-centre dimension. Self-reporting leaves the reporting process behind the consumption it is supposed to explain. Count refused traffic. When a suspected credential is refused, legitimate requests using it may be refused too. If the service keeps admitting work during investigation, the spend ceiling needs to account for that interval. Reporting only lower accepted usage can make an interrupted workflow appear to be successful containment, so the drill should retain both attributed consumption and refusal reasons. Per-key reporting isn't proof of atomic budget enforcement. Two workers may read the same remaining allowance and both admit work; a strict ceiling needs a consistency boundary around reservation and admission. Require that contract explicitly. Neither credential separation nor an accounting dashboard establishes how quickly new usage becomes visible. Choose the ceiling and refusal rule before the exercise, identify a test credential as suspected compromised, then rehearse its replacement while preserving the owning cost centre. Rotation must not turn the same team's later usage into an unowned bucket. Those are design acceptance criteria, not promises about a vendor's propagation time. Compare the control boundary, not the invoice headline Evaluate alternatives against the part of the drill they need to own. The following table is a selection framework: it does not assert identical budget-enforcement behavior across products. Option Useful evaluation focus Fit Boundary to resolve Stripe Billing Customer-facing billing A team whose accounting question ends in customer invoices An invoice alone cannot establish that a leaked backend credential was refused Unkey API credential management A team evaluating the credential boundary independently of its backend providers Reconcile credential identity with the source of billable usage Kong Gateway Gateway admission policy A team that wants to evaluate policy at its application ingress Determine which backend calls can bypass that ingress Infrai One API key across DNS and account capabilities A team that wants a stable capability contract when the underlying vendor changes, with per-call cost and vendor metadata for reconciliation Shared-service allocation remains a team policy; a combined provider concentrates operational dependency The first three are real alternatives for different portions of the control system. Stripe Billing is relevant when the output is an invoice; Unkey and Kong Gateway ar...

Powered by Readybot.io

**DEV Community** ## Leaked Keys: SaaS API Cost Attribution Explained …

DEV Community

SuppressIldasmAttribute is not protection: what anti-ILDASM actually buys you

Search "protect .NET assembly" and someone will tell you to add one line: [assembly: System.Runtime.CompilerServices.SuppressIldasm]
The promise is that your DLL can no longer be disassembled. The reality is narrower than almost anyone who pastes that line realises, and on modern .NET it does nothing at all. This is a deep explainer on what SuppressIldasmAttribute actually does, why it stops exactly one program, and what it takes to make an assembly genuinely expensive to read. What the attribute really is SuppressIldasmAttribute is not encryption, not a permission, not a lock. It is a marker — a zero-field custom attribute that the compiler writes into your assembly's metadata. At the IL level it is just another .custom entry in the CustomAttribute table: .custom instance void [System.Runtime]
System.Runtime.CompilerServices.SuppressIldasmAttribute::.ctor() = ( 01 00 00 00 )
That ( 01 00 00 00 ) is the attribute blob: a two-byte prolog and a two-byte count, with no arguments. Nothing about your code changes. Every type, every method body, every string literal is written to the file exactly as before. The only new thing in the assembly is a flag that says, in effect, "please don't disassemble me." Whether anyone honours that request is entirely up to the tool reading the file. Exactly one tool ever listened — and it stopped Historically, Microsoft's own ildasm.exe — the IL Disassembler shipped with the .NET Framework SDK — checked for this attribute. If it found one, it printed // This assembly is protected... and refused to dump the IL. That is the entire mechanism. It was a gentleman's agreement between Microsoft's authoring tool and Microsoft's disassembling tool. Two facts collapse the protection: No other reader ever checked it. ILSpy, dnSpy, dotPeek, JustDecompile, the Mono monodis utility, and modern decompilers including Glass.NET read the metadata tables directly. None of them consult the SuppressIldasm flag, because nothing in the ECMA-335 format obliges them to. They open the file, walk the TypeDef and MethodDef tables, resolve each method's IL from its RVA, and reconstruct C#. The attribute is invisible to them. On .NET 6 and later, even ildasm ignores it. The honour was removed. The attribute still compiles — it is marked obsolete — but the modern disassembler dumps the assembly regardless. So on any current .NET target, [assembly: SuppressIldasm] is a literal no-op: it changes four bytes of metadata and protects nothing, not even against the one tool it was written for. The net effect, today: you have added an attribute that does nothing, and possibly convinced yourself you are protected when you are not. That second part is the real hazard. Why it was always weak: the file is still readable Step back from the attribute and look at what a .NET assembly actually exposes. The managed metadata is not an opaque blob — it is a set of well-defined streams inside the PE file, and decompilers feed on them directly. What a decompiler reads from the metadata streams — the SuppressIldasm flag guards none of it Assembly metadata a decompiler walks directly #~ (tables) TypeDef, MethodDef, Field, Param rows #Strings every type, method and field name #US every string literal in your code method bodies (IL) resolved from each RVA #Blob signatures, constants SuppressIldasm flag — one row in CustomAttribute The flag sits beside the data; it does not encrypt, remove or guard any of it. A reader that skips the flag still reads every box above. The #Strings heap holds the plaintext name of every type, method, field and parameter. The #US (user-string) heap holds every string literal your code contains. The #~ stream holds the tables that stitch them together, and each method's IL is resolved from its relative virtual address. A decompiler opens the file and reads these structures. That is the whole job. The SuppressIldasm flag sits next to all of this, in one row of the CustomAttribute table. It does not remove a single nam...

Powered by Readybot.io

**DEV Community** ## SuppressIldasmAttribute is not protection: what anti-ILDASM actually …

DEV Community

Shift Left AI Coding Agent Boundaries with Pre-Commit Gates

Autonomous AI coding agents operating inside large monorepos frequently struggle with strict boundary enforcement, often importing unauthorized modules deep into their coding loops only to fail late during CI merge checks. When an agent spends thousands of tokens writing code that gets rejected at merge time, teams face expensive rollback and untangling cycles. Quick solution: Prevent cross-module import leaks instantly by pairing a deterministic static AST linter in a pre-commit hook with your CI checks, enforcing boundaries before code ever reaches remote storage. npx dependency-cruiser --config .dependency-cruiser.js apps/billing/
Prerequisite: Ensure your repository uses isolated worktrees as outlined in guides like Git Sparse Checkout Cone Mode Root Files before implementing pre-commit hook enforcement. Be mindful that local hooks can occasionally be bypassed if the agent environment retains raw shell execution permissions. The Late Failure Trap in Autonomous Pipelines Platform engineers typically rely on a CI Merge-Time Diff Allowlist to stop unauthorized files from entering trunk branches: # CI merge check verifying modified paths
git diff --name-only origin/main...HEAD | grep -v -E "^apps/billing/"
While a CI allowlist provides a strong unforgeable barrier, it introduces a significant latency and financial penalty known as the late failure trap. An agent might spend dozens of tool-call iterations refactoring code, only to pull in a forbidden utility from another service. By the time CI runs minutes later, the agent has finished its turn, requiring a human or an expensive retry loop to fix the stray import. When an agent burns thousands of tokens producing code only to be rejected at merge time by CI, teams face expensive rollback and untangling cycles. In large-scale enterprise environments with hundreds of active agents running in parallel, these wasted cycles accumulate into massive cloud compute bills and stagnant pull request queues that stall feature delivery. Furthermore, relying solely on post-push validation creates an adversarial dynamic between automated agents and platform stability guards. Because the agent receives no immediate tactile feedback during its generation loop, it often repeats the same architectural mistake across multiple subsequent tasks. This systemic oversight highlights why shifting validation upstream into the local worktree is an operational necessity rather than a premature optimization. Without early boundary enforcement, engineering organizations find themselves continuously tuning LLM system prompts with strict negative constraints, which agents inevitably bypass when complex refactoring tasks require reaching across internal service boundaries. To maintain robust control over expanding codebases, platform maintainers must implement proactive filters that intercept violations inside the developer sandbox before remote propagation occurs. Architectural Trade-Offs: The 3-Tier Shift-Left Model To balance agent autonomy with strict repository hygiene, engineering teams can adopt a 3-tier governance model that moves validation upstream from remote CI runners into the local developer or agent loop. Option When to Use It Trade-off or Failure Mode Recommendation Tier 1: Static AST Linter For instant, zero-token import checks on every local commit. Catches explicit imports only; misses dynamic runtime or reflection-based leaks. Use as the mandatory first line of defense in pre-commit hooks. Tier 2: Semantic Subagent To evaluate architectural intent and subtle boundary breaches. Incurs a small token cost and adds milliseconds of latency before pushing. Run as an automated pre-push review gate in the orchestrator pipeline. Tier 3: CI Merge Fence As an immutable backstop and unbypassable security boundary. Fails late after branch push, wasting tokens if used alone. Keep as the final source of truth for trunk promotion safety. According to community discussions highlighted by Manoj Kagitha ...

Powered by Readybot.io

**DEV Community** ## Shift Left AI Coding Agent Boundaries with …

DEV Community

A PM's Guide to Vibe-Coding: Requirements First, Code Second

For about a year, my team kept a shared resource — meeting rooms — in a spreadsheet and a group chat. Someone would write "Room B, Thursday 2–4pm?" in the chat. Someone else would check the spreadsheet. Someone would forget to update it. And then two teams would show up at the same door at the same time, each holding a laptop and a reasonable claim to the room. It worked badly, and everyone knew it worked badly. Nobody had time to build a real system for it. And I am a project manager, not a programmer — I hadn't written production code in years. So I did the thing every PM seems to be doing now: I asked an AI coding assistant to build it for me. I want to be honest about what happened next. The AI did not magically turn my idea into software. It turned my requirements into software — and the difference between those two sentences is the whole story. The requirements came first Before I opened the editor, I spent a day writing the rules. Not a PRD, not a forty-page spec — just a list, in plain language, of how the thing had to behave. Four questions did most of the work: Who can use it? Anyone on the team, no approval needed. If a tool needs a gatekeeper, people go back to the group chat. When can they book? Within a fixed window ahead of time — far enough to plan, short enough that nobody hoards rooms weeks out. What happens when two people want the same slot? The second booking fails, clearly, in words a human understands. No silent overwrites, ever. What happens when someone cancels? The slot frees up immediately, and the system shows it as free. No ghost bookings. Those four answers became the spine of everything I asked the AI to build. Everything else — the layout, the colours, the buttons — was decoration. Here is the part nobody warns you about: the AI will also invent rules. Mine did, on the first day. It added an auto-expiry rule I never asked for — unconfirmed bookings would vanish after two hours. It sounded sensible. It was also completely made up, and it would have deleted real bookings made by real people who simply hadn't clicked a confirmation nobody told them about. So I learned the first real lesson of vibe-coding, and it is a PM lesson, not a coding lesson: every rule in the system must come from your written spec. If a behaviour isn't in the list, it doesn't exist. I added one line to the top of my spec, and it stayed there for the whole build: "Build only the rules written here. Do not add rules of your own." The rules I insisted on, the ones the AI would never have written by itself, were the boring human ones: One active booking per person per day. Not because the system needs it, but because without it, one organised person books every room and everyone else goes back to the spreadsheet. Every booking shows a name. Not an ID, not an email — a name. When two people collide, they need to know who to talk to. Software can't resolve that conversation; it can only make it possible. The system never moves or deletes a booking silently. If something changes, the person affected gets told. This rule cost me an afternoon of argument with the AI, which kept trying to "helpfully" resolve conflicts on its own. I kept deleting that help. Those three rules are the whole difference between a tool people trust and a tool people route around. The AI was very good at the first kind of rule — the logic. It was blind to the second kind — the trust. That part was my job, and no prompt would have done it for me. The workflow: small prompts, real acceptance tests The tools were deliberately boring: an AI coding assistant in my editor, plain HTML, CSS and JavaScript with no framework, a private repo for version control, and Cloudflare Pages for hosting. Nothing exotic. The point of the exercise was the method, not the stack. I wrote prompts the way I write tickets: context first, then the rule, then what "done" looks like — one feature at a time. I never asked for the whole app at once. Every prompt ended with the same ac...

Powered by Readybot.io

**DEV Community** ## A PM's Guide to Vibe-Coding: Requirements First, …

DEV Community

Signal2Speech: one app, a final round of testing, and our submission (Update 6)

This is our sixth update on Signal2Speech, our Hack the Nest 2026 project that lets someone answer questions with an EEG headset. The app suggests replies, the wearer picks one with a P300 response (a brain signal that shows up about 300 milliseconds after the card you're watching flashes), and they confirm by closing their eyes. Nothing is spoken until they confirm. In our last post, we covered testing a PiEEG board on two people and finding no usable brain signal, so the app now runs on real human EEG that g.tec recorded on their own amplifier. Since then, we have submitted our project on Devpost. This post covers the last few hours before the deadline. One app instead of two Up to now, the AI replies and the NASA air-quality demo were two separate windows. Signal2Speech is now one app. The main screen is a question box and two reply cards, and the top of the window says what the app is and the three steps to use it. The NASA question is now an example inside the app. Clicking "Example: NASA air quality" brings up the map in the side panel, and the conversation shows the rest of the time. Nothing about choosing, previewing, confirming, or speaking changed, only the layout and the way in. We made this change because the conversation is the actual product. A person who can't speak needs to answer any question, not just one about air quality. The NASA example shows that the app can also do something on screen, but it shouldn't be the first thing someone sees. The reply screen can also run on g.tec's recorded brain data now, so recorded EEG picks between Claude's replies the same way it picks between the NASA options. Testing the parts we couldn't see Soak test: We wanted to know the app would hold up for a full judging hour, so we built a soak test that runs the demo by itself for 60 minutes. It runs through the same crash-safe launcher we use at the table and kills the app once on purpose. The first full run passed with 169 confirms and 169 spoken lines, zero doubles, zero crashes, and the app back within 1.1 seconds after the kill. The selection time was 3.1 seconds at the start and 3.2 seconds at the end, so the app didn't slow down over time. This ran on simulated input, not live EEG. OSCAR on real EEG: OSCAR is g.tec's artifact removal (cleaning out noise from blinks and muscle movement). We measured it on all five of g.tec's recorded people. The biggest blink and movement swings got 14 to 65% smaller while the rest of the signal barely changed, and classification stayed the same or improved, with one person going from 0.72 to 0.81. We also found something we didn't expect. OSCAR delays the signal by about a third of a second, but g.Pype doesn't shift the flash markers to match. Because of this, the classifier ends up looking at the wrong part of the response after each flash, which can cost up to 0.14 accuracy. We documented how to handle it, and it is something the live headset path will have to check. A last-minute voice bug About half an hour before the deadline, we found that some fresh spoken lines were silent on the judging laptop. Qt's audio player reported the clips as playing, so the app thought everything had been said, but nothing came out of the speakers. In an app that speaks for someone, that is a serious problem. The wearer would confirm a reply, the screen would say it was spoken, and the person they're talking to would never hear it. We switched clip playback to the Windows WAV player and added tests that cover both players. Smaller things Restart key: Between judges, pressing R brings back a fresh first question from wherever the app is, without saying anything. It uses the same rules as a normal cancel, so a brain decision still in progress from before the restart is thrown away instead of picking something on the new question. Team briefing: We wrote one page every teammate read before judging. It covers what is real and what is scripted, the numbers to know, and straight answers to the questions j...

Powered by Readybot.io
**DEV Community** ## Signal2Speech: one app, a final round of …

DEV Community

Decompiling file-local types: recovering the file modifier from a mangled metadata name

C# 11 added the file access modifier: a type declared file class Parser is visible only inside the single source file that declares it. Two files in the same project — or two source-generated files that each emit a helper — can both declare a file class Parser without colliding, and neither can be touched from anywhere else. It exists mostly for the benefit of source generators, which emit support types into a user's compilation and must not leak names that clash with the user's own code or with another generator's. From a decompiler's point of view file is an interesting problem because, like several recent C# features, it leaves no attribute behind. There is no [FileLocal] marker, no custom modifier, no flag in the TypeDef row that says "this type was declared file." The compiler encodes the modifier in the one place that survives into metadata and is guaranteed unique: the type's name. It mangles the declared name into a form that is deliberately not a legal C# identifier, and it drops the visibility down to assembly-internal. A decompiler that reads the TypeDef table and prints what it finds will emit a type called F0__Parser with internal accessibility — which is neither what the author wrote nor anything the C# compiler will accept. Reconstructing the original means recognising the mangling, reversing it, and putting the recovered type back in a file bucket. This post walks the full round trip: the source, the metadata the compiler emits, and the C# Glass.NET reconstructs. What the author wrote A file type usually keeps a small helper private to one file. Here Validators.cs has a file-local rule plus a public façade that uses it: // Validators.cs
file sealed class PhoneRule
{
public static bool IsValid(string s) => s.Length == 10;
}

public static class Contact
{
public static bool Check(string phone) => PhoneRule.IsValid(phone);
}
PhoneRule is file-scoped, so nothing outside Validators.cs can name it — not another file in the same assembly, not a consumer referencing the DLL. Contact, declared normally, calls it freely because it lives in the same file. What the compiler emits Two things happen to PhoneRule on the way to metadata. First, its name is mangled. The compiler builds a metadata name from a file identifier (derived from the source file's name), an ordinal that disambiguates files that happen to share a name, and the declared type name, wrapped so the result cannot be written in source: .class private sealed auto ansi beforefieldinit
'F0__PhoneRule'
extends [System.Runtime]System.Object
{
.method public hidebysig static
bool IsValid (string s) cil managed
{
ldarg.0
callvirt instance int32 [System.Runtime]System.String::get_Length()
ldc.i4.s 10
ceq
ret
}
}
Note what is not there: no CompilerGeneratedAttribute, no custom attribute of any kind announcing the modifier. The F0__PhoneRule name is the entire record of the file keyword. The < and > are the tell — they are reserved exactly so that user code can never produce an identifier that collides with a compiler-synthesized one. Second, the type's accessibility drops to assembly-internal. A top-level type can only be public or internal in the CLI type system — there is no finer-grained visibility at the metadata level — so the compiler emits PhoneRule as internal and relies on the unspeakable name to enforce the stronger "one file only" rule at compile time. In ILDasm a top-level internal type reads as .class private, which is why the row above says private even though you never wrote private. The call site inside Contact.Check references the mangled name directly, because by the time IL is emitted the only name PhoneRule has is the mangled one: .method public hidebysig static bool Check (string phone) cil managed
{
ldarg.0
call bool 'F0__PhoneRule'::IsValid(string)
ret
}
Every reference to a file-local type inside its own file — base types, field...

Powered by Readybot.io

**DEV Community** ## Decompiling file-local types: recovering the file modifier …

DEV Community

Let's Encrypt for Internal Domains: What CT Logs Make Public

Let's Encrypt for internal domains works: the DNS-01 challenge proves you control a domain without any server answering from the internet, and wildcard certificates come the same way. What it does not do is keep the name private. Every certificate a browser trusts is written to public Certificate Transparency (CT) logs. A service on a private address behind a VPN therefore still has a public hostname, and its issue dates and renewals are on record for anyone to read. A public certificate means a public name. Choose a certificate per host, a wildcard or a private CA by how much of the name you can afford to publish, and protect every service as if its name is already known. What a certificate publishes the moment it is issued Before issuing, a CA submits a precertificate to the logs. It is the certificate-to-be plus a critical extension, called the poison, that makes standard clients refuse it. The logs answer with signed timestamps (SCTs), and the CA embeds them in the real certificate. Nearly every CA works this way, so the hostname is public before the certificate exists. Chrome and Apple platforms both require signed proof from logs run by at least two separate organizations, so a publicly trusted CA cannot skip the step and a site owner cannot opt out. The log entry holds the whole certificate. For a domain-validated certificate, the kind Let's Encrypt issues, that means the names it covers, the issuer and the validity dates. Neither the server's address nor what it runs is in the entry. The leak is the name, which usually tells you what the host is for. Internet-wide scans already aggregated certificates, but the logs make the collection complete and early, and let anyone search it by name without connecting to your server. The entries for a domain, read as a list, give a stranger: the services you run, from labels such as vault, grafana, jenkins or vpn; products and customer names before any announcement; the date each host appeared and whether its certificate keeps renewing; a ready target list, if the same names also resolve in public DNS. Newer logs publish their contents as plain files that any client can download, and some add a compact list of just the names. For logs that Chrome accepts, the time a log may take to include an entry is capped at one minute for these static logs and four hours for the older kind. Soon after a Let's Encrypt certificate is logged, automated crawlers can find the new hostname and request it, and a public web server sees that traffic in its access log. Logs are append-only, so a name stays listed after its certificate expires or is revoked. The full Certificate Transparency background covers logs, SCTs and browser enforcement in more detail. Let's Encrypt for internal domains: what DNS-01 solves and what it publishes Let's Encrypt checks control of a name with a challenge. HTTP-01 needs a web server answering on port 80. DNS-01 needs only a TXT record in the domain's public DNS, so it works for hosts that are not exposed to the internet, and only DNS-01 can issue a wildcard. The renewing machine then holds a DNS API credential, and one that can edit your whole zone is a risk on a web server, so scope it narrowly or run the validation elsewhere. The name must sit under a domain you own in public DNS: public CAs may not issue for names that do not end in a registered top-level domain, so names ending in lan or local are out. On the publishing side, Let's Encrypt submits every certificate it issues to CT logs. Its default lifetime is 90 days, with renewal advised every 60, and six-day certificates are opt-in. Industry rules cap lifetimes at 200 days now, 100 from March 2027 and 47 from March 2029, so a per-host certificate puts the same name into the logs more often each year. Wildcard certificate subdomains: what stays hidden A wildcard certificate for .lab.example.com covers exactly one label below lab.example.com. It matches vault.lab.example.com and rejects a.vault.lab.example.com ...

Powered by Readybot.io*

**DEV Community** ## Let's Encrypt for Internal Domains: What CT …

DEV Community

Bus Parking Out, codé en CoddyRun

Nouveau jeu de réflexion écrit entièrement en CoddyRun, le langage de programmation en français. Le principe est simple, mais il faut réfléchir avant de cliquer : Le parking est encombré de voitures, de minibus et de bus. Clique sur un véhicule : il avance dans le sens de sa flèche. Si la voie est libre, il sort et se gare au quai. Sinon, il cogne et revient. Les passagers montent dans le véhicule de leur couleur, dans l'ordre de la file. Une voiture prend 4 passagers, un minibus 6 et un bus 8. Le quai n'a que 4 places. S'il est plein et que personne ne peut monter, c'est perdu. Ce qu'il y a dedans : des niveaux générés automatiquement et toujours faisables la route du véhicule qui s'affiche quand on passe la souris dessus, en rouge si quelque chose le bloque des véhicules vus de dessus, avec phares, vitres et sièges qui se remplissent un joker pour ouvrir une 5e place au quai, une fois par niveau une note de 1 à 3 étoiles à la fin du niveau, et le niveau atteint gardé en mémoire Le tout fait environ 900 lignes de code en français : si … alors, tant que, procédure, et un processus qui dessine l'écran en continu pendant que le jeu attend les clics. Jusqu'à quel niveau irez-vous ? Démo : Démo

Powered by Readybot.io
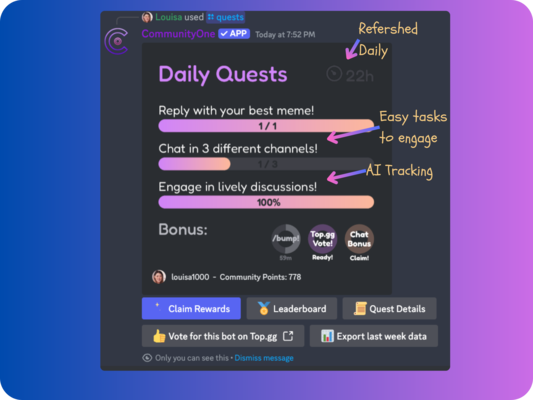
**DEV Community** ## Bus Parking Out, codé en CoddyRun Nouveau …

DEV Community

Conditional license refresh with ETag: stop re-downloading a license that has not changed

A Keyright client does not call home on every license check. It activates once, caches the signed lease, and from then on every Validate() is a local, offline operation against the embedded public key. What does talk to the issuing service is the background refresh: on a timer — typically every few minutes to a few hours — the SDK re-fetches the lease so that a renewal, an entitlement change, or a revocation is picked up without waiting for a restart. Here is the thing about that refresh loop: almost every iteration of it is a no-op. A license is a slow-moving resource. It changes when someone renews, upgrades, transfers a seat, or gets revoked — events that happen days or weeks apart. Between those events, a client that refreshes every five minutes asks the service "what is the current state of this license?" hundreds of times and gets back byte-for-byte the same signed lease every single time. Each of those answers is a full response body the service serialized and signed, pushed over the network, that the client then base64-decoded and ran an RSA verify over — all to confirm what it already knew. HTTP has had the right primitive for this since 1999. It is the conditional GET, built on the ETag response header and the If-None-Match request header, and wiring it into the refresh path turns the common case — nothing changed — into a headers-only round trip that returns 304 Not Modified with an empty body. Key takeaway: Have your issuing service stamp every license response with a strong ETag derived from the license's version and signature. Have the SDK remember that tag and send it back as If-None-Match on the next refresh. When nothing has changed the service answers 304 Not Modified with no body, the client keeps its cached lease untouched, and you have replaced a full signed-payload download plus a signature verify with a few hundred bytes of headers — without ever letting a stale cache hide a revocation. What a license fetch looks like today Strip the SDK away and a refresh is an ordinary HTTP GET. The client asks for the current lease for a key; the service returns the signed document. GET /v1/licenses/current HTTP/1.1
Host: keyright.example.com
X-Keyright-Product: acme-suite
Authorization: Bearer AK-9f3c… ← the activation token from the initial handshake

HTTP/1.1 200 OK
Content-Type: application/vnd.keyright.lease+json
Content-Length: 1184

{ "lease": "eyJhbGciOi…", "signature": "MEUCIQ…", "edition": "pro", "expiresAt": "2027-01-01T00:00:00Z" }
That lease blob is the canonical, signed payload the client verifies offline. At a kilobyte-plus a shot, times a fleet of clients, times a refresh every few minutes, times the fact that the content is identical between license events, it is pure waste. The service did real work to produce a body nobody needed. The ETag: a fingerprint the client can quote back An ETag ("entity tag") is an opaque validator the server attaches to a response. Its only contract is this: if two responses for the same URL carry the same ETag, their representations are identical; if the resource changes, the ETag must change. The client treats it as a black box — it never parses it — and simply quotes it back on the next request to ask "do you still have exactly this?". For a license, you do not want to hash the whole response body to produce the tag (that works, but it costs a hash over the payload on every request). You already have two fields that change if and only if the license changes: a monotonic version the issuing service bumps on every mutation, and the signature itself. Combine them into a strong validator: ETag: "v47-3b9a1f" ← license version 47, first bytes of the signature, strong tag
This is a strong ETag (no W/ prefix), which is the correct choice here: a conditional request should match only when the bytes are genuinely identical, because the client is going to skip verifying a new signature on a match. A weak tag (W/"…"), which only promises semantic equivalence,...

Powered by Readybot.io
**DEV Community** ## Conditional license refresh with ETag: stop re-downloading …

DEV Community

Build a readable TypeScript agent loop with tools and traces

An agent that calls tools needs a few concrete pieces: conversation history, a model interface, an allowlist of tools, and a decision about when to stop. Writing those pieces yourself makes the behavior visible. You can follow a failed tool call from its arguments to the error message sent back to the model. I put that approach into Agent Loop Starter, a small MIT-licensed TypeScript repository. It uses strict TypeScript, ESM, Zod v4, and the official OpenAI SDK. There is no agent framework between the loop and the tools. Start with the conversation The model receives messages and tool definitions. Its reply contains text, tool calls, or both. Each tool call has an ID, a name, and arguments encoded as JSON text. Keeping the arguments raw lets malformed JSON follow the same recovery path as other tool errors. The loop begins with one user message. Every model reply is appended as an assistant message. Tool results follow it, carrying the matching call IDs. On the next request, the model sees what it asked for and what actually happened. Here is the model-call section from src/agent.ts, inside while (steps < maxSteps): if (signal?.aborted) return stopped("aborted");
const step = ++steps;
const started = performance.now();
let response;
try {
try {
response = await withAbort(() => model.complete({ messages, tools: definitions, ...(signal ? { signal } : {}) }), signal);
} finally {
emit({ type: "model_call", step, durationMs: performance.now() - started });
}
} catch (error) {
if (signal?.aborted) return stopped("aborted");
throw error; // Transport/auth errors are different from recoverable tool errors.
}
withAbort stops waiting if the signal fires. It also passes the signal through to the model adapter. Authentication and transport failures reject the run, giving the caller a chance to decide whether to retry. The next decision is short: if (signal?.aborted) return stopped("aborted");
messages.push({ role: "assistant", ...response });
if (!response.toolCalls?.length) {
emit({ type: "final", step, durationMs: 0, output: response.content });
return { output: response.content, stopReason: "final", steps, trace };
}
A reply with tool calls enters a sequential execution loop. After appending all results, execution returns to the next model call. A reply without tool calls ends the run. Define tools once, with Zod A tool needs a description the model can read and validation the program can enforce. defineTool takes a Zod object schema, converts its input shape with z.toJSONSchema, and validates arguments before calling execute. The argument type is inferred from that schema. This is the calculator definition from src/tools/calculator.ts: export const calculator = defineTool({
name: "calculator",
description: "Calculate arithmetic with +, -, , /, %, parentheses, decimals and unary signs. No exponents. Uses JavaScript floating-point numbers.",
schema: z.object({ expression: z.string().min(1).max(512) }).strict(),
execute: ({ expression }) => ({ value: evaluateExpression(expression) }),
});
expression is a string inside execute. The schema also rejects extra fields. The arithmetic implementation is a recursive descent parser with precedence, parentheses, and unary signs. It never evaluates JavaScript. It rejects division by zero, excessive nesting, and non-finite results. The other examples return the current time for an IANA timezone through Intl, and search three built-in notes by keyword. All three run without external services. Tools return JSON values so results can go into conversation history and traces. Make failures part of the conversation A model can request an unknown tool, send broken JSON, or use the wrong argument types. A valid call can also fail during execution. These cases become tool error messages rather than crashing the loop. The execution boundary includes these lines: const tool = registry.get(call.name);
if (!tool) throw new Error(Unknown tool: ${call.name});
const args: u...

Powered by Readybot.io*

**DEV Community** ## Build a readable TypeScript agent loop with …