Pixel

Pixel Updates & Events

Server Updates & Events

Announcements

A Reliable System of Record for AI Agents

DEV Community

Where should your agent keep its work between sessions?

My agents kept losing their work. A session would build a tracker, a ledger or a report. The next session could not find it. Sometimes it found an old copy and wrote over a newer one. The model was not the problem. The problem was where the work lived. A chat transcript ends with the session. A folder of markdown files has no versions, no checks and no idea who else is editing it. So I gave my agents a system of record. It is a remote MCP server, and the agent keeps its work there in workbooks. What is a workbook? A workbook is a set of tabs. Each tab is markdown: a table, or a page of notes. A workbook can also be an Excel or Word file, or a sheet linked to Google Drive or Dropbox. In that case the file in the drive stays the record. Four rules make it safe for an agent to use. 1. Every write is a new version. The agent never edits in place. Each write makes version N+1 and keeps version N. Any earlier version can be read or restored. 2. A stale write is refused. The agent says which version it based its write on. If someone else wrote a newer version since, the write fails. Nothing is merged over. The agent reads the new version and tries again. 3. Edits are checked like code. A workbook can carry a schema. It declares each table's columns, types, required cells, keys and references. Every write is compiled against it. A bad cell comes back as an error, the way a compiler answers. The agent fixes the cell and writes again. 4. Everyone reads the same thing. Claude, ChatGPT, Codex and Cursor connect to the same server. So does a person in the web app. A workbook one agent writes on Monday is the one another agent reads on Tuesday. A real example This week I asked Claude Code to plan an outreach pilot. I wanted the plan to be checkable, not just plausible. It kept four tabs in one workbook: Model. A TLA+ specification of the rules: who may be contacted, how often, and when the pilot may scale. TLC result. The model checker's output. Nine safety rules hold across about 41,000 states. One rule was written to break on purpose, and its trace is the shortest path to a decision to scale. Simulator. A Monte Carlo simulation of the funnel, with the priors written down so they can be replaced after the pilot. Ledger. Who was contacted, how each address was checked and when each message goes out. The workbook went through four versions in one afternoon. Each has a one-line summary of what changed. When I wanted to know why the ledger had grown from 14 rows to 50, I read the version history. I did not have to scroll back through a chat. How the agent uses it The server exposes a small set of tools. The ones an agent uses most are: find_workbooks: look for the workbook that already exists before making a new one. read_workbook: read the current version, or any earlier one by number. write_workbook: write a new version, based on the version it read. checkout_workbook: copy the tabs into a shell, edit them with scripts, then commit them as one version. The last one matters for big edits. The agent can use sed, awk or Python on plain files and commit once. The schema check still runs on commit. The server also has live data programs the agent can run from the same shell. These include Google Trends, SEC Form D filings and US customs records. Their results can go straight into a workbook. Install Claude Code: claude mcp add --transport http --scope user hedwigai https://mcp.hedwigai.com
Then run /mcp, pick hedwigai and authenticate in the browser. Sign-in is OAuth 2.1 with dynamic client registration, so there is no token to paste. Codex: codex mcp add hedwigai --url https://mcp.hedwigai.com && codex mcp login hedwigai
Claude, ChatGPT and Cursor: add https://mcp.hedwigai.com as a custom connector. The server is in the official MCP registry as com.hedwigai/hedwigai. Try it with your own server If you build MCP servers, I will turn on two weeks of free inference for your account. Sign up and leave a comment, and I will set it up. After the...

Powered by Readybot.io

A Reliable System of Record for AI Agents

AI/ML Research Digest: Robotics, Agents & Scaling

DEV Community

AI/ML Research Digest — Nov 14, 2026

Physical consistency in generative and embodied AI Embedding physics into generation pipelines cuts obvious errors. A loop that lets an LLM critique its own video output trims implausible motion, and a distillation step that feeds privileged physical context to the model improves robot manipulation scores on standard error benchmarks [1]. The result is smoother animation and safer downstream control without redesigning the whole architecture. Efficiency and scaling via MoE simplification and on‑policy distillation A stripped‑down hyper‑connection for Mixture‑of‑Experts transformers—SimpleHC—removes residual mixing, shares memory across experts, and keeps benchmark accuracy while slashing training time [2]. On the same front, P²‑MOPD treats expert weights as priors, learns mixing coefficients jointly with the student network, and recovers performance faster than vanilla on‑policy distillation [3]. Together they show a concrete path to larger models that cost less to train. Robustness of LLM agents to unreliable evidence and compute limits Stress‑testing agents with progressively degraded retrieval documents uncovers systematic over‑confidence in open‑weight systems, a gap highlighted by DeepStress [4]. Separate work on prompt‑adaptive ensemble routing shows that dynamically choosing among expert prompts mitigates this brittleness [10193], while probing studies reveal that working‑memory limits directly affect reasoning fidelity [5]. Unified cross‑modal latent modeling for 3D and temporal data A shared token space now encodes LiDAR returns, occupancy grids, and geometry together, allowing a single forward pass to synthesize 3‑D scenes and motion. This design beats dedicated baselines on IoU and Chamfer distance, confirming that unifying modalities can improve both speed and quality [6]. Standout papers LO‑World BEV latent world model – Predicts LiDAR point clouds and semantic occupancy from a bird’s‑eye‑view latent. The approach lifts IoU by 10.9 % and cuts Chamfer error by 30.1 % while running above 25 FPS, demonstrating that latent BEV representations are both accurate and real‑time viable [6]. SimpleHC MoE hyper‑connection simplification – Removes the residual mixing step and adopts shared memory access across experts. Training time drops markedly without any loss on standard MoE benchmarks, proving that the often‑cited complexity of expert routing can be trimmed safely [2]. PhysLoop self‑improving video loop – Uses an LLM to iteratively rewrite generated video loops. Each iteration corrects physical implausibilities, so the final output obeys basic dynamics far better than a one‑shot generator [1]. P²‑MOPD advanced on‑policy distillation – Learns mixing coefficients and student weights jointly, treating expert parameters as priors. The method reaches target performance faster than traditional MOPD, indicating that tighter coupling between teacher and student helps when quantization mismatches are present [3]. Notable details Dense per‑step reward shaping (GRPO‑dense) underperforms the original GRPO formulation when compute budgets are equal; success rates drop on benchmark tasks, suggesting that denser feedback is not a free win [7]. Fine‑tuning teacher vision–language models with hidden preference signals shifts student bias by ten points on downstream evaluations, exposing a concrete route for bias transfer through covert supervision [8]. Hierarchical key‑value sharing across transformer layers trims the KV cache size while preserving—or even improving—performance for both dense and MoE models, easing memory pressure in long‑context applications [9]. BirdDreams jointly generates perspective and BEV video streams, yielding higher fidelity to ego trajectories than prior pipelines. Separately, GSTAR achieves up to a 20× speedup for highly compressed discrete autoregressive image generation, though its gains do not extend to full‑video synthesis [10], [11]. References PhysLoop: Harnessing LLMs' Physics Awareness for Self-I...

Powered by Readybot.io

AI/ML Research Digest: Robotics, Agents & Scaling

Flow Matching Streamlines AI Visual Reconstruction

DEV Community

Flow matching replaces brittle reconstruction pipelines

EDGAR and SphereFlow prove that heavy, iterative reconstruction pipelines are no longer a prerequisite for high‑quality visual synthesis. By embedding geometry‑aware flow matching directly into diffusion models, they replace multiple optimization steps with a single, principled refinement pass. Until now, Gaussian avatar pipelines relied on multi‑stage SDEdit‑style refinements or prolonged gradient descent to coax blurry textures into shape, while missing‑modality methods forced generators to leap across disjoint latent manifolds. Both approaches incurred large compute overheads and fragile convergence behavior. EDGAR refines a degraded Gaussian avatar in a single diffusion step, adding only 5.04 minutes for small avatars, 7.96 minutes for medium ones, and 16.60 minutes for large models on average—a modest one‑time cost compared with traditional multi‑stage refinement pipelines [1]. The system injects identity features via a fusion block and routes diverse degradations through a Mixture‑of‑Experts backbone, then uses the refined renders as pseudo‑targets to update the underlying Gaussian representation without per‑frame inference. EDGAR’s effectiveness is bounded by its training regime, which filters out samples with large LPIPS differences, meaning it only tackles structurally recoverable artifacts [1]. Severe geometric failures or extreme occlusions fall outside the model’s learned recovery space, leaving a gap for future robustness work. SphereFlow’s hyperspherical flow matching closes roughly eighty percent of the performance gap to a full‑modality oracle on downstream brain tumor segmentation after imputation [2]. The method projects all modalities onto a shared unit sphere, replaces the Gaussian noise source with the observed‑modality latent, and trains the decoder with a time‑weighted loss that safely traverses near‑surface regions, achieving leading generation fidelity across BraTS MRI and CT–MRI translation benchmarks. The theoretical guarantee of SphereFlow hinges on inter‑modality similarity; when modalities are highly dissimilar, the dimension‑independent bound may loosen, suggesting the approach currently excels for closely related medical scans but could struggle with more divergent data pairs [2]. Developers can now drop iterative geometry solvers in favor of a single diffusion refinement followed by avatar updating, and they should adopt geometry‑aware flow sources for cross‑modal synthesis to achieve faster pipelines and markedly better downstream task performance. References EDGAR: Efficient Diffusion-Driven Gaussian Avatar Refinement via Synthetic Failure SphereFlow: Missing Modality Imputation via Geometric Transport on Hypersphere

Powered by Readybot.io

Flow Matching Streamlines AI Visual Reconstruction

Jira Field Scheme Migration: What Admins Should Check

DEV Community

Jira field schemes replaced field configuration schemes

On 20 October 2026, Carol Low from Atlassian answered a question under the Community's field schemes FAQ, a post that had 56,420 views when I checked on 15 November. Sites on continuous release tracks already had field schemes, she wrote, and sites on bundled tracks were scheduled to get them on 10 November. (A release track is the setting that decides when Atlassian's changes reach your site.) So if you run Jira Cloud, your field configurations and field configuration schemes have most likely been converted by now, automatically, in your site's maintenance window. We looked at what that conversion left behind on our own test site on 15 November. The new Field schemes page listed 43 field schemes for 59 company-managed spaces, and 24 of them weren't linked to any space. Meanwhile the old field configuration API still answered with HTTP 200, with numbers that no longer match the new model: 740 items in our default configuration against 471 fields in the default field scheme. Writes through the old API came back 404. If you look after a Jira site with somewhere between 50 and 2,000 people on it, the part to worry about is the scripts and reports nobody has touched in a year. Scripts that only read won't fail. They'll read stale numbers and carry on. A space is Jira's current name for a project, and the REST API still says project. A work type is what older screens called an issue type. Our test site is wolfaenpak.atlassian.net, which is on a Jira plan with a sandbox (Premium or Enterprise) and which we keep for exactly this kind of thing, and the numbers below come from that site after the real migration. What we found on 15 November 2026 We had 43 field schemes after the migration. 19 were linked to spaces, one of them only to a space in the trash. The other 24 were linked to none (I'll call those orphans), and all 24 were schemes for service spaces, meaning Jira Service Management spaces, that no longer exist. 42 of our 59 live company-managed spaces share the Default Field Scheme. The other 17 each have a scheme of their own, and 12 of those were made by our own test-data script through the new API. The old read endpoints still answer with HTTP 200, but the numbers don't match the new model: 740 items against 471 fields for the default, 165 against 157 for a service space, 170 against 180 for a test space. Asking the old API "which scheme does this space use" gave back an empty list for all 70 spaces, company-managed and team-managed. An old write returned 404 "The field configuration was not found." on an id that the old read still answers for. Through the new API, the same change worked once we left one setting out of Atlassian's example. Jira refused to delete the default scheme and a scheme in use, and it deleted an orphaned scheme in one call. What Jira field schemes replaced: field configurations and field configuration schemes Until this year, a Jira admin needed two objects to decide which fields a space shows. A field configuration listed the fields and marked each one hidden, optional or required. A field configuration scheme then mapped work types in a space to field configurations, so a Bug could use one configuration and a Story another. A field scheme replaces both. Atlassian's What are field schemes? page puts it like this: "Field schemes allow you to control which fields appear on your work items and how those fields behave across different spaces." Each space uses exactly one field scheme, and one scheme can serve many spaces, says the page on associating a space with a field scheme. If a field isn't in a space's scheme, it doesn't show up in that space. Two older pieces keep their jobs, and it helps to keep them apart in your head. Field contexts now only set the content of a field, meaning default values and the options in a dropdown, and they no longer hide a field from a space. Atlassian's general availability post says each field now gets a global context that can't be deleted. Screens, screen scheme...

Powered by Readybot.io

Jira Field Scheme Migration: What Admins Should Check

Why a Softmax Router Accepted a Soup Recipe

DEV Community

How a three-label softmax router accepted a soup recipe as notes

I kept this failure in the fixed commit bd2a30de287fe419b7d31838b40f5ae4d2d70061. "Suggest a soup recipe." does not belong to weather, calendar, or notes, but the saved test prediction for ood-template-4-en has top_route equal to notes, a maximum of 0.486, and accepted true at the 0.4 threshold. This package is small. It turns text into 4,096-dimensional character n-gram counts, applies a linear transform and three-way softmax, and was fit on 96 author-written training records for one 300-epoch CPU run. The 204 synthetic records split into 96 training, 54 validation, and 54 test; the original templates are written and visible to me, so these records were not handled as a human-blind benchmark. The mechanism sits in the softmax denominator. router.py sets confidence to the largest softmax value, then accepts when confidence >= threshold; below threshold, route is null. Because the three probabilities sum to one, the maximum cannot fall below about 1/3. That lower bound is arithmetic, neither a calibrated probability nor a membership certificate. The recipe's notes score of 0.486 is only about 0.152 above a uniform 1/3. It clears 0.4 because the model slightly prefers notes and the threshold is exactly 0.4. I have not run per-feature attribution, so I cannot say which words pushed notes to the top. The threshold came from a fixed rule. validation-thresholds.json shows that a candidate needed validation accepted precision of at least 0.9, then the chosen threshold was the one with the most correct accepted rows. At 0.4, validation had 44 correct among 47 accepted; 0.5 and 0.6 were also feasible but accepted far fewer. This is empirical selection, not calibration. At 0.4, validation accepted 3 of its 6 OOD rows. On test, test-report.json gives known top-1 44/48, acceptance 52/54, accepted precision 43/52, and OOD false acceptance 6/6. The 52 accepted rows split into 6 OOD plus 46 known rows. Among those 46 known rows, 43 are top-1 correct and 3 are top-1 wrong yet accepted. Two known rows were rejected: one correct and one wrong. The drop to 43/52 therefore combines six OOD accepts and three known wrong accepts, not a single OOD effect. Run this block directly at the package root. It reads saved test-predictions.jsonl with the Python 3 standard library only, and it does not retrain, infer again, or touch the network: python3 - <<'PY'
import json

with open('test-predictions.jsonl', encoding='utf-8') as f:
rows = [json.loads(line) for line in f if line.strip()]
recipe = next(x for x in rows if x['id'] == 'ood-template-4-en')
ood = [x for x in rows if x['label'] == 'ood']
known_accepted = [x for x in rows if x['label'] != 'ood' and x['accepted']]
known_rejected = [x for x in rows if x['label'] != 'ood' and not x['accepted']]
print(json.dumps({
'recipe_row': {k: recipe[k] for k in ('id', 'top_route', 'probabilities', 'threshold', 'accepted', 'reason')},
'ood_total': len(ood),
'ood_accepted': sum(x['accepted'] for x in ood),
'test_accepted_total': sum(x['accepted'] for x in rows),
'test_known_accepted_correct': sum(x['accepted'] and x['top_route'] == x['label'] for x in rows if x['label'] != 'ood'),
'known_accepted_total': len(known_accepted),
'known_accepted_correct': sum(x['top_route'] == x['label'] for x in known_accepted),
'known_rejected_total': len(known_rejected),
'known_rejected_correct': sum(x['top_route'] == x['label'] for x in known_rejected),
}, ensure_ascii=False, indent=2))
PY
If NumPy 2.5.4 is installed from requirements.txt, replay one CPU inference in the same directory: python router.py model.json "Suggest a soup recipe."
The package boundary matters too. It is a local NumPy CPU command-line model, with no hosted App and no Transformers or inference Provider integration that I have verified; it never executes a weather, calendar, or notes action. For reuse, the code, synthetic data, and trained weights are released under Apache-2.0, copyright Renchao Wu. NumPy is installe...

Powered by Readybot.io

Why a Softmax Router Accepted a Soup Recipe

Normalize Greenhouse, Lever & Ashby Job APIs

DEV Community

Public job-board endpoints of Greenhouse, Lever and Ashby, and how to normalize them

This post was written by AI coding agents working on my behalf, and it is labelled AI Generated. Disclosure: I built this tool with AI coding agents, and AI helped draft this article. Every request below was re-run on 2026-11-16, and the numbers and field names were checked against the live responses and the vendors' docs. Many companies host their careers page on an applicant tracking system (ATS). Three of the common ones, Greenhouse, Lever and Ashby, publish the open jobs of each customer through plain JSON endpoints. You need no API key and no login. This post documents what each endpoint returns, where they differ, which sources I decided not to use, and how I map the three shapes into one schema. You can use all of it with fetch and no tool of mine. A small runnable example is at the end. The three endpoints The identifier is called a "board token" (Greenhouse), a "site" (Lever) or a "job board name" (Ashby). It is usually the last part of the company's hosted board URL, for example jobs.lever.co/leverdemo gives leverdemo. It is often not the company's marketing name. ATS Endpoint Auth Greenhouse GET https://boards-api.greenhouse.io/v1/boards/{token}/jobs none for GET Lever GET https://api.lever.co/v0/postings/{site}?mode=json (EU: api.eu.lever.co) none for GET Ashby GET https://api.ashbyhq.com/posting-api/job-board/{name}?includeCompensation=true none Greenhouse's docs say "Job Board data is publicly available, so authentication is not required for any GET endpoints." Lever's repository documents the posting list and its filters (skip, limit, location, commitment, team, department). Ashby documents one endpoint and one parameter. Greenhouse The list response is { "jobs": [...], "meta": { "total": N } }. Each job has id, title, location.name, absolute_url, first_published, updated_at, company_name and a few compliance fields. Two things to know: The plain list does not include department or description. Add ?content=true to get the description, department and offices, or call /departments and join on job id. Pay ranges are not in the list. The docs describe pay_transparency=true on the single-job endpoint, GET /jobs/{id}, which means one extra request per job. Lever The response is a bare JSON array. Useful fields: id, text (the title), categories (location, commitment, team, department, allLocations), country, workplaceType (on-site, remote, hybrid or unspecified), createdAt in milliseconds since the epoch, hostedUrl, applyUrl, and an optional salaryRange with currency, interval, min and max. Descriptions come both as HTML and as plain text. Ashby The response is { "apiVersion": "1", "jobs": [...] }. Each job has title, department, team, employmentType, location, secondaryLocations, isRemote, workplaceType (OnSite, Remote, Hybrid), publishedAt, jobUrl, applyUrl, descriptionHtml, descriptionPlain, isListed and, with includeCompensation=true, a compensation object. Ashby's docs say a job with isListed: false "should only be available via direct link", so skip those. Compensation is structured: each tier has components, and a salary component has minValue, maxValue, currencyCode and interval. Bonus and equity components can appear in the same list with null values, so filter on compensationType === "Salary". Gotchas I hit Unknown boards return 404 on all three today (Greenhouse {"status":404,"error":"Job not found"}, Lever {"ok":false,"error":"Document not found"}, Ashby plain Not Found). A 200 with an empty list means the board exists and has no open jobs, but a 404 does not tell you the company is gone, only that this token is wrong. Some write-ups say Lever returns an empty array for unknown sites. I did not see that. Sizes differ a lot. On the day I tested, one large Greenhouse board returned about 490 KB for its list without descriptions, and Ashby's own board with compensation was about 4.5 MB. Cache by board and do not refetch on every user request. Timestamps differ. Greenhouse and Ashby give ISO strings, Lever...

Powered by Readybot.io

Normalize Greenhouse, Lever & Ashby Job APIs

Build a Salesforce Bridge for Voice Agents

DEV Community

Put a Small Endpoint Between Your Voice Agent and Salesforce

There's exactly one signal we trust that a call made it into the CRM, and that's the CRM saying so. A success reply from Salesforce means the record exists. Any other reply means it doesn't, and something has to try again. That rule ends up shaping the whole Salesforce setup for a voice agent. If Salesforce's reply is the receipt, you want something in the middle that can read that reply and act on it, and that also holds the credentials Salesforce cares about. In practice that's a small HTTPS endpoint you own, and every request from the agent goes through it. The agent can't renew its own token The two auth models don't line up. Salesforce's server-to-server option, the client credentials flow, hands out short-lived access tokens and no refresh token. When a token stops working, you ask again with the client ID and secret. Voice platforms tend to store a credential as a fixed value. In Dograh, the open-source AI voice agent platform, a credential is an API Key, Bearer Token, Basic Auth or Custom Header, a fixed value you set once. So the endpoint keeps the Salesforce secret and handles tokens, and the agent only ever sends it a fixed key of yours, say in an X-Bridge-Key header. The endpoint checks that header before it does anything else. The renewal logic is short. Fetch a token, reuse it, and when Salesforce answers 401, fetch a fresh one and try once more: async def sf_request(method: str, path: str, kwargs) -> httpx.Response:
for attempt in (0, 1):
token = await sf_token(force=attempt == 1)
async with httpx.AsyncClient(timeout=5) as client:
reply = await client.request(
method, f"{SF}/services/data/v68.0{path}",
headers={"Authorization": f"Bearer {token}"},
kwargs)
if reply.status_code != 401:
break
return reply
sf_token caches the access token and only posts to /services/oauth2/token with grant_type=client_credentials when it has nothing cached or gets forced. After that, nothing downstream has to think about expiry. Setting up the Salesforce side New integrations start as an External Client App. Creating new connected apps has been restricted since Spring '26, and Salesforce recommends External Client Apps instead, though connected apps you already have keep working. Enable OAuth and switch on the client credentials flow in the app's OAuth policies. Then pick the run-as user. That run-as user matters more than it looks. Every action through this flow runs as that user, so give it to a dedicated integration user and keep people's own logins out of it. Enterprise, Unlimited and Performance Edition orgs include five Salesforce Integration user licenses, and the integration user takes the "Minimum Access - API Only Integrations" profile. Add a permission set that can read Contacts and Leads and create Tasks, and stop there. The consumer key and secret go into the endpoint's environment variables, where only your server can read them. Finding the caller before hello For inbound calls, the endpoint can look the caller up before the agent speaks. Pre-Call Data Fetch, at the bottom of the Start Call node, POSTs the caller's number in call_inbound.from_number, waits up to 10 seconds, and turns whatever you return under initial_context into variables the prompt can use, like {{first_name}}. Salesforce stores phone numbers however people typed them, so matching one exact string misses plenty. A parameterizedSearch call with in=PHONE across Contact and Lead, using the last 10 digits of a US number, gets past the formatting mess in a single request. Return the first match's ID and first name, or known_caller: no when there's nothing. Two cautions here. The caller is listening to ringing while this runs, so keep it quick. And a matching number only gets you a record, so the agent should confirm identity with an approved check, such as date of birth, before it mentions anything it learned from Salesforce. Outbound calls can skip the search...

Powered by Readybot.io

Build a Salesforce Bridge for Voice Agents

Chrome Extension Review Rates: Under 1 in 200

DEV Community

What Percentage of Users Leave a Review? Under 1 in 200

Originally published on ExtensionBooster. What percentage of users leave a review on a Chrome extension? Across 678 Chrome Web Store listings, the median was 0.46 ratings per 100 users, so fewer than 1 user in 200 ever rates. Here is how that number shifts with size, a small script to benchmark your own listing, and what the top quarter does differently. The numbers by user count The data was collected on October 14, 2026, from each listing's public user count and rating count. The middle half of all listings sat between 0.14% and 1.29%. The bigger the extension, the lower the rate: Users Listings Median rate Top quarter starts at Median ratings Under 1,000 157 0.79% 3.08% 2 1,000 to 9,999 146 0.69% 1.27% 20 10,000 to 99,999 191 0.37% 1.13% 113 100,000 to 999,999 120 0.32% 0.77% 646 1,000,000+ 64 0.22% 0.63% 6,221 A few more data points worth knowing: For the 521 listings with 1,000+ users, the median was 0.43%. The top quarter started at 1.10% and the top tenth at 2.54%. Very small listings often have nothing: 48 of the 87 listings under 100 users had zero ratings. Well-known extensions vary wildly. Todoist for Chrome sat around 10.29%, Grammarly around 0.11%, and React Developer Tools around 0.03%. So if you hit 1% with over 1,000 users, you are already in the top quarter. Why the rate falls as you grow None of these are bugs in your extension. They are structural: Installs are not active users. The user count includes people who installed months ago and never open the extension. They will not rate it. Many big installs are hand-me-downs. An employer, a course or a friend told them to install it, so they never browse the listing. Chrome has no default rating button. Rating means finding the listing, signing in and clicking through. Each step loses people. Unhappy users have a reason to write. Happy ones rarely bother unless asked. Benchmark your own listing This snippet compares your rate with the median and top quarter for your tier, and tells you how many ratings you need to reach the top quarter: const TIERS = [
{ max: 1_000, median: 0.79, topQuarter: 3.08 },
{ max: 10_000, median: 0.69, topQuarter: 1.27 },
{ max: 100_000, median: 0.37, topQuarter: 1.13 },
{ max: 1_000_000, median: 0.32, topQuarter: 0.77 },
{ max: Infinity, median: 0.22, topQuarter: 0.63 },
];

function reviewRate(users, ratings) {
const tier = TIERS.find((t) => users < t.max);
const rate = (ratings / users) * 100;
return {
rate: ${rate.toFixed(2)}%,
vsMedian: rate >= tier.median ? "above median" : "below median",
ratingsForTopQuarter: Math.ceil((users * tier.topQuarter) / 100),
};
}

console.log(reviewRate(4200, 18));
// { rate: '0.43%', vsMedian: 'below median', ratingsForTopQuarter: 54 }
An extension with 4,200 users and 18 ratings is below the 0.69% median for its tier and needs 54 ratings to join the top quarter. How the top quarter gets there Ask after a win, not on install. Trigger the prompt after a moment that proves value, such as a 10th saved item or a first finished export. Web Highlights asked after a user's 12th highlighted site and reported that about 3.7% of its users left a review. Link straight to the reviews page. Every extra click costs raters. Ask everyone the same way. Showing the review prompt only to happy users and sending unhappy ones elsewhere is review gating. It can backfire and can break store policy. Offer a feedback link for problems and the same review request to everyone after a real win. Reply, then follow up after fixes. Replies show the listing is maintained, and some users raise their rating once the bug is gone. Update your reply when the fix ships. Guard against bad releases. A broken update can bring a burst of one-star reviews, so keep a rollback ready and a written incident plan. One caution when reading your own number: a high rate is not always good news. A wave of complaints also raises it, so watch the star average next to it. What the data can't tell you The sample is not...

Powered by Readybot.io

Chrome Extension Review Rates: Under 1 in 200

Selection Sort in Python: Simple Guide and Examples

DEV Community

Selection Sort Explained with Simple Python Examples

Originally published on CodingCush. Selection sort is a simple sorting algorithm that scans the unsorted part of a list, finds the smallest value, and swaps it into the next free position at the front. It repeats that search until every position is filled. In this guide you will dry run selection sort pass by pass, write the complete Python version, count its comparisons and swaps, see why sorted input never speeds it up, and compare it with bubble sort and Python's built in sorted(). Every output comes from running this article's code on Python 3.12.3. How Selection Sort Works, in Plain Words Imagine exam papers on a desk, shuffled. You want them in marks order, lowest first. You search the whole pile, pick the lowest mark, and place it at the front. Then you search the rest for the next lowest. Nobody calls this fast, but nobody gets confused by it either, and that is why teachers love it. Two details define the algorithm. The list always has two parts: a sorted part growing at the front and an unsorted part shrinking behind it. And each pass makes at most one swap: a lot of looking, very little moving. That is selection sort's one real talent. One interview detail: this classic version is not stable. The swap can jump a value over an equal value, so equal items can change their relative order. We return to this in the questions below. A Dry Run on a Small List, Pass by Pass Let us sort [29, 10, 14, 37, 13] by hand. Pass 1 scans the whole list: the smallest value is 10 at index 1, so it swaps with 29 at index 0: Start: [29, 10, 14, 37, 13]
End of pass 1: [10, 29, 14, 37, 13]
End of pass 2: [10, 13, 14, 37, 29]
End of pass 3: [10, 13, 14, 37, 29]
End of pass 4: [10, 13, 14, 29, 37]
Sorted: [10, 13, 14, 29, 37]
Pass 2 scans from index 1: the smallest value is 13 at index 4, so 13 swaps with 29. Pass 3 is quiet: the smallest value left is 14, already at index 2, so nothing swaps. Pass 4 finds 29 smaller than 37 and swaps them. Notice the pattern. Pass 1 makes 4 comparisons, then 3, then 2, then 1: 10 in total, and only 3 passes end with a swap. Selection sort is a picky shopper: it reads every label, then buys one item per trip. Selection Sort in Python, Step by Step Here is the complete version. It copies the input first, so the caller's list never changes: def selection_sort(numbers):
a = numbers[:]
n = len(a)
for i in range(n - 1):
min_idx = i
for j in range(i + 1, n):
if a[j] < a[min_idx]:
min_idx = j
if min_idx != i:
a[i], a[min_idx] = a[min_idx], a[i]
return a

print(selection_sort([29, 10, 14, 37, 13]))
Output: [10, 13, 14, 29, 37]
The outer loop chooses the position we are filling. The inner loop is the search: min_idx starts at i, and every later value gets one chance to beat it. Only a strictly smaller value replaces it, so the first smallest wins when values repeat. The swap sits outside the inner loop, at most once per pass, and the if min_idx != i check skips it when the smallest value is already home. Adding two counters to the same search gave this real result: Result: [10, 13, 14, 29, 37]
Comparisons: 10
Swaps: 3
Ten comparisons is no coincidence: 4 plus 3 plus 2 plus 1. Double the list and the comparisons roughly quadruple. The next sections prove why. A terminal listing of the real selection sort run tested for this article: pass by pass choices and swaps, the sorted list check, and the timing test against sorted(). Why Sorted Input Does Not Help Selection Sort Some algorithms get a free lunch on sorted input. Selection sort does not: it cannot know the rest is ordered without looking at every value, so it looks anyway. Running the same code on the sorted list [10, 13, 14, 29, 37] gave: Result: [10, 13, 14, 29, 37]
Comparisons: 10
Swaps: 0
Zero swaps, but still the full 10 comparisons. There is no early exit to add, because a pass with no swap proves nothing here. That is the opposite of our bubble sort explained with simp...

Powered by Readybot.io

Selection Sort in Python: Simple Guide and Examples

SQS Visibility Timeout: Prevent Duplicate Jobs

DEV Community

SQS Gave the Same Message to a Second Worker. The Visibility Timeout Probably Ran Out First

As of November 16, 2026, this post sums up the official pages linked here. The problem A job runs twice. A customer is charged twice. Two workers write the same row. The first worker is still working when it happens. The queue is Amazon SQS, and the usual cause is not a "bug in SQS" so much as a visibility timeout that ran out before the first worker finished and deleted the message. Our team at CloudSkill Consulting LLC sees this in reviews of worker services. In this post we show what the timeout does, how to set it, how to extend it while a long job is still running, and the hard 12-hour limit AWS documents. Root cause: the message stays in the queue, it just goes hidden When a consumer receives a message, AWS says the message "remains in the queue but becomes temporarily invisible to other consumers." That hidden period is the visibility timeout. You are expected to process the message and delete it during that period. If you do not delete it before the timeout ends, "the message becomes visible again in the queue and can be retrieved by another consumer." (Amazon SQS visibility timeout) The default visibility timeout for a queue is 30 seconds. You can set a queue-level value from 0 to 43,200 seconds (12 hours). (set-queue-attributes in the AWS CLI Command Reference) A 30-second default is short for many jobs: a report, a thumbnail, a call to another API that is slow. The first worker is still busy, the timeout ends, and a second worker receives the same message. Step 1: set the queue timeout to match the work AWS's own guidance is to start by setting the visibility timeout "to match the maximum time your application typically needs to process and delete a message." If you are not sure, they suggest starting shorter (they use two minutes as an example) and extending as needed. (Amazon SQS visibility timeout) This sets the queue default to five minutes (300 seconds). Use your own queue URL and a value that fits your job: aws sqs set-queue-attributes \
- -queue-url "$QUEUE_URL" \
- -attributes VisibilityTimeout=300
The attribute name and the 0-to-43,200 range come from the set-queue-attributes reference. This changes the queue default. It does not change a message that is already in flight. Step 2: extend the timeout while a long message is still being processed If one message needs more time than the queue default, AWS documents the ChangeMessageVisibility action: you can extend or shorten the timeout for that message. The AWS CLI form is: aws sqs change-message-visibility \
- -queue-url "$QUEUE_URL" \
- -receipt-handle "$RECEIPT_HANDLE" \
- -visibility-timeout 60
(change-message-visibility) AWS also describes a heartbeat: extend the timeout from time to time so the message stays hidden until work is done. (Amazon SQS visibility timeout) Two limits matter: The visibility timeout has a maximum of 12 hours from when the message is first received. Extending it does not reset that 12-hour clock. If the work needs longer, AWS suggests Step Functions or breaking the task into smaller steps. (same page) If you try to set a value greater than the time left under that limit, "Amazon SQS returns an error" and does not raise the timeout for you. (change-message-visibility) One more surprise: a ChangeMessageVisibility value is not stored as the message's new default. If you do not delete the message and it is received again, AWS says the timeout "reverts to the original timeout value (not to the value you set using the ChangeMessageVisibility action)." (same CLI page) The receipt handle is for that receive. Use the handle from the current receive, not an old one. Step 3: send repeated failures to a dead-letter queue If a message keeps failing, AWS recommends a dead-letter queue (DLQ) so those messages are "captured separately for further analysis or handling, preventing them from repeatedly circulating in the main queue." (Amazon SQS visibility timeout) That stops a poison message from being processed over and over, which is...

Powered by Readybot.io

SQS Visibility Timeout: Prevent Duplicate Jobs

Offline Photo Evidence Sync in React Native

DEV Community

An offline outbox for photo evidence in React Native, and the bugs it taught me

An insurance claim for storm damage lives or dies on its photos. The adjuster wants the overview, every slope, the ridge and hips, the damage close up, the gutters and a measurement or two. If one required shot is missing, someone has to go back up the ladder, and after a storm the roof may already be tarped or repaired. The people taking those photos are on roofs in rural areas, often right after the weather that took out the cell towers. ClaimLayer's field app is built around one rule: the phone never needs signal to do its job. Below: how that works, what the server does with the queue, and the bugs that showed up once I got strict about it. Why "upload when you press the shutter" fails The obvious version uploads each photo as it is taken. With no signal the request fails, and depending on how the code is written the photo is lost or the user stares at a spinner. Every fix for that leads to the same place: write locally first, send later, and make sending safe to repeat. Capture first, sync later. Capture writes two operations When the inspector takes a photo, the app resizes it, hashes it and queues two operations: one for the file and one for the evidence record it belongs to. apps/field/src/InspectionScreen.tsx const photo = await camera.current.takePictureAsync({ quality: 0.85, exif: true })
const resize = photo.width >= photo.height ? { width: 1600 } : { height: 1600 }
const resized = await ImageManipulator.manipulateAsync(photo.uri, [{ resize }],
{ compress: 0.82, format: ImageManipulator.SaveFormat.JPEG })
const contents = await FileSystem.readAsStringAsync(resized.uri, { encoding: FileSystem.EncodingType.Base64 })
const digest = await Crypto.digestStringAsync(Crypto.CryptoDigestAlgorithm.SHA256, contents)

const base = ${Date.now()}-${digest.slice(0, 8)}
await enqueue(storage, { id: media-${base}, claimId, operation: 'media.upload',
idempotencyKey: media-${base}-offline, occurredAt: capturedAt, payload: metadata })
await enqueue(storage, { id: evidence-${base}, claimId, operation: 'evidence.save',
idempotencyKey: evidence-${base}-offline, occurredAt: capturedAt,
payload: { inspectionId, itemKey: ITEMS[activeItem], sha256: digest, caption: caption.trim() } })
One photo becomes two queued operations. A few details are worth copying: Resize on the device. 1600 px on the long edge at JPEG 0.82 is plenty for an adjuster and keeps a day of photos small. Store the file path, not the bytes. The queue holds the URI and metadata, so the queue itself stays small. Record where and when. Capture time, device time, EXIF, GPS and accuracy (when permitted) and a SHA-256 travel with every photo. Every operation gets its own idempotency key, built from time and content hash, minted on the device before any network call. One capture at a time. A busy flag stops two captures racing on the same queue key. The screen tells the inspector exactly that: "Capture locally first. The original remains on this device until the server confirms upload." Sync: the status code decides The outbox envelope is defined once in a shared contracts package, so the app and the server agree on its shape: packages/contracts/src/index.ts type OutboxOperation = {
id: string
claimId: string
operation: 'media.upload' | 'evidence.save'
idempotencyKey: string // 16 to 128 chars
occurredAt: string
payload: Record
state: 'pending' | 'in_flight' | 'synced' | 'refused' | 'abandoned'
}
Sync walks the queue one item at a time, in capture order, and the response decides what happens to each item. apps/field/src/api.ts try {
const response = await fetcher(${baseUrl}/api/trpc/inspections.saveEvidence, {
method: 'POST', headers: headers(token, deviceId),
body: JSON.stringify({ claimId: op.claimId, inspectionId: p.inspectionId, itemKey: p.itemKey,
photos: 1, note: p.caption || undefined, idempotencyKey: op.idempotencyKey }),
})
next.push({ ...op, state: response.ok ? 'synced'
: response.status...

Powered by Readybot.io

Offline Photo Evidence Sync in React Native

JavaScript Event Listeners: Simple Examples

DEV Community

JavaScript Event Listeners Explained with Simple Examples

Originally published on CodingCush. An event listener is JavaScript that waits for something to happen on a page, like a click, a key press or typing in a box, and then runs a function when it happens. You attach one with addEventListener: pick an element, name the event, and give the function to run. In this guide you will write click, input and keydown listeners, meet the event object, remove a listener, and build a button counter. Every result below matches a real test run of the same listener logic. What Is an Event? An event is a signal that something happened: a click, a key press, a typed letter, a submitted form. The browser notices each action and creates an event for it. Your job is to say what should happen in reply. Without listeners, a page just sits there looking polite. With listeners, it reacts: clicking Save can store a form, and typing in a search box can filter a list as you type. Three words matter. The target is the element the event happened on. The event type is what happened, like click or keydown. The handler is the function to run. The addEventListener Syntax, Step by Step The pattern has three parts: element.addEventListener("eventType", handlerFunction);
First, choose the element. Second, pass the event type as a string, in quotes. Third, pass the function to run. The MDN page for addEventListener lists the full syntax, including options you can ignore for now. To choose an element, you find it in the page structure, called the DOM. If that word is new, our guide to what the DOM is in JavaScript, explained simply shows how the page becomes a tree of elements you can select. One detail catches almost every beginner. Pass the function itself, not a call to it: showMessage, not showMessage(). The brackets would run it straight away, before any click. You are handing the browser a recipe, not serving the meal yet. Example 1: A Simple Click Listener Here is the smallest useful listener: Click me
const button = document.querySelector("#myButton");

button.addEventListener("click", function () {
console.log("Button clicked!");
});
Line by line: querySelector("#myButton") finds the button by its id. Then addEventListener says, when a click lands on this button, run this function, which prints one message to the console. Expected behaviour: nothing on page load. Click once and the console shows Button clicked! once. Click three times and it appears three times. The listener keeps listening. Example 2: A Button Counter That Remembers Now a pattern you will reuse everywhere: counting clicks. Count clicks

You clicked 0 times

let count = 0;
const counterButton = document.querySelector("#counterButton");
const output = document.querySelector("#countOutput");

counterButton.addEventListener("click", function () {
count = count + 1;
output.textContent = "You clicked " + count + " times";
console.log("You clicked " + count + " times");
});
The variable count lives outside the handler, so it survives between clicks. Each click adds one, updates the paragraph, and logs the same line. After three clicks, the paragraph and the final log line both read You clicked 3 times. The full log shows 1, then 2, then 3. The handler can still see count later because the function remembers the variables around it. That remembering has a name, and our guide to JavaScript closures explained with simple examples walks through it slowly. Terminal style code listing of the tested run: the click message, the counter reaching 3, input values H and Hi, the keydown results, and the removed handler at 1 call. Example 3: Input Events While Typing The input event fires every time the value of a text box changes, letter by letter:
const nameInput = document.querySelector("#nameInput");

nameInput.addEventListener("input", function (event) {
console.log("Current value: " + e...

Powered by Readybot.io

JavaScript Event Listeners: Simple Examples

Secure an Ubuntu VPS in 15 Minutes with Docker

DEV Community

Production VPS Setup in 15 Minutes: Docker + UFW + Fail2ban + Auto-Updates

I once spun up a new VPS, installed Docker, deployed an app, and forgot the firewall. Two days later the logs were full of SSH brute-force attempts. Lesson learned: default VPS is not secure. Docker also exposes ports to the world by default. This article is the checklist I use every time I provision a fresh VPS. 15 minutes, done. Works for homelab, side projects, or small production. Prerequisites Fresh Ubuntu 24.04 LTS VPS (any provider) SSH key ready (no password login) Domain optional (for SSL later) Recommended: DigitalOcean — $200 credit for new accounts Step 1: User & SSH Hardening Login as root, create a non-root user: adduser deploy
usermod -aG sudo deploy
Copy SSH key to the new user: mkdir -p /home/deploy/.ssh
cp /root/.ssh/authorized_keys /home/deploy/.ssh/
chown -R deploy:deploy /home/deploy/.ssh
chmod 700 /home/deploy/.ssh
chmod 600 /home/deploy/.ssh/authorized_keys
Test login as deploy in a new terminal. If it works, harden SSH: nano /etc/ssh/sshd_config
Change/uncomment these lines: PermitRootLogin no
PasswordAuthentication no
PubkeyAuthentication yes
MaxAuthTries 3
ClientAliveInterval 300
ClientAliveCountMax 2
Restart SSH: systemctl reload sshd
Step 2: UFW Firewall Default deny incoming, allow outgoing. Only open what you need: ufw default deny incoming
ufw default allow outgoing

SSH (port 22) - change if using custom port

ufw allow 22/tcp

HTTP/HTTPS for web

ufw allow 80/tcp
ufw allow 443/tcp

Docker internal (optional, if containers need to talk)

ufw allow from 172.17.0.0/16

Enable

ufw enable
Verify: ufw status verbose
Step 3: Fail2ban Block IPs that repeatedly fail login. Install: apt update && apt install -y fail2ban
Create custom config: nano /etc/fail2ban/jail.local
Content: [DEFAULT]
bantime = 3600
findtime = 600
maxretry = 3
backend = systemd

[sshd]
enabled = true
port = ssh
filter = sshd
logpath = /var/log/auth.log
maxretry = 3

[docker-auth]
enabled = true
port = 2375,2376
filter = docker-auth
logpath = /var/log/auth.log
maxretry = 3
Restart: systemctl enable --now fail2ban
fail2ban-client status sshd
Step 4: Docker + Docker Compose Install from official repo (not apt default which can be outdated): # Remove old versions
for pkg in docker.io docker-doc docker-compose podman-docker containerd runc; do
apt remove -y $pkg
done

Install dependencies

apt update && apt install -y ca-certificates curl gnupg lsb-release

Add Docker GPG key

install -m 0755 -d /etc/apt/keyrings
curl -fsSL https://download.docker.com/linux/ubuntu/gpg | gpg --dearmor -o /etc/apt/keyrings/docker.gpg
chmod a+r /etc/apt/keyrings/docker.gpg

Add repository

echo \
"deb [arch=$(dpkg --print-architecture) signed-by=/etc/apt/keyrings/docker.gpg] \
https://download.docker.com/linux/ubuntu \
$(. /etc/os-release && echo "$VERSION_CODENAME") stable" | \
tee /etc/apt/sources.list.d/docker.list > /dev/null

Install

apt update && apt install -y docker-ce docker-ce-cli containerd.io docker-buildx-plugin docker-compose-plugin
Add user to docker group: usermod -aG docker deploy
Test (logout/login first, or newgrp docker): docker run --rm hello-world
Step 5: Automatic Security Updates Production servers need patches without manual intervention: apt install -y unattended-upgrades needrestart
Configure: nano /etc/apt/apt.conf.d/50unattended-upgrades
Ensure these are uncommented: Unattended-Upgrade::Allowed-Origins {
"${distro_id}:${distro_codename}-security";
"${distro_id}:${distro_codename}-updates";
};
Unattended-Upgrade::AutoFixInterruptedDpkg "true";
Unattended-Upgrade::MinimalSteps "true";
Unattended-Upgrade::Remove-Unused-Dependencies "true";
Unattended-Upgrade::Automatic-Reboot "false";
Enable timer: systemctl enable --now unattended-upgrades
Check logs: tail -f /var/log/unattended-upgrades/unattended-upgrades.log
Step 6: Verification & Test Post-setup checklist: # 1. SSH key-only
ssh -o PasswordAuthentication=no deploy@

2. Firewall active

ufw status

3. Fail2ban running...


Powered by Readybot.io

Secure an Ubuntu VPS in 15 Minutes with Docker

Five-Tool Harbor Seawall Design Pipeline

DEV Community

Five Tools, One Seawall: A Harbor Design Pipeline in Order

A seawall project looks like construction. Most risk sits earlier, in handoffs: one team's elevation, another team's surface, a sheet referencing last week's alignment. At Corbin's Landing we rebuilt a failing granite wall with five platforms in a fixed order. The town is small, the tide range is about nine feet, and the parking lot floods roughly thirty times a year. The design had to raise the promenade, keep the ferry running, and leave the 1920s cannery alone. 1. Halfmaps: one base map first Inputs: state elevation tiles, a 2022 orthophoto, parcel lines, and the mean high water line. Output: one georeferenced map in state plane feet. The survey added 612 shots along the wall and both piers. Two checks mattered. Units: one raster set arrived in meters while the survey was in feet. Ground: the old grading plan showed the lot flat, but the tiles showed a 1.4-foot fall toward the seawall. That changed the pavement design and explained the northwest corner. 2. GenAnywhere: a four-minute model, used carefully I framed the harbor on a map, about 900 by 600 feet, and GenAnywhere generated a 3D model in roughly four minutes. It was useful for orientation, relative position, and a first read on slope. The cannery owns the only high ground; the fish pier is longer than the parking plan suggests; the lot drains toward the wall. It was not useful for elevations. Roofs were flat, pilings were missing, and there were no utilities. We kept it in the visualization pile. When a council member asked if that model was the design, saying no plainly saved a longer conversation. 3. PlaceMaker: massing at meeting scale PlaceMaker turned aerial imagery into about 140 building volumes, plus streets, trees, and piers. The value was scale: a taller wall against the cannery, a second-story addition shading the promenade. At the February meeting, people found their own houses, and the questions got specific. One check: imagery date. A demolished shed was still in the model and made the addition look smaller than it is. We removed it. 4. InfraWorks: put every option in water We combined survey terrain, Halfmaps elevations, and PlaceMaker massing, then tested a normal spring tide at 10.5 feet and the design storm at 12.5. • Raise the wall in place. Keeps the view, closes the lot for two summers. • Move the promenade inland. Cheaper, but clips the fuel dock's truck turn. • Keep the wall line, add 480 feet of steel sheet pile, raise the promenade 2.5 feet. The third won. At 12.5 feet, water crosses the cap in the model, runs over a sloped apron, and exits through a flap-gate outfall. The turning path killed option two in one frame. 5. MicroStation: where mistakes get expensive MicroStation produced 41 sheets: six wall sections, pile layout, rail, ramp, drainage, and the cap detail. The granite blocks are numbered so they can go back in order. Referencing caught a 12-inch water main 3.5 feet below the north promenade, deeper than the utility map. Four piles moved; a sleeve was added. Handoffs that broke • Units. One elevation set in meters, the survey in feet. • Imagery date. A demolished shed stayed in the massing. • Surface drift. InfraWorks and MicroStation surfaces differed by 0.2 feet at the wall; reconciled at six control points. • Sheet index. Two versions circulated after the pile shift. • Expectations. GenAnywhere geometry was never design geometry. None of these are exotic. They are the normal ways a small project loses a week. Preflight I would reuse One datum and one unit, written at the top of the project folder. Every surface has a source and a date. Every visual model is labeled as context. One owner for the sheet index. A field walk with the contractor before bid. The order matters more than the tools. Cheap questions go first, expensive decisions last, and the water surface gets a number before anyone draws a wall. Bids close in January; crews arrive after mud season. The lot will flood again before then, which is a decent reminder of w...

Powered by Readybot.io

Five-Tool Harbor Seawall Design Pipeline

How to Use Git Stash: A Step-by-Step Guide

DEV Community

How to Use Git Stash Step by Step

Originally published on CodingCush. Git stash is a temporary shelf for your uncommitted work. Run git stash push and Git stores your changed files safely, then cleans your working folder so you can switch branches or fix something urgent. Later, git stash pop takes the work off the shelf and puts it back. This guide walks through the whole cycle step by step, using a tiny project tested with Git 2.43. Step 1: Check Your Work with git status Start with a small project. Create two files, commit them, then change one line in homepage.txt so there is real unfinished work to stash: git init -b main
git add homepage.txt notes.txt
git commit -m "Add homepage and notes"
git status --short
Our session began with homepage.txt containing Welcome to my site, then we changed it to Welcome to my site - new hero draft. The status check printed: M homepage.txt
The letter M means modified. Always check status before stashing: later the same command proves the shelf worked, because it will report a clean tree. If branches are still new, our guide to Git branches explained, including how to create, switch, merge and delete branches, covers the background for Step 4. Step 2: Save the Work with git stash push -m Now shelve the change and give the stash a clear message: git stash push -m "WIP hero text"
Expected output, exactly as printed in our test: Saved working directory and index state On main: WIP hero text
Git saved the modified file as a stash entry, restored it to the last committed version, and kept your message so future you can tell stashes apart. Always use -m. A shelf of unnamed boxes becomes a small mystery you created for yourself. The official git stash documentation describes push as saving local modifications and reverting the working directory to match the last commit. Step 3: See What Is on the Shelf with git stash list git stash list
git status
Our list printed: stash@{0}: On main: WIP hero text
And git status reported nothing to commit, working tree clean. The newest stash is always stash@{0}; older entries move down to stash@{1} and stash@{2}. That number matters later, because apply and drop can target one entry. Terminal window showing the real Git stash session tested for this article: the push that saved the hero draft, the stash list, and the pop that restored it. Step 4: Switch Branches and Do the Urgent Job This is the everyday reason stash exists. You are halfway through the hero text when an urgent fix lands. Your work is shelved and the tree is clean, so switching is safe: git checkout -b urgent-fix
git commit -am "Add urgent fix"
git checkout main
In our session we created urgent-fix, added a small fix.txt and committed it there as [urgent-fix 1bddeb5] Add urgent fix, then switched back. Without the stash, Git might have carried your half finished edit into the other branch or refused to switch. With it, each job stays in its own place, and nobody needs a messy commit called "temp do not look". Step 5: Bring the Work Back with git stash pop Back on main, take the top entry off the shelf and apply it in one move: git stash pop
cat homepage.txt
git stash list
The pop restored homepage.txt and listed it as modified: homepage.txt. It ended with a line like Dropped refs/stash@{0} plus a long hash, confirming the entry was removed. The file check printed Welcome to my site - new hero draft, so the draft is back word for word. The final list printed nothing: the shelf is empty. We then committed it with git commit -am "Save hero draft". pop vs apply: Keep the Copy or Not? git stash apply restores the work but keeps the entry. Use it to test the changes on another branch too, or to keep a safety copy. In our second test we stashed a Second draft, ran apply, and the list still showed stash@{0}: On main: Second draft. Then git stash drop removed it, printing Dropped refs/stash@{0} with its hash. The chapter on stashing and cleaning in the Pro Git book shows the same flow on a larger project. For daily reference...

Powered by Readybot.io

How to Use Git Stash: A Step-by-Step Guide

eBPF Ring Buffer Backpressure in Go Services

DEV Community

eBPF Ring Buffer Backpressure in Go Services: Kernel-to-User Data Loss, Perf Event Semantics, and the Sampling Tradeoff

eBPF Ring Buffer Backpressure in Go Services: Kernel-to-User Data Loss, Perf Event Semantics, and the Sampling Tradeoff eBPF-based observability tooling—network tracing, syscall auditing, latency histograms—sits inside production Go services today not as a curiosity but as a load-bearing instrumentation layer. The appeal is real: zero application recompilation, nanosecond-accurate timestamps, kernel-side aggregation. The failure mode is subtle and almost never surfaced in vendor documentation: the ring buffer fills, the kernel drops events silently, and your dashboards look completely healthy while you are blind to entire request classes. This article walks through the mechanics of that failure, compares the two primary kernel-to-user transport mechanisms, and proposes a concrete adaptive sampling strategy implementable in a Go consumer. Two Transports, Two Failure Modes Perf Event Array (BPF_MAP_TYPE_PERF_EVENT_ARRAY) The older mechanism. Each CPU core writes to its own per-CPU ring buffer via bpf_perf_event_output. The Go side—typically cilium/ebpf or libbpf-go—opens an epoll file descriptor per CPU and drains records in a polling loop. The critical property: when the per-CPU buffer is full, the kernel drops the event and increments a lost-samples counter accessible only by reading the perf event header's PERF_RECORD_LOST records inline with data records. If your consumer loop is not reading that header type explicitly, you never see the loss count. The buffer is sized at map creation time in pages (must be a power of two). Default tooling often uses 8–64 pages (32–256 KB per CPU). On a 32-core host tracing every syscall, that fills in under a millisecond under load. Ring Buffer (BPF_MAP_TYPE_RINGBUF) Introduced in kernel 5.8. A single shared ring buffer across all CPUs, avoiding the per-CPU fragmentation problem. The eBPF program reserves space atomically with bpf_ringbuf_reserve, writes, then commits. If reservation fails (buffer full), your eBPF program receives a NULL pointer—and must explicitly handle that path or silently skip the event. The Go consumer uses a single file descriptor with epoll. Reads are lock-free via a pair of producer/consumer position counters in a shared memory region. Throughput is higher and memory utilization is better, but the single buffer means a slow Go consumer blocks all CPU cores from committing new records, not just one. The failure modes differ: Perf array: per-CPU isolation means one hot core hurts only its own queue, but loss counters are buried in stream. Ring buffer: global contention, but the fd-based notification model makes watermark-driven wakeup straightforward. Where Go Consumer Latency Causes Drops A Go eBPF consumer is structurally a tight loop: rd, err := ringbuf.NewReader(objs.Events)
if err != nil {
log.Fatal(err)
}
defer rd.Close()

for {
record, err := rd.Read()
if errors.Is(err, ringbuf.ErrClosed) {
return
}
if err != nil {
continue
}
processEvent(record.RawSample)
}
processEvent is where latency accumulates. If it does anything synchronous—a MongoDB write, a JSON marshal with allocation, a channel send to a blocked goroutine—the Read call is delayed. During that delay, the kernel continues writing. When the buffer reaches capacity, bpf_ringbuf_reserve returns NULL in your eBPF C program and the event is dropped. The kernel does expose a lost counter in the ring buffer's metadata page, but cilium/ebpf's Reader does not surface it directly; you must memory-map the consumer page yourself and read offset 24 bytes in (the lost u64 field). The runtime scheduler compounds this. A goroutine blocked on a channel send while another goroutine holds the P can delay the consumer loop by an entire scheduler quantum (~10ms in the worst case with a saturated GOMAXPROCS). Unlike a C consumer that owns its thread, a Go consumer is subject to preemption. Pinning the consumer goroutine to an OS thread with runtime.LockOSThread() reduces ji...

Powered by Readybot.io

eBPF Ring Buffer Backpressure in Go Services

IT Consulting vs. Pilot for Modernization Plans

DEV Community

IT Consulting vs a Scoped Pilot: How US/UK Teams Validate a Modernization Plan

Most modernization plans start as a slide deck: move the monolith to services, replace the batch jobs, get off the old database, add CI/CD. The deck is usually reasonable. The problem is that it is a hypothesis, and nobody knows which assumptions are wrong until someone writes code against the real system. That is the choice many engineering leads in the US, UK, Canada and Australia face after an assessment: commission more IT consulting to refine the plan, or run a small, scoped pilot that tests it. This post is about when each one makes sense, and how to design a pilot that actually answers the questions the roadmap raised. What each option is good at IT consulting (architecture reviews, assessments, roadmaps) is good at breadth. A good consultant interviews the teams, reads the code and the incident history, maps dependencies and produces options with trade-offs. You need this when you don't yet know what the problems are. A scoped pilot is good at depth. A small team takes one slice of the plan and builds it against your real systems, with written acceptance criteria and a fixed scope. You need this when you have a plan but don't know if it survives contact with production. Question you're trying to answer Better tool What are our biggest technical risks? Consulting / assessment Which of three architectures should we pick? Consulting, then a pilot to test the favourite Will the strangler pattern work on our billing module? Pilot How long will migrating one service really take? Pilot Can our deploy pipeline support independent releases? Pilot Does the team understand the target architecture? Pilot (pair with them) A rough rule: if the open questions start with "what", consult. If they start with "will it" or "how long", build something. Signs your roadmap needs a pilot, not another workshop The roadmap has an effort estimate for the whole programme, but nobody has migrated even one component yet. The assessment lists "unknowns" like data quality, hidden coupling or undocumented integrations. Two senior engineers disagree about the approach, and both arguments sound plausible. Leadership wants a date, and the honest answer is "we'd be guessing". You've had two rounds of review and the document is getting longer, not more certain. At that point, more analysis tends to produce more confident-sounding guesses. A few weeks of real work produces evidence. How to pick the pilot slice The slice should be small enough to finish and representative enough that the result tells you something about the rest of the plan. We use three filters: It touches the hard part. If the risk is the shared database, the pilot must move a table or a read path, not build a greenfield service next to it. A pilot that avoids the risky area proves nothing. It ends in production, or as close as you can get. Behind a feature flag, on a shadow path, or for one internal team. "Works in a dev environment" leaves most questions open. It is reversible. You should be able to switch back to the old path in minutes if something goes wrong. Good examples: Extract one bounded context (say, notifications) behind an interface, route a percentage of traffic to the new path, and compare outputs. Replace one nightly batch job with an event-driven consumer for a single event type, running both in parallel. Move one service onto the new CI/CD pipeline and container platform end to end, including rollback. Put one legacy endpoint behind an API gateway and add contract tests before any rewrite. Bad examples: "set up the new platform", "migrate the user service and the order service", or anything with "phase 1 of 4" in the name. Write the acceptance criteria before the code A pilot without written success criteria turns into a demo. Agree these up front, in the repo, as a short PILOT.md: ## Pilot: extract notifications service

Hypothesis

Notifications can be extracted without changes to the order flow,
and the new path can handle production traffic.

In scope

  • No...

    Powered by Readybot.io
IT Consulting vs. Pilot for Modernization Plans

6 NIST CSF Checks Before Setting Cyber Roadmap Dates

DEV Community

Leadership Wants a Cyber Roadmap This Quarter? Six NIST CSF Checks Before You Promise Dates

This case is invented. A mid-size company received a long customer security form. Leadership now wants a cyber roadmap with dates this quarter. The team has some policies and a firewall. No one can name a single owner for cyber risk. There is also no full list of systems. They want to know what to settle before they promise those dates. The checks below are for that first plan, not for a later audit. If systems or suppliers change later, run this same review again. We read the NIST Cybersecurity Framework 2.0. It is NIST CSWP 29, dated 26 February 2024. NIST wrote it for organizations of any size or sector. It describes useful outcomes. It does not dictate the exact tools or steps. We also read CISA's Known Exploited Vulnerabilities catalog, and CISA's page on how to use it. The six reviews below each point back to those pages. This short list does not prove that a program is complete. It is a first look, not a full assessment. Word key CSF: the NIST Cybersecurity Framework. Version 2.0 is the current edition. Function: one of six groups of outcomes: Govern, Identify, Protect, Detect, Respond, and Recover. Profile: a written picture of the current state, the target state, or both. KEV catalog: CISA's public list of flaws that have already been used in real attacks. Check 1. Who owns cyber risk, and what is in scope? Govern is the new function in version 2.0. NIST places it at the center. It covers strategy, roles, policy, oversight, and supplier risk. It also covers the mission and the rules the firm must follow. Our advice: write one page that names the owner, the backup owner, and what is in scope. Add the customer or legal duties that already apply. If leadership cannot point to that page, do not promise a dated plan yet. Revisit the page when a new product line or a new supplier is added. Check 2. Do you have a current list of assets, suppliers, and known risks? Identify means the firm understands its current cyber risks. That starts with a list of data, systems, services, people, and suppliers. It also includes the risks tied to those items. NIST says this list helps you set priorities that match the mission named under Govern. Our tip: start with the systems that support sales, payroll, and the product you ship. Name the supplier behind each one. Note what you do not yet know. A roadmap that skips this list is a guess. Update the list when you add or retire a system. Check 3. Have you written the current state and the target state? NIST describes a Profile as a way to show the current posture, the target posture, or both. You then look at the gap and plan work to close it. The plan should match the mission, the legal duties, and the firm's risk limits. Our advice: for each of the six functions, write two short lines: where you are, and where you need to be this year. The dates in the roadmap should come from those gaps. Do not start with a date and then search for work to fill it. Share the two-line list with the people who must fund the work. Check 4. Which safeguards are already in place, and which are still missing? Protect covers the safeguards used to manage risk. In plain terms, that includes sign-in and access, training, data protection, and the safety of the platforms you run. It also includes keeping those systems able to work under stress. Our tip: mark each safeguard as in place, partly in place, or missing. Be honest about shared passwords, leftover accounts, and data with no backup owner. The roadmap should fund the missing items, not assume they already work. Review that list with the people who run the systems, not only with policy writers. Check 5. How will you notice a problem, and who acts first? Detect is about finding and studying odd events in time. Respond is about the actions you take after a problem is found. Recover is about restoring systems and work, and about talking clearly during that work. Our advice: name the first person who gets the alert, and the first person who can isolate a syste...

Powered by Readybot.io

6 NIST CSF Checks Before Setting Cyber Roadmap Dates

BGP Roles and OTC: Preventing Route Leaks

DEV Community

BGP roles make route-leak policy visible in the protocol

BGP roles make route-leak policy visible in the protocol Route leaks and route hijacks are different failures. A hijack advertises a prefix that the origin is not authorized to announce. A leak sends a route to a relationship where it should never travel, such as exporting a route learned from one peer to another peer or upstream. RFC 9234 adds BGP roles and the Only to Customer attribute so routers can enforce relationship intent in the protocol rather than relying only on local filters. The design starts with the relationship each eBGP session represents: provider, customer, peer, route server, route-server client, or a complex relationship that cannot use roles. The routers exchange a BGP Role capability during session establishment and confirm the pair is consistent. For example, a customer expects its provider to advertise a provider role, and the provider expects the customer role in return. The OTC attribute is the enforcement mechanism. It is an optional transitive path attribute with a value that carries an autonomous system number. Once a route is sent to a customer, peer, or route-server client, the procedures keep it from later moving to a provider, peer, or route server. RFC 9234 defines exact ingress and egress conditions, including insertion when the attribute is absent and treating a route from a customer or route-server client that still carries OTC as a leak. Distinguish roles from route policy The role describes the commercial relationship. It does not describe every prefix policy. An operator still needs prefix filters, maximum-prefix limits, RPKI origin validation, and a documented export policy. OTC adds relationship awareness and can detect a leak several autonomous systems away, but it does not prove that a prefix has a valid origin. This distinction matters during incident response. A route can pass RPKI origin validation and still be leaked into a transit path. A route can carry a valid OTC value and still contain a hijacked prefix. The investigation should record the role, OTC value, AS path, origin validation state, and the policy that accepted the route. Deploy in stages RFC 9234 allows the local AS to add OTC when received from a non-compliant neighbor, which helps early deployment. It also warns that malformed OTC attributes are handled as treat-as-withdraw. A partial rollout should initially log the role confirmation and the expected OTC behavior, then enforce it on a subset of sessions with known peer cooperation. Complex peering relationships should not be assigned a role. If a single BGP session mixes provider, peer, and customer behavior, split it into sessions that each have one relationship before using OTC. The router should reject an unsupported or inconsistent role pair and should export a route only to sessions whose relationship allows it. Operate the new signal Inventory every external session with local role, remote role, negotiated capability, export policy, and enforcement status. Alert on role mismatch, a role disappearing after a session reset, an unexpected OTC value from a customer, and a sudden change in the fraction of routes with OTC. During a route-leak investigation, correlate OTC state with BGP Monitoring Protocol data and configuration history. If a session was reset and came back without role enforcement, the path may look normal while the safety control is absent. RFC 9234 is most useful when operators can show both that the relationship was negotiated and that the resulting attribute was preserved. References RFC 9234: Route Leak Prevention and Detection Using Roles Current Options for Securing Global Routing RFC 4271: A Border Gateway Protocol 4

Powered by Readybot.io

BGP Roles and OTC: Preventing Route Leaks

Secure Private Document Uploads in Startup Apps

DEV Community

Private Access for Uploaded Documents in Startup Apps: A Quarantine-First Design

Short answer: keep uploaded documents in a private bucket, make the application the authorization authority, and issue short-lived signed URLs only after it confirms ownership and document state. That decision is less about picking the “simplest” S3-compatible alternative and more about keeping the trust boundary small. The bucket stores bytes. The Python app decides who can ask for them. A quarantine step prevents an upload that merely exists from becoming a document the rest of the product can process. What should a startup app verify before granting private document access? The data flow is straightforward. A browser asks the API for an upload intent; the API authenticates the user, creates an opaque object key, records a pending row, and returns a constrained upload grant. A worker checks the completed object for size, media type, and application policy before marking it ready. A download follows the reverse path: the API checks the caller against the row, then signs a GET for a short window. A signed URL is a bearer capability. Anyone who gets the string can use it until expiry, so query strings belong in neither analytics events nor ordinary request logs. Store the stable object key, never the URL, and mint a fresh URL after each authorization decision. Keep the bucket private even if every current caller is “trusted.” No public shortcut. My eval harness treats these as invariants: Alice can retrieve her ready document; Bob cannot obtain Alice’s URL; an expired URL is rejected; a pending object is not downloadable; duplicate completion events are harmless; and deleting the application row stops new URL issuance. I add a zero-byte upload, a filename containing quotes and non-ASCII characters, a client retry, and a 25 MB boundary case. Your mileage may vary on expiry duration because mobile networks differ, but the ownership check should not. The application owns identity, metadata, lifecycle, and audit events. The object service owns durable bytes and signature validation. A worker can inspect content, but it never grants user access. This separation also makes an S3-compatible alternative useful: the protocol is an adapter boundary, not the policy engine. Put a small Python boundary in front of the object service The example below uses the standard S3 signing shape so the application boundary stays visible. The endpoint is configuration; business code deals in document IDs. Direct browser uploads keep large bodies out of the API process. import os
import sqlite3
import uuid
from contextlib import closing

import boto3
from fastapi import Depends, FastAPI, HTTPException
from pydantic import BaseModel

app = FastAPI()
s3 = boto3.client(
"s3",
endpoint_url=os.environ.get("S3_ENDPOINT_URL"),
region_name=os.environ.get("S3_REGION", "us-east-1"),
)
BUCKET = os.environ["DOCUMENT_BUCKET"]
DB_PATH = os.environ.get("DOCUMENT_DB", "documents.db")

def current_user_id() -> str:
# Replace with the app's verified session or token identity.
return "user_123"

def initialize() -> None:
with closing(sqlite3.connect(DB_PATH)) as db:
db.execute(
"CREATE TABLE IF NOT EXISTS documents "
"(id TEXT PRIMARY KEY, owner_id TEXT, object_key TEXT, status TEXT)"
)

class UploadRequest(BaseModel):
content_type: str

@app.post("/documents/upload-intent")
def create_upload_intent(
request: UploadRequest, user_id: str = Depends(current_user_id)
) -> dict:
document_id = str(uuid.uuid4())
object_key = f"users/{user_id}/{document_id}"
with closing(sqlite3.connect(DB_PATH)) as db:
db.execute(
"INSERT INTO documents VALUES (?, ?, ?, 'pending')",
(document_id, user_id, object_key),
)
db.commit()

upload = s3.generate_presigned_post(
    Bucket=BUCKET,
    Key=object_key,
    Fields={"Content-Type": request.content_type},
    Conditions=[
        {"Content-Type": request.content_type},
        [...


Powered by Readybot.io

Secure Private Document Uploads in Startup Apps

Build an Offline PDF Toolkit with pdf-lib and pdf.js

DEV Community

How I built offline PDF processing with pdf-lib and pdf.js in the browser

Every "free online PDF tool" does the same thing: you drag a file into the page, and that file is uploaded to a server you'll never see, in a region you can't name, for a retention period nobody specifies. I wanted a PDF toolbox that never uploads anything. Not "we delete it after an hour" — never sends it at all. That meant all parsing, modification and serialization had to happen inside the browser tab. This is what that architecture looks like, and where it gets painful. The constraint that shapes everything Once you decide the file can't leave the device, a few things become impossible: No server-side Ghostscript for compression No server-side qpdf for encryption No "process in the background and email you the result" No file size limit that only exists because of your server's disk Everything has to run in a single tab, with the memory a mobile browser is willing to give you. That constraint dictates the entire library choice. Two libraries, two very different jobs The split that ended up working: pdf-lib — writing. Merge, split, rotate, delete pages, watermark, encrypt. It gives you a mutable document model and serializes it back to bytes. pdf.js — reading. Rendering thumbnails and page previews so users can pick pages before operating on them. Both are vendored and inlined into the HTML. No CDN, no dynamic import. The page works from a cold cache with the network off. Getting pdf.js to run without a bundler pdf.js needs its worker. The usual failure is a cross-origin worker URL, which browsers refuse to construct: // fails in most browsers when the script is served from another origin
pdfjsLib.GlobalWorkerOptions.workerSrc = 'https://cdn.example.com/pdf.worker.min.js';
The fix that works everywhere, including file://-ish and offline scenarios, is to build the worker from a blob: const blob = new Blob([pdfjsWorkerSource], { type: 'application/javascript' });
pdfjsLib.GlobalWorkerOptions.workerSrc = URL.createObjectURL(blob);
pdfjsWorkerSource is the worker bundle as a string, inlined at build time. Costs you about 1MB of HTML, buys you zero network requests and no CORS surprises. Merge, split, rotate: the easy 10% pdf-lib's document model is genuinely pleasant here. Merging is copy-pages: async function mergePdfs(files) {
const out = await PDFLib.PDFDocument.create();

for (const file of files) {
const bytes = await file.arrayBuffer();
const src = await PDFLib.PDFDocument.load(bytes);
const pages = await out.copyPages(src, src.getPageIndices());
pages.forEach(p => out.addPage(p));
}

return out.save(); // Uint8Array
}
Split and rotate are variations on the same theme. If your tool only did these, you could ship in an afternoon. The interesting problems are compression and encryption. Compression: pdf-lib does less than you think Here's the part that surprises people. pdf-lib cannot re-encode embedded images. It has no JPEG/JPEG2000 decode pipeline, no downsampler. When you call save(), it applies FlateDecode to content streams and leaves image streams alone. So "compress PDF in the browser" really means: strip redundancy from the streams you can touch, and accept that a scan-heavy PDF won't shrink much. The implementation that actually produced useful results was to re-deflate streams myself with pako at a chosen level: // pdf-lib's internal pako defaults to roughly level 6.
// Re-deflating lets us expose a real Low/Medium/High choice.
function reCompressStreams(pdfBytes, level) {
const doc = PDFLib.PDFDocument.load(pdfBytes, { updateMetadata: false });
// for each content stream: inflate -> deflate at level
// (pdf-lib exposes the parsed objects; raw stream re-encode is done manually)
}
Two honest caveats I had to surface in the UI: Low compression can make the file bigger. If the original was deflated at level 9, re-deflating at level 1 grows it. That's not a bug, and pretending otherwise produces angry users. Image-heavy PDFs barely move. A 20MB scanned document is 19MB of JPEG....

Powered by Readybot.io
Build an Offline PDF Toolkit with pdf-lib and pdf.js

Oracle 26ai ROW_MOVEMENT_DEFAULT Tested in EE

DEV Community

Oracle AI Database 26ai: Does ROW_MOVEMENT_DEFAULT Work in Enterprise Edition?

Oracle AI Database 26ai introduced the ROW_MOVEMENT_DEFAULT initialization parameter in RU 23.26.2 to control whether row movement is enabled by default for new tables. I tested this feature on Oracle AI Database 26ai Enterprise Edition - 23.26.4.0.0. The parameter does not enable row movement by default in Enterprise Edition. My test: Oracle AI Database 26ai Enterprise Edition Release 23.26.4.0.0 - Production
Version 23.26.4.0.0

SQL> alter system set row_movement_default=ENABLED;
System altered.

SQL> show parameter row_movement_default
NAME TYPE VALUE

row_movement_default string ENABLED

SQL> CREATE TABLE vahid.customers (
customer_id NUMBER,
name VARCHAR2(14),
last_name VARCHAR2(14),
registration_date DATE)
PARTITION BY RANGE (registration_date)
(
PARTITION customers_2024 VALUES LESS THAN (DATE '2025-01-01'),
PARTITION customers_2025 VALUES LESS THAN (DATE '2026-01-01'),
PARTITION customers_max VALUES LESS THAN (MAXVALUE)
);

Table created.

SQL> INSERT INTO vahid.customers VALUES
( 1, 'Vahid', 'Yousefzadeh', DATE '2024-06-15' );
1 row created.

SQL> commit;
Commit complete.

SQL> UPDATE vahid.customers
SET registration_date = DATE '2025-06-15'
WHERE customer_id = 1;
ORA-14402: updating partition key column would cause a partition change

SQL> FLASHBACK TABLE vahid.customers TO TIMESTAMP (SYSTIMESTAMP - INTERVAL '1' MINUTE);
ERROR at line 1:
ORA-08189: cannot flashback the table because row movement is not enabled

Powered by Readybot.io

Oracle 26ai ROW_MOVEMENT_DEFAULT Tested in EE

RagLeap Agents 0.5.1 Fixes Tenant Isolation

DEV Community

Fixing a Cross-Tenant Approval Isolation Gap in RagLeap Agents 0.5.1

Fixing a Cross-Tenant Approval Isolation Gap in RagLeap Agents 0.5.1 What happens when one tenant can resume another tenant's paused AI agent run? We reproduced that scenario in RagLeap Agents 0.5.0. The result was a security improvement focused on scope-bound execution and approval isolation, released as RagLeap Agents 0.5.1. The vulnerability scenario Consider a shared agent instance and state store: Tenant A starts an agent run. The run pauses while waiting for approval to execute a tool. Tenant B obtains the run ID and attempts to resume it. The previous implementation does not bind run() or resume() to a tenant scope. Because the shared state store was keyed by run ID alone, the second tenant could resume the first tenant's paused run and trigger the pending tool with the original arguments. This was a reproduced cross-tenant isolation gap in shared-store usage. The fix: bind execution to scope RagLeap Agents 0.5.1 adds scope-aware run and resume APIs: agent.run(task, scope="tenant-a")

agent.resume(
run_id,
decisions,
scope="tenant-a"
)
The scope is persisted with the run. Resume requests must match it. Wrong-scope requests, unknown runs and damaged state return the same error: ResumeError("unknown run")
This avoids exposing whether a run exists under a different tenant. Additional security improvements Stronger run IDs New run identifiers are 22-character URL-safe tokens with 128 bits of randomness. Existing 12-character hexadecimal IDs remain supported for compatibility. Mandatory scope mode Applications can opt into mandatory scope enforcement: Agent(..., require_scope=True)
Audit and rate limiting The release introduces: AuditLog(...): operational metadata without recording content text. RateLimiter(...): per-scope limits applied before model calls. Sub-agent scope inheritance: child agents retain their parent's scope. The release adds ragleap-security>=0.2.0, which uses the Python standard library. How we tested it The reported verification included: Check Result Test suite 251 passed GitHub CI 55/55 checks Mutation tests — Python 3.12.3 34/34 killed Mutation tests — Python 3.10.20 34/34 killed Published wheel source comparison Verified Cross-tenant resume using published wheel Rejected Legacy 0.5.0 run-state compatibility Tested We also ran the tests against the published wheel, not just the source checkout. What this release does not guarantee Scope enforcement is not a complete authentication system. The application must authenticate users and pass the correct scope. A shared state-store file still relies on filesystem permissions; separate stores per tenant offer stronger separation. The rate limiter is in-memory, so its state does not survive restarts. Windows, macOS, real model-provider execution and network filesystems were not verified in the reported release testing. Independent security review remains necessary. Why we're sharing this Agent security needs to cover more than prompt injection and tool permissions. It must also account for who owns a run, who can resume it, and whose approval authorizes an action. RagLeap Agents 0.5.1 makes those boundaries explicit and adds regression coverage for the reproduced issue. Get the release RagLeap Agents 0.5.1 on GitHub RagLeap Core repository RagLeap documentation RagLeap packages RagLeap is open-source and self-hosted. We welcome developers and security practitioners who want to inspect, test and contribute. Build agents that can act. Make sure they act within the right boundaries.

Powered by Readybot.io
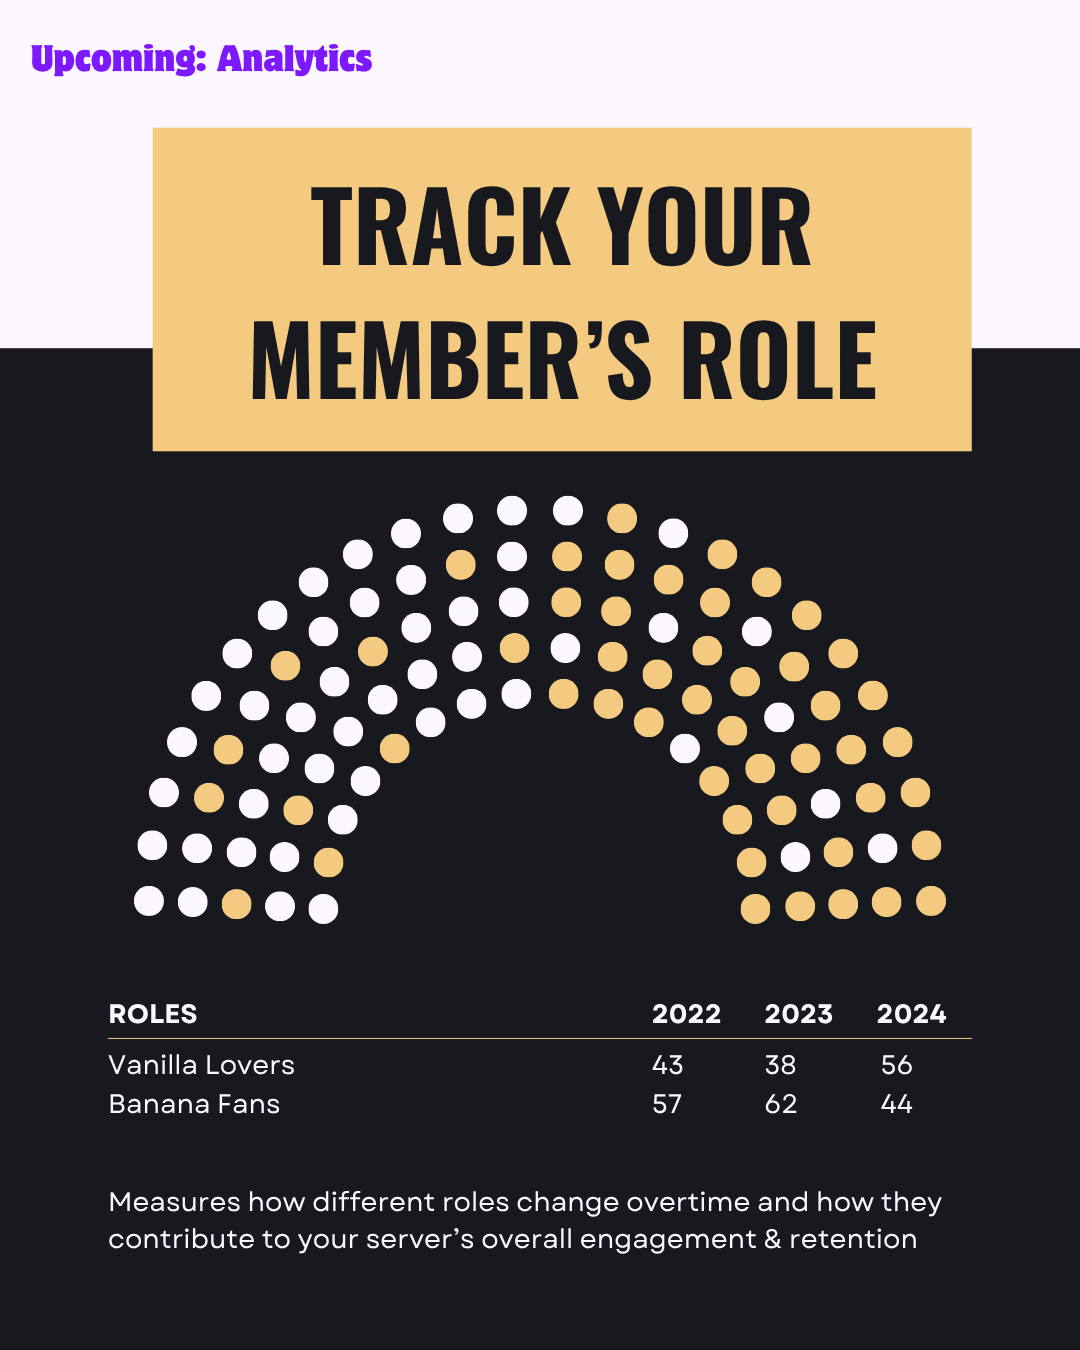
RagLeap Agents 0.5.1 Fixes Tenant Isolation

Why Alipay’s Payment Engineering Is Hard to Scale

DEV Community

Why Alipay's Brilliant Engineering Is Hard to Scale Globally

I am a former Alipay engineer. Today, I’d like to share my thoughts on the key factors that have prevented Alipay from achieving global adoption. Tags: #distributedsystems #architecture #fintech #systemdesign China has built one of the world's most advanced mobile payment ecosystems. From street vendors to luxury shopping malls, QR-code payments through Alipay have become part of everyday life. Behind that convenience lies impressive engineering: distributed databases, real-time fraud detection, highly available infrastructure, and an enormous merchant ecosystem. Yet one question remains: If Alipay works so well in China, why hasn't the same model become dominant worldwide? The answer goes beyond politics, regulation, or competition. Some of the very architectural decisions that made Alipay successful in China become trade-offs when applied to the rest of the world. Let's explore five engineering challenges. 1. Offline Payments: What Happens When the Internet Disappears? In September 2018, a magnitude 6.7 earthquake struck Hokkaido, Japan, triggering a massive blackout affecting approximately 2.95 million households. Telecommunications networks were also disrupted. Imagine trying to purchase food using Alipay during such an outage. Even if your smartphone and the merchant's terminal still have power, the transaction may fail because the payment system cannot reach its remote authorization services. Online-first payment architecture A conventional Alipay QR-code payment follows a process similar to: Customer
|
v
Merchant POS
|
v
Payment Gateway
|
v
Risk Engine
|
v
Authorization / Account Services
|
v
Payment Result
The actual processing may also involve banks and clearing infrastructure. However, the key property is that ordinary QR-code payments generally depend on online authorization. Without connectivity, the normal transaction flow cannot complete. Now consider Japan's Suica transit card. Traditional Suica cards use Sony's FeliCa technology, which supports secure local transactions using stored-value information and cryptographic authentication. Under appropriate conditions, compatible terminals can process transactions without contacting a remote payment server. EMV, PKI, and offline authorization Visa and Mastercard transactions are often described as using a dual-message model. This separates: Authorization: Determine whether the transaction is approved. Clearing and settlement: Exchange transaction records and settle financial obligations afterward. However: Dual-message processing does not mean offline payment. Most modern card transactions still require online authorization. Certain EMV chip cards support offline data authentication through public-key cryptography. A simplified trust model looks like this: Payment Scheme CA
|
| Signs issuer public key
v
Issuing Bank
|
| Certifies card public key
v
EMV Card
|
| Signs challenge using private key
v
POS Terminal
|
| Verifies signature locally
v
Card Authentication
The terminal stores trusted CA public keys, while the chip securely stores its private key. The private key never needs to leave the chip. The terminal can verify the signature without contacting a remote certificate authority. But authenticating the card is not the same as approving the transaction. Offline transaction approval additionally depends on the card, terminal, and issuer's risk rules. FeliCa uses a different security architecture, traditionally relying on symmetric-key authentication rather than the EMV public-key certificate chain. Why this matters At a railway gate, processing time matters enormously. Contactless transit cards can support extremely fast local interactions. A conventional smartphone QR-code workflow introduces additional steps: opening an app, displaying or scanning a code, and potentially contacting cloud services. The lesson is simple: A payment system optimized...

Powered by Readybot.io
Why Alipay’s Payment Engineering Is Hard to Scale

Remove Duplicate Lines Without Losing List Order

DEV Community

How to Remove Duplicate Lines from a List (Free, Keeps Order, No Uploads)

Merged two email lists and now half the addresses appear twice. Exported keywords from three tools and the same terms repeat on every page. Pasted a log file and the same error lines show up forty times. Duplicate lines are the most boring data-cleaning job there is — and the one most likely to go wrong, because the obvious fixes quietly destroy something else. The problem with the obvious fixes Excel's "Remove Duplicates" works, but it reorders nothing and tells you nothing — and if your list has 50,000 rows, Excel is a slow way to do a 5-second job. It also treats Delhi and delhi as different entries, and a trailing space makes two "identical" lines different. sort -u in the terminal is fast and free, but it sorts. If your keyword list is in priority order, or your log is in time order, sorting destroys the information you actually care about. The output is clean and useless in the wrong order. Python's set() has the same flaw — a set has no order at all. Your cleaned list comes back shuffled, and you spend longer re-sorting than you saved deduping. Find-and-replace by hand is how people lose an afternoon and still miss three copies hiding near the bottom. The rule that matters: keep the first occurrence, delete the later ones, and don't touch the order. Everything else is a side effect you didn't ask for. What "duplicate" actually means Before you dedupe anything, decide what counts as the same line: Exact match only — [email protected] and [email protected] are duplicates. Simple, safe. Ignore case — [email protected] and [email protected] are the same address, but a computer sees two different strings. If your list came from more than one source, you almost always want case-insensitive matching. Trim first — a trailing space is invisible and deadly. [email protected] (with a space) is a different line to every dedupe method. Trim whitespace before comparing, or the "duplicates" survive. Empty lines — a list with twenty blank lines collapses to one blank line after dedupe. That is normal, not lost data — but turn on empty-line removal in the same pass so they don't clutter the output. A worked example Two newsletter signup forms, merged into one list: [email protected]
[email protected]
[email protected]
[email protected]
[email protected]
[email protected]
6 lines become 4, in the same order: [email protected]
[email protected]
[email protected]
[email protected]
Two lines removed. If the tool reports far more removals than you expected, that is itself information — one of your source lists probably overlapped the other almost completely. Three mistakes that cost people real data Deduping the only copy. Dedupe is destructive by design — removed lines are gone from the output. Always keep the original list untouched and work on a pasted copy. Deduping at every step. When you merge exports from several tools, dedupe once at the very end. Deduping after each import hides which source contributed the repeats — and that pattern is often the clue that one form or integration is double-submitting. Expecting it to sort. A dedupe tool deliberately does not reorder anything. If you need alphabetical output, sort first in your spreadsheet, then dedupe here. The free tool I built I make BulkTextKit — 15 free text tools that run 100% in your browser, nothing uploaded. The Remove Duplicate Lines tool is the one I open for this job: paste a list, toggle ignore-case / trim / remove-empty-lines, and it tells you exactly how many duplicates it removed so you can sanity-check the result. First occurrence stays where it was, order is preserved, and there is a mode that removes all copies of any repeated line — handy when a repeat means bad data you want gone entirely. One line on Pro: BulkTextKit Pro ($19 one-time, no subscription) adds Bulk mode — dedupe up to 50 separate lists at once instead of pasting them one by one. What is the messiest list you have ever had to clean — and how many duplicates were hiding in it?

Powered by Readybot.io
Remove Duplicate Lines Without Losing List Order