Pixel

Pixel Updates & Events

Server Updates & Events

Announcements

AI Agents on BNB Chain: Why On-Chain Trust Matters

DEV Community

My AI Agent Moves Real Money On-Chain — Here's Why 'Just Trust Me' Isn't Enough

My AI Agent Moves Real Money On-Chain — Here's Why "Just Trust Me" Isn't Enough Creator Track entry for Agent Games Season 01 — #AgentGames I let an AI agent run my crypto wallet. Not a demo wallet. My real one. It mints NFTs, claims airdrops, runs miners, and signs transactions on BNB Chain while I sleep — under an Agent ID called mujib.ai. Every morning I wake up to a report of what it did. It works. It has also taught me the one problem nobody in the agent hype talks about honestly: every time my agent acts, I am taking its word for it. What my agent actually does My agent — I call her cintaku — does the kind of on-chain chores that eat a whole evening if you do them by hand: Free mints and claims across a dozen small projects (Nomio, QAGENT, ORBIT, DYOR, CLAF, Pacture, Agent Harvest…). Daily farming steps: claiming seeds, checking plots, watching prices hourly. Proof-of-work mining sessions that run for two hours a night. Price watches on everything I hold, so I only hear about it when something actually moves. None of this is science fiction. It's scripts, RPC calls, and a wallet that signs. The agent reads the chain, decides, and acts. And that is exactly where the trust problem lives. The signature is a leap of faith A wallet signature is not a chat reply. Once my agent signs, value moves. There is no undo button on-chain, no customer support to call, no "are you sure?" from the blockchain. So before every signature, my agent and I built guardrails the hard way: Preview before signing. Every transaction is simulated first. If the simulation reverts, shows unexpected token movement, or touches an approval I didn't ask for, nothing gets broadcast. The preview is the whole decision. Exact-amount approvals, never unlimited. An unlimited approval is a blank cheque with my wallet as the account. My agent defaults to the exact amount, every time. Fail closed on ambiguity. If the recipient, chain, token, or amount is unclear, the agent stops and asks. Guessing with money is not a feature. No paid moves without a fresh yes. Free lanes only, unless I explicitly approve a specific paid action. "Stop all paid mints" was one of my earliest instructions — and it has stayed in force for weeks. These rules exist because I have seen what happens without them. Twice now, something tried to get past: A forwarded post promised a 50,000-token reward pool for a waitlist I was joining. The official page promised only early access. My agent checked the official source instead of the forwarded claim — and registered me for early access only, with no reward counted. A farming transaction kept getting rejected by the wallet's own risk engine (code 351803: "transaction risk is too high"). The agent didn't route around it. It stopped, logged it, and the land stayed unplanted. Annoying — but that is the system working. The lesson is simple: an agent that never says "I won't do that" is not helpful. It is dangerous. A claim is not a proof Here is the gap my guardrails can't close on their own: everything my agent tells me is still just a claim. "Mint succeeded." "Price is 0.00132 BNB." "The pool hasn't opened yet." I can verify each one myself — check the transaction hash, read the contract, open the marketplace. And I do, when the stakes are high. But the whole point of having an agent is that I don't check everything. The moment I stop checking, I am back to trusting a black box that prints confident sentences. This is the exact problem zkVerify's Agent Games is built around: if an AI agent says it did the job, how would you know? A zero-knowledge proof changes the shape of the answer. Instead of "trust me, I followed the rules," the agent hands over a receipt that anyone can verify: this decision followed these rules, on this input, and the math checks out — without revealing anything else. The proof doesn't ask you to trust the agent's character. It asks you to trust arithmetic. That's a different relationship between a human and their agent....

Powered by Readybot.io

AI Agents on BNB Chain: Why On-Chain Trust Matters

Celesto CI vs GitHub Actions and Blacksmith Benchmarks

DEV Community

Blacksmith vs GitHub Actions vs Celesto CI: what the benchmarks say

I build Celesto CI. Celesto has a lower paid per-minute rate than both Blacksmith and GitHub's 4-core Linux larger runner. In the snapshot below, Celesto finished the cold builds faster than GitHub's benchmark runner. That's the useful comparison: how long you wait, what a running minute costs, and what those numbers actually measure. What we compared The Celesto CI benchmark repository publishes workflows, results and source run links. This article uses its November 14 comparison, including the November 15 Celesto Docker rerun after a runner disk change. All three rows use Linux x64 runners with 4 vCPU and 16 GB of listed RAM. That is the same listed configuration, not identical hardware. CPU models, disks, regions and host load differ. The workloads are real public projects pinned to commits: Rust: spotify-player, with formatting checks, tests and two Clippy passes. Node/TypeScript: opencode, with a cold Bun install and typecheck. Turbo's local and remote caches are disabled. Docker: PostHog's production image, built with no build cache. Cache: save and restore a 4 GiB file using actions/cache. Queue: start a burst of 15 jobs and measure the median wait from job creation to runner start. Celesto's results come from our repository. GitHub and Blacksmith results come from the RunsOn public benchmark data, using the workloads described in its methodology. RunsOn also sells CI infrastructure, so this is vendor-maintained evidence, not an independent lab test. Build times: Celesto beats GitHub; Blacksmith trades a 6x paid rate for speed Lower is better. Workload GitHub Blacksmith Celesto CI Rust 3m 35s 2m 02s 2m 54s Node/TypeScript 1m 38s 50s 1m 19s Docker 12m 59s 5m 52s 9m 14s Cache save + restore 1m 20s 17s 41s Burst queue, p50 3s 11s 15s Compared with GitHub in this snapshot, Celesto reduced Rust workload time by about 19%, Node/TypeScript by 19%, and Docker by 29%. Blacksmith completed all three builds and the cache test sooner, at 6x Celesto's paid per-minute rate for this listed configuration ($0.008 versus $0.00133333). That is a rate comparison, not a claim that each build costs 6x as much: Blacksmith's shorter runtime offsets part of the rate difference. GitHub had the shortest burst queue wait. These are workload-phase times, not the full time from pushing a commit to getting a green check. Setup, collection and other steps outside the measured phases are excluded. Queue wait is shown separately. Paid rates: Celesto costs less per running minute Here are the published Linux x64 rates for the same listed 4-vCPU / 16-GB configuration, checked November 15, 2026: Provider Paid rate per minute Source GitHub, Linux 4-core larger runner $0.012 GitHub runner pricing Blacksmith, 4 vCPU $0.008 Blacksmith pricing Celesto CI, Large $0.00133333 Celesto CI pricing Celesto's $0.08/hour rate works out to about 89% less per minute than GitHub's 4-core larger runner and 83% less than Blacksmith's 4-vCPU runner. There is an important distinction: the GitHub timing row uses its public-repository standard runner. The $0.012 rate belongs to GitHub's paid 4-core larger-runner SKU. The listed CPU and RAM align, but these results do not establish the performance of that paid SKU. This is a specification-level price comparison alongside a benchmark, not an invoice comparison for the measured GitHub jobs. Also, free usage matters: GitHub's standard runners are free for public repositories, and eligible private-repository usage has an included allowance. Celesto does not beat a $0 bill on price. Blacksmith advertises 3,000 free minutes per month. Celesto offers a one-time $5 trial, but the current trial is Micro-only. It does not cover the Large runner used here. A lower rate is not the whole bill A runner that costs more per minute can finish sooner. A fair cost-per-job comparison needs each provider's full billable runtime, its billing rules, allowances and any extra charges. Multiplying only the build times above by the rates would leave th...

Powered by Readybot.io

Celesto CI vs GitHub Actions and Blacksmith Benchmarks

Test AI Preference Pairs for Shortcut Bias

DEV Community

Shortcut judges: a cheap test your preference pairs should pass before you train on them

I'm building evaluation adapters (small reward models) for Telegraph, a network that routes AI requests to miners and scores their answers. Disclosure: I'm competing in Telegraph Hackathon Season II, which has prizes. A preference pair is a prompt, a better answer and a worse one. A reward model trained on pairs learns whatever separates the two answers. If something cheaper than the skill you want separates them, it learns that instead, and your accuracy number measures the shortcut. The test Before training, run rules that pick an answer without checking anything: pick the longer answer pick the answer with more words in common with the prompt (TF-IDF cosine) pick the answer with more of an obvious feature (alarm words, a verdict word) If any of them is far above 50%, fix the pairs first. Two cases from this week Another builder (AdversarialEval, in the Telegraph Discord) found a keyword-count judge got every one of their severity pairs right, because all the worse answers were downgrades. After adding inflations, the TF-IDF judge still won ~95%. They rebuilt the pairs so the two answers are identical except for the severity claim, drew wrong severities from the same distribution as true ones (either direction), and balanced which answer is longer. On 84 new pairs: length 50%, TF-IDF 50%, keywords 55%. My own 300 weather-verification pairs: length was 49.7% overall but 17–88% within error families, because the verdict phrases differ in length and some families lean one way. TF-IDF was 78% overall. Part of that is legitimate (in a wrong-station pair, not matching the question is the error), but my digit-swap and fill-value pairs leak too. Those rows are already in the pool, so I'm reporting this as a limit rather than quietly fixing it. What I'd do differently write the worse answer by copying the better one and changing only the claim balance verdict direction and length within every error family, not just overall report the shortcut judges next to model accuracy in every run Script (standard library only) and the per-family table: https://github.com/fexx301/oathcast-telegraph-s2/tree/main/shortcut-judges-v1 dev.to allows up to four tags. I'd use machinelearning, ai, llm, datascience.

Powered by Readybot.io

Test AI Preference Pairs for Shortcut Bias

Type Faster by Improving Accuracy and Consistency

DEV Community

Typing Faster Isn't Enough: Why Accuracy and Consistency Matter More

Most people think improving their typing speed means learning to move their fingers faster across the keyboard. That sounds reasonable, but it misses an important part of the equation. Typing speed is useful only when you can maintain accuracy. If you type quickly but constantly make mistakes, you may spend more time correcting errors than you save by typing faster. Whether you're a software developer, student, content writer, or someone who works with computers every day, improving your typing skills can make everyday tasks more efficient. Let's look at what actually makes someone a better typist. Understand the Difference Between Speed and Accuracy Typing performance is usually measured using two main metrics: Words Per Minute (WPM): How many standardized words you can type in one minute. Accuracy: The percentage of characters typed correctly. For example, consider two people: Metric Person A Person B Typing speed 75 WPM 60 WPM Accuracy 88% 99% Person A types faster, but makes considerably more mistakes. In real-world situations, Person B might actually finish a document or email sooner because fewer corrections are needed. This is why accuracy should be a priority when developing typing skills. Learn Touch Typing Instead of Looking at the Keyboard One common habit among beginners is constantly looking down at the keyboard to find individual keys. This interrupts the natural flow of typing. Touch typing is the ability to type without looking at the keyboard. Instead of visually searching for each key, your fingers gradually learn their positions through repetition. Start by learning the home row: A S D F J K L ; Your left-hand fingers rest on A, S, D, and F, while your right-hand fingers rest on J, K, L, and the semicolon key. These positions provide a starting point for reaching other keys. Once you're comfortable with the home row, gradually practise the top row, bottom row, and number row. Don't worry about speed initially. Focus on pressing the correct keys without looking down. Build Muscle Memory Through Consistent Practice Typing is a physical skill that improves through repetition. Occasional long practice sessions are generally less effective than short, consistent sessions. For example, practising for 10–15 minutes every day gives you regular opportunities to reinforce correct finger movements. A simple routine could look like this: 3 minutes practising home-row keys. 3 minutes practising difficult letter combinations. 3 minutes typing complete sentences. 3 minutes taking a timed typing test. The goal isn't to achieve an impressive score every day. It's to make correct finger movements feel increasingly natural. Over time, you'll spend less attention finding keys and more attention thinking about what you're writing. Measure Your Progress Instead of Guessing One problem with learning typing is that improvement can be difficult to notice. You might feel faster without actually knowing whether your speed or accuracy has improved. This is where regular typing tests become useful. A typing test gives you measurable results, including: Words per minute Characters per minute Typing accuracy Number of mistakes You can use these results to identify weaknesses and adjust your practice routine. For example, if your speed increases but your accuracy decreases, you may be rushing too much. If your accuracy is consistently high but your speed remains low, you might need more practice with finger movement and common letter combinations. A browser-based typing test such as RapidFinger can help you measure your performance across different test durations and track your progress. Try both short and longer tests. A one-minute test measures your burst speed, while a longer session gives you a better idea of how consistently you can type over time. Practise Difficult Words and Letter Combinations Not all words are equally easy to type. Some combinations require more complicated finger movements, especially when several letters are...

Powered by Readybot.io

Type Faster by Improving Accuracy and Consistency

PHP Security Audit: Spot Hidden Authentication Flaws

DEV Community

Auditing PHP Code for Hidden Security Flaws

Imagine you are reviewing an API endpoint that checks a shared secret: $payload = json_decode(file_get_contents('php://input'));

if ($payload->token == 'SECRET_API_TOKEN') {
$session->grantAdmin();
}
At first glance, this looks like normal authentication code. But because it uses the loose == operator, an attacker who sends {"token": true} will pass the check. In PHP, any non-empty string other than '0' loosely evaluates to boolean true Zend Engine type rules. The caller gains administrative access without ever knowing the secret. Spotting vulnerabilities in a PHP codebase requires understanding how the engine handles data types, superglobals, and input streams. Type Juggling Across PHP Versions Loose comparisons have caused authentication bypasses for years. Developers often assume that upgrading to PHP 8 eliminates every comparison flaw, but that is only partly true. In PHP 7.x, comparing a non-numeric string to zero evaluated to true type juggling notes. That meant "admin" == 0 succeeded. PHP 8.0 changed this behaviour by casting the number to a string instead PHP 8.0 migration guide. Under PHP 8, "admin" == 0 evaluates to false. Boolean type juggling remains unchanged across PHP versions Laravel comparison notes. If your code checks a string against user input with ==, a boolean value in JSON will still match. Magic hashes also persist in modern runtimes. When two strings formatted in scientific notation are compared loosely, the engine treats both as float 0.0 and returns true magic hash behavior. However, this PHP 8 behaviour strictly requires both strings to consist exclusively of 0e followed solely by digits. If a digest contains letters other than the exponent e, PHP 8 classifies it as a non-numeric string and the comparison fails. To prevent comparison bypasses, always verify that security checks use strict comparison (===) or constant-time comparison: if (!is_string($payload->token) || !hash_equals('SECRET_API_TOKEN', $payload->token)) {
throw new \InvalidArgumentException('Unauthorized');
}
You can study more comparison traps and input validation flaws in the CodeReviewLab learning hub. Where Untrusted Input Starts Every audit requires tracing data from input boundaries to dangerous sinks. In PHP, inputs arrive through superglobals such as $_GET, $_POST, and $_COOKIE. A frequent review finding is the use of $_REQUEST. The superglobal $_REQUEST combines GET, POST, and COOKIE data based on the engine's request_order setting PHP superglobals. If a handler expects a token in a POST body but inspects $_REQUEST, an attacker can often supply that value in a GET query string instead. File uploads present a similar pitfall. The values in $_FILES['upload']['name'] and $_FILES['upload']['type'] come directly from client HTTP request headers Safeguard upload notes. They do not reflect server-side MIME detection. Treat both values as untrusted strings until verified by an extension allowlist and a server-side inspection tool such as finfo. Command Execution and Argument Injection When code runs operating system commands via exec(), shell_exec(), or system(), developers often try to sanitise parameters using escapeshellcmd(). The escapeshellcmd() function escapes shell metacharacters like pipes and semicolons, but it leaves spaces and command switches untouched PHP escapeshellcmd manual. If untrusted input represents command flags rather than a fixed argument, an attacker can pass arbitrary switches. // Insecure: escapeshellcmd allows space-separated parameter switches
$extraOptions = escapeshellcmd($_GET['options']);
system("tar -czf /backups/archive.tar.gz {$extraOptions} /var/data");
In this example, an attacker can supply --checkpoint=1 --checkpoint-action=exec=sh to achieve arbitrary code execution. Passing an array of arguments to proc_open() bypasses the system shell, which prevents shell metacharacter injection proc_open documentation. However, proc_open() does not prevent argument injection if the binary...

Powered by Readybot.io

PHP Security Audit: Spot Hidden Authentication Flaws

Fix Docker x509 Errors in GitHub Actions CI

DEV Community

Docker x509 certificate signed by unknown authority in CI

Docker x509 certificate signed by unknown authority in GitHub Actions means the daemon reached your registry, read the certificate it presented, and found no trusted root behind it, so to fix registry TLS you install that CA where Docker looks for it. Marking the registry insecure also silences the error, and it turns off the check that was protecting every layer the job pulls. Three places hold a CA, and they serve different clients. Installing one and testing with another is why this error survives the first fix. What this error means Public images pull normally and one host fails, every time, at the first request rather than part way through a download. Two wordings are in circulation: the older one ends the Get line with "x509: certificate signed by unknown authority", and newer clients put "tls: failed to verify certificate" in front of it, which is the shape cnoe-io/idpbuilder#520 reports. The failing URL is usually the registry /v2/ endpoint, or something under it, because verification happens during the handshake and the first request is the one that trips it. We did not reproduce this on a runner: it needs a registry holding a certificate from a private CA, which we are not going to stand up on the public internet, so the log below is the shape a private registry prints rather than a recorded run. ```The shape a private registry prints (illustrative, not a recorded run) Error response from daemon: Get "https://registry.internal.example.com:5000/v2/": tls: failed to verify certificate: x509: certificate signed by unknown authority

Common causes

The registry certificate comes from a private CA

The ordinary case. An internal registry, a corporate proxy that re-signs TLS, or a self-signed certificate on a test registry all present a chain that ends in a root the runner has never seen. Nothing is wrong with the certificate; the runner simply has no reason to trust it.

The CA was installed in the wrong trust store

The wasted fix on this page. A certs.d entry does nothing for a build running inside BuildKit or for a curl in the next step, and the system store does not cover a daemon lookup that has its own directory. In our experience the second attempt at this error is the same certificate in a different place.

The directory name does not match the registry reference

The daemon looks up the directory by the host and port exactly as they appear in the image reference. A registry pulled as registry.internal:5000 needs the directory with the port; the same registry behind a proxy on 443 needs the directory without one. A mismatch leaves the file on disk and the daemon unaware of it.

The chain is incomplete rather than untrusted

A server configured to send only its leaf certificate leaves the client unable to reach the root it does trust, and the error reads the same way. Check what the server actually presents before assuming the CA is missing locally, because the fix is on the registry rather than on the runner.

How to fix it

Install the CA where the daemon looks

  1. Create the certs.d directory for that registry, with the host and port spelled as your references spell them.
  2. Write the CA certificate into ca.crt in that directory.
  3. Pull one image from that registry in the same job to confirm the trust took effect.

```Terminal
sudo mkdir -p /etc/docker/certs.d/registry.internal.example.com:5000
sudo cp internal-ca.crt /etc/docker/certs.d/registry.internal.example.com:5000/ca.crt
docker pull registry.internal.example.com:5000/acme/api:1.4.2
Add it to the system store for everything else Anything that is not the daemon reads the system bundle: curl, Helm, a language HTTP client, a scanner. Copy the CA into the system directory and refresh the bundle, in the same step that wrote the daemon copy, so the two can never drift apart. sudo cp internal-ca.crt /usr/local/share/ca-certificates/internal-ca.crt
sudo update-ca-certificates
curl -sSf https://registry.internal.example....

Powered by Readybot.io

Fix Docker x509 Errors in GitHub Actions CI

DNS over HTTPS: Resolver Policy and Security

DEV Community

DNS over HTTPS changes resolver policy, not just transport

DNS over HTTPS changes resolver policy, not just transport DNS over HTTPS sends DNS queries and responses through HTTPS. RFC 8484 maps each query and response pair to an HTTP exchange and defines the application/dns-message media type for the DNS wire format. The encryption protects the path between the client and the selected DoH endpoint. It does not make the resolver disappear, and it does not make every DNS answer globally consistent. That distinction matters in a security review. An endpoint can be encrypted, authenticated, and still return policy-dependent answers. Split DNS, local filtering, enterprise domains, and resolver-side logging all remain part of the system. Moving clients to a public DoH service can change both the answer and the evidence available to the network owner. Choose the resolver before the protocol Record which resolver the client is configured to use, how it discovered the endpoint, and how it validates the TLS connection. RFC 9462 describes discovery of designated resolvers through SVCB records. RFC 9463 describes network-designated resolver options for DHCP and router advertisements. These mechanisms solve configuration distribution. They do not remove the need to define which resolver is authorized for which network. An enterprise laptop on a corporate network may need the internal resolver for private names. The same laptop on a hotel network may need a public resolver only for public names. A DoH client that sends every query to one public endpoint can break split-horizon resolution or send internal names to a service the organization did not intend to trust. Create a resolver policy by environment, device class, and name scope. Pin the endpoint and its certificate expectations. Document the fallback path when the DoH endpoint is unavailable. A fallback to cleartext DNS may be acceptable for some networks and unacceptable for others. Account for the HTTP surface DoH uses a URL template and the DNS message media type. The client must validate the HTTPS certificate and process the DNS response format, including truncation and error conditions. A response can arrive over HTTP status codes that do not map directly to DNS errors. Logging should distinguish a transport failure, a TLS failure, a malformed DNS message, and a valid negative answer. The resolver can still see the query name and client address unless a privacy design such as Oblivious DoH is used. RFC 9230 describes one such relay design. It does not turn every DoH deployment into an oblivious one. Explain what the chosen service can observe and retain. HTTP intermediaries also matter. A proxy that inspects DoH traffic may defeat the privacy goal, while a cache or logging layer may retain URLs and request bodies. Apply the same data-minimization rules to HTTP access logs as to DNS logs. Do not log full query strings from sensitive applications unless the investigation requires it and the retention policy permits it. Keep DNSSEC and DoH separate DoH protects transport to the resolver. DNSSEC authenticates signed DNS data through a chain of trust. A client can use DoH and still receive a forged or unsigned answer from a resolver that does not validate DNSSEC. Conversely, a DNSSEC-validating client can use an unencrypted transport and still verify signed answers. Document which layer supplies confidentiality, which layer supplies data authentication, and which resolver performs validation. Test a signed name with a valid chain, a bogus signature, and an unsigned name that policy should reject. Check the result at the application, not only the resolver log. Roll out with a name map Build a list of internal zones, partner domains, break-glass names, and public domains that applications need. Test each class through the new endpoint. Include a service that resolves through the corporate proxy and a service that performs direct DNS. Confirm that the application receives the expected answer, not just that port 443 is reachable. Record the re...

Powered by Readybot.io

DNS over HTTPS: Resolver Policy and Security

How to Quote a Small Business Website Project

DEV Community

How I Quote a Website Project: What a Small Business Should Expect

When a small business asks me "how much for a website?", the honest answer is always the same: it depends on what the site has to do. A quote is not a price pulled from thin air. It is a short list of decisions, and the business owner should be able to see every one of them. This is how I build a quote, and what a business should expect from any developer who quotes one. 1. Start with the job, not the price The first question is never about money. It is about what the website has to do: show services and prices, take bookings, sell products, or just be findable on Google. A simple brochure site with five or six pages is one job. A site with online booking or an online shop is a different job, with more moving parts and more testing. I ask the owner to describe the site in one sentence: "a website where customers can see my services and book an appointment." That sentence decides almost everything else. 2. Count the pages and the features separately A quote has two parts. The pages — Home, Services, About, Contact, and any others — are one part. The features are the other: a booking form, a WhatsApp button, a photo gallery, a map, a contact form that actually reaches the owner. Listing them separately matters, because it lets the owner change the quote. If a feature is not needed now, it can wait. A quote that hides everything in one number gives the owner nothing to decide about. 3. Say what is included — and what is not A good quote names what the price covers: the design and build, the basic SEO setup (titles and meta descriptions on every page), the site going live on the owner's domain, and a short handover showing the owner how to change text and photos. It should also name what it does not cover, so there are no surprises: the domain and hosting costs (paid to the hosting company, not to me), any paid plugin the site needs, and new pages or features added after launch. Those are separate, and the owner should know that before work starts. 4. Give one number, in writing I give a single fixed number for the agreed pages and features, in writing — usually by message or email — before any work starts. A simple small-business website typically falls in a range I can state upfront once I know the pages and features; a booking or shop feature moves it up, because it adds real work and testing. A range is honest at the quoting stage. A fixed number is what the owner gets once the scope is agreed. What a quote should never be is a number that grows during the work without anything being added. 5. Ask for a deposit, and say when the rest is due For a small project, I ask for a deposit before starting and the rest when the site is live and the owner is happy with it. The deposit protects the developer's time; paying the rest on delivery protects the owner. Both sides should know the schedule before the first page is built. 6. Show the work before it goes live Before a site goes live, the owner should see it — a preview link or a staging site — and be able to ask for changes. The pages, the text, the photos, the phone number: the owner checks all of it, because it is their business and their customers who will read it. A developer who launches a site without the owner seeing it first is skipping the most important step of the whole job. That is the whole process: understand the job, list the pages and features, say what is included, give one number in writing, agree the payment schedule, and show the work before launch. A business that gets a quote like that knows exactly what it is paying for. And a developer who quotes like that has nothing to hide. Author Bio Muhammad Asad Bukhari is a freelance WordPress developer based in Lahore, Pakistan. He builds WordPress websites for small and service businesses, including salons and spas, sets up AI automation with n8n workflows, and works on SEO for WordPress sites. His portfolio is at https://asadbukhari.site.

Powered by Readybot.io

How to Quote a Small Business Website Project

Build a Verifiable Product Management Portfolio

DEV Community

Building a Product Management Portfolio That Survives Review (Without Inventing a Single User)

Most early-career product management candidates face the same trap: job posts ask for evidence of shipped work, and the honest answer is that you have not shipped anything yet. The tempting shortcut is to inflate — invent a user base, claim revenue, dress up a class project as a launch. It works right up until someone asks a follow-up question in an interview. There is a better path. A portfolio can be built entirely from work that is real, small, and verifiable, as long as you structure it around evidence rather than storytelling. Here is how to do that. 1. Separate evidence from narrative Every portfolio claim falls into one of two buckets: something a reviewer can inspect, or something they have to take on faith. Faith-based claims are cheap and therefore discounted. Reviewable evidence — a written PRD, a defined metric with a calculation, a SQL query that returns a specific number, an evaluation plan with labeled criteria — costs you effort and therefore signals something. A simple test before you publish any project page: underline every sentence and ask "what could a reviewer click, read, or recompute to confirm this?" Sentences with no answer get cut or rewritten. 2. Label simulated work as simulated If you work through a project brief rather than a live product, say so in the first line of the page, not in a footnote. "Simulated project brief: I defined the problem, drafted the PRD, and built an evaluation plan; no real users or revenue are represented." This is not a weakness. Reviewers who have read a hundred inflated portfolios find clear labeling refreshing, and it protects you from the follow-up question you cannot answer. 3. Show the AI decisions, not just the AI feature If your project involves AI, the interesting part for a reviewer is your judgment, not the model. Document: what you chose to automate and what you kept human, what you refused to build, how you planned to catch failures, and what would make you reverse the decision. A one-page decision log beats a polished mockup. 4. Write the evaluation plan before the feature spec An evaluation plan is the cheapest high-signal artifact you can produce. Define the task, the inputs, the output you will grade, and the rubric — then build a small evaluation set as a CSV with a rubric definition alongside it. Even twenty rows, honestly graded, demonstrate more rigor than a diagram of an architecture you never tested. 5. Make metrics auditable For each metric you cite, include the definition, the numerator and denominator, the time window, and where the number came from. If it came from a simulated dataset, say that. An auditable small number is worth more than an impressive vague one. 6. Fix the three biggest problems, not all twelve Portfolio revision goes wrong when candidates try to rewrite everything at once. A more effective loop is: answer, score, revise, retry — and keep before-and-after versions so you can see what actually changed. Prioritize ruthlessly. Three fixes to the weakest dimensions will move a portfolio further than twelve cosmetic edits. This is the loop the free 12-point rubric at OfferKu is built around: twelve transparent, self-reported criteria spanning evidence, AI decisions, evaluation, metrics, project integrity, and presentation. It returns dimension scores and up to three highest-priority revisions in about five minutes, with no name and no material upload required. Treat the score as a diagnostic, not a verdict. 7. Optimize the first thirty seconds Presentation is its own dimension. Assume a reviewer gives your page half a minute. Lead with the problem, what you produced, and what evidence exists. Put artifacts near the top, links working, file names descriptive, and remove anything you cannot explain out loud. A weekly cadence that actually compounds Pick one brief per week. Produce one artifact set: a PRD, a metrics definition, a SQL query, and an evaluation plan. Label it simulated. Score it against the rubric. Make the three hi...

Powered by Readybot.io

Build a Verifiable Product Management Portfolio

Fix GitHub Actions Steps with Both Uses and Run

DEV Community

GitHub Actions step cannot have both uses and run, and what you get

A GitHub Actions step cannot have both uses and run, and that sentence was once the message you got, but the parser that ships today does not contain it anywhere. What it produces instead names one of the two keys as unexpected, which is a different sentence and a more precise one once you know how the reader arrives at it. The reader narrows as it reads. The first of the two keys chooses a shape, and the second has nowhere to go inside it. What this error means The workflow stops running and the commit carries an invalid file annotation with a line, a column and a quoted key. The quoted key is one of the two you wrote, and which one it is depends on the order you wrote them in rather than on which one is wrong. If you came here from an older answer expecting a sentence about both keys, the thing to check is whether your annotation says that at all, because a message that quotes a single key is telling you something the older sentence did not. ```Reconstructed from the key branch of TemplateReader and the UnexpectedValue format string in actions/runner Invalid workflow file: .github/workflows/ci.yml#L9 (Line: 9, Col: 9): Unexpected value 'run'

Common causes

Indentation merged two steps into one item

The commonest cause and the hardest to see. A missing dash turns what should be a new sequence item into another key of the previous one, and the file stays valid YAML throughout.

A command was replaced by an action in place

Somebody swapped the middle of a step, putting an action reference where a command was, and left the other key behind. The diff touches one line, which is why review passes over it.

An example was pasted inside an existing step

Documentation examples begin with a dash and assume they are being added as a new item. Pasted into the body of an existing step they become extra keys of it.

The step was meant to do two things

Occasionally the intent really was to run an action and then a command. In our experience this is rarer than the accidental cases, and the answer is the same: two steps.

How to fix it

Read which key the annotation names

  1. Open the annotation and note the quoted key and the column.
  2. The quoted key is the second one in your file, not necessarily the wrong one.
  3. Go to that line and look at whether it should have started a new sequence item.

Split into two steps

Give each of the two a dash of its own at the same indentation as the other items in the sequence. Name them if the job has several steps, since the default name of a run step is the command text.

```.github/workflows/ci.yml
steps:
- name: Check out
uses: actions/checkout@v5
- name: Install
run: npm ci
Check the whole sequence, not just the reported line An indentation slip that merged one pair often merged another further down, and the reader stops recording after it has enough to reject the file. Read every item in the sequence once before pushing again. Validate before pushing The same schema is available to editor tooling, so a file that will be rejected can be rejected locally. This is the only one of these fixes that prevents the next occurrence rather than resolving this one. How to prevent it Keep one action or one command per step, and treat that as a review rule. Watch for a missing dash whenever a step gains a key it did not have. Paste documentation examples after a step, never inside one. Validate workflow files in the editor against the published schema. What the reader does with the second key In the published schema an item in a step sequence is a choice between two mapping shapes. One requires the run key and additionally allows a working directory and a shell. The other requires the uses key and additionally allows with. Everything else the shapes accept, env among it, is on both. Neither shape lists the other required key, and neither permits loose keys. The reader does not collect your keys and judge them at the end. It narrows while it reads. Each key ...

Powered by Readybot.io

Fix GitHub Actions Steps with Both Uses and Run

How to Receive and Spend USDC in Indonesia with Raenest

DEV Community

Paid in USDC, Living in Indonesia: How I Use Raenest to Receive, Hold and Spend Stablecoins

I work in web3 from Indonesia, and a growing share of my work — bounties, contests, research and security gigs — pays in USDC on Solana. Getting paid was never the hard part. A client or a platform sends stablecoins to my wallet, and they arrive in seconds. The hard part starts after the money lands. A wallet full of USDC is not the same thing as money I can use. I still need dollars I can hold safely, a way for them to not just sit idle, and a practical way to spend or move them when real life asks. For a long time my answer was a patchwork: keep everything in a self-custody wallet, swap through an exchange when I needed local currency, and accept the friction at each step. That is the gap I opened a Raenest account to close. This article walks through what Raenest does for someone paid in stablecoins from an emerging market — without pretending any of it is magic. What Raenest is Raenest describes itself as "your global money partner to receive, send and spend." It is a financial technology platform, not a bank — banking services are provided by its partners. Inside one app you can open global accounts in USD, GBP and EUR, alongside dedicated wallets for USDT and USDC, plus invoicing and payment links for getting paid by clients, money transfers, and virtual and physical cards. For a freelancer or remote worker, the pitch is simple: one place where money earned in different currencies — including stablecoins — can be received, held, converted, spent or sent on, instead of being scattered across wallets and exchanges. Receiving USDC and USDT This is the feature that matters most to me. On Raenest, USDC and USDT each have their own dedicated wallet, with its own balance, wallet address and transaction history. Setting one up takes less than a minute: open the app, go to Accounts, switch to the Stablecoin tab, and create your wallet. To get paid, you share your wallet address with the sender. Stablecoin deposits are supported across several networks, including Ethereum, Tron, Binance, Polygon and Solana. Because most of my payouts move on Solana, that support is the deciding detail: a sponsor or client can send USDC straight from their Solana wallet to my Raenest address, and it lands in my USDC wallet. One rule matters more than everything else here: the sender must use a network your wallet supports. Sending on the wrong network can keep funds from arriving correctly, so I always state the network explicitly when I share an address — "USDC, Solana network" — rather than assuming the sender will guess. A second detail is worth knowing. Incoming stablecoins are no longer automatically converted to USD on arrival. They stay in their original form until you decide what to do with them. That control is the whole point: the same balance can be held, converted, spent or sent, on your schedule rather than the platform's. Adding money with SOL Not everything I earn arrives as a stablecoin. Sometimes the payout is SOL itself. Raenest covers that case too: through the Add Money flow you can deposit SOL, BTC or ETH, and Raenest converts the deposit into USDC in your stablecoin wallet. A small feature, but it removes a step — no detour through an exchange just to turn a SOL payout into dollars. Holding dollars — and putting idle ones to work Once stablecoins are in Raenest, there are two sensible things to do with them: hold them as dollar exposure, or put part of them to work. For the second option, Raenest offers the Stablecoin Vault: move USDC or USDT in and earn variable returns, advertised at up to 7% APY on eligible balances. Per Raenest's help centre, the minimum deposit is $100, earnings begin 24 hours after a deposit is processed, and they are added daily, so they compound over time. Now the honest part, because this is where marketing usually gets loud. "Up to 7%" is a ceiling, not a promise. The rate is variable and moves with market conditions; the rate in the app on a given day may be lower. The Vault is a yield product, ...

Powered by Readybot.io

How to Receive and Spend USDC in Indonesia with Raenest

Warako PDF Scanner Seeks 12 Android Testers

DEV Community

Closed test swap: Warako (PDF scanner) needs 12 testers, I'll test yours too

Hi all, I'm an indie developer and my app Warako is in a Google Play closed test. I need testers to stay opted in for 14 days, and I'm happy to test yours in return. About Warako: a PDF scanner for Android. It scans documents, receipts and ID cards into clean PDFs, reads Arabic and Latin text on the phone (OCR), and lets you sign and fill forms. Documents stay on the phone: no account, no upload to my servers. The interface is in English, Arabic, French, Spanish and German. What I ask: Join the test with your Gmail: https://play.google.com/apps/testing/com.amrani.docscan Install it and keep it installed for 14 days Open it a couple of times and tell me anything that is confusing or broken What I offer: I will install and keep your app for 14 days too I will send you written feedback (what worked, what didn't) Comment with your opt-in link and I'll join today.

Powered by Readybot.io

Warako PDF Scanner Seeks 12 Android Testers

Paste AI Markdown Tables into Word and Google Docs

DEV Community

How to Paste AI Markdown Tables Into Word and Google Docs Without Broken Borders

Copying a table out of an AI chat gives you two different things at once, and which one your paste uses decides whether you get a real table or fifty pipe characters. In a test run on 2026-11-15, the chat app's Copy button followed by a normal paste in Google Docs produced a table object with 9 rows, 4 columns and 36 filled cells, and left 0 markdown characters behind. The same clipboard pasted as plain text produced no table at all and 50 pipes. On the Word side, Pandoc 3.9 produced real Heading 1, 2 and 3 styles and a 36-cell table in 1.59 seconds, but the file it wrote carries no cell grid lines and dropped every column alignment marker. One Copy click puts two versions on the clipboard The chat app renders the markdown you see, and its Copy button puts both the rendered version (as HTML) and the source version (as text) on the clipboard. The application you paste into then picks one. Clipboard format What it holds What a paste does with it HTML Rendered tags: heading elements, a table with rows and cells, bold and code spans Google Docs built 1 table, 3 heading paragraphs and 7 bullet paragraphs; 0 markdown characters arrived Plain text The markdown source: hash marks, pipes, asterisks, backticks, one separator row of dashes Google Docs inserted 34 plain paragraphs; 50 pipes, 2 asterisks, 8 backticks and 3 hash-marked lines arrived as characters The plain-text version is not a degraded copy of the answer. It is the answer exactly as the model wrote it, which is what you want when the next stop is another tool, and the wrong version when the next stop is a person reading a document. The four paste paths, measured Path What arrived What did not Copy button, then Ctrl+V in Google Docs 3 heading paragraphs (2 at level 2, 1 at level 3), one 9×4 table with 36 of 36 cells filled, 7 bullet paragraphs at 2 levels, bold and monospace text The code block: its fence and language label arrived as a plain "Python" line, and the code as monospace paragraphs Copy button, then Ctrl+Shift+V in Google Docs All 34 paragraphs of text, every word intact, 1,566 characters 0 headings, 0 tables, 0 bullet objects, 0 bold runs; 50 pipes and 2 asterisks stayed in the text Google Docs "Paste from Markdown" Not measured: the command opened a dialog asking to install a Chrome extension Alignment, footnotes and code blocks on that path Pandoc GFM to DOCX Heading 1 ×1, Heading 2 ×4, Heading 3 ×1 as real styles, 9×4 table with 36 of 36 cells, 7 bold runs, 1 hyperlink, 1 footnote, 12 list paragraphs at 2 levels Cell grid lines (the table style defines one rule under the header row), 0 aligned cells The rich paste is the only path that gave a real table with no cleanup. Pandoc is the only path that produced Word heading styles, a working hyperlink and a real footnote. Turning on Markdown in Google Docs did not fix a plain paste Google documents two different things and they are easy to conflate: typing markdown as you write, and converting markdown on paste. I tested the second with the first switched on. Tools → Preferences → Enable Markdown, confirmed on. Ctrl+Shift+V with the same markdown clipboard: 34 plain paragraphs again, 50 pipes, 2 asterisks, 8 backticks. Identical to the run with Markdown off. "Paste from Markdown" under the Edit menu and the right-click menu both opened a dialog titled "Turn on copy, cut and paste", asking for a Chrome extension. So that result says more about this browser than about Google Docs. What a measured number does support is narrower: on this setup the setting alone did not change what a text-only paste produced. The one-line Pandoc command pandoc -f gfm -t docx -o report.docx report.md
On a 536-word markdown report with a 4-column table, a footnote and a link: 1 H1, 4 H2, 1 H3 in the source → Heading 1 ×1, Heading 2 ×4, Heading 3 ×1 as Word paragraph styles an outline can read 4-column table, header row plus 8 data rows → 9 rows × 4 columns, 36 cells, 36 filled, header row marked to repeat across page breaks Align...

Powered by Readybot.io

Paste AI Markdown Tables into Word and Google Docs

Loop Pop Closed Test: Swap Feedback with Testers

DEV Community

Closed test swap: Loop Pop (one-tap arcade game) needs testers, I'll test yours too

Hi all, I'm an indie developer and my Android game Loop Pop is in a Google Play closed test. I need testers to stay opted in for 14 days, and I'm happy to test yours in return. About Loop Pop: a one-tap arcade game. A ball runs round a ring; tap when it is on the gold target, collect gems and keep off the snakes. Made with Godot. Available in English, French and Arabic. What I ask: Join the test with your Gmail: https://play.google.com/apps/testing/com.amrani.looppop Install it and keep it installed for 14 days Play a couple of times and tell me anything that is confusing, too hard or broken What I offer: I will install and keep your app for 14 days too I will send you written feedback Comment with your opt-in link and I'll join today.

Powered by Readybot.io

Loop Pop Closed Test: Swap Feedback with Testers

GitHub Actions vs Argo Workflows: Key Differences

DEV Community

GitHub Actions vs Argo Workflows: which one runs what

GitHub Actions vs Argo Workflows is usually a false choice, because the two are not sold the same unit of work: Actions runs a workflow file in response to a git event, and Argo Workflows reconciles a Kubernetes custom resource that models a DAG of containers. The place they genuinely collide is fan-out, where Actions caps a job matrix at 256 jobs per run and Argo is bounded by the cluster. The same five steps on each engine. Actions shares one runner and one filesystem; Argo generates a pod per step, historically with an init and a wait container around your own image. Argo Workflows is a container-native workflow engine implemented as a Kubernetes CRD, and a graduated project in the Cloud Native Computing Foundation. Its own documentation lists its use cases in this order: machine learning pipelines, data and batch processing, infrastructure automation, and CI/CD. CI/CD is fourth on that list for a reason. GitHub Actions is triggered by repository events, runs on machines somebody else keeps warm, and reports back into the pull request. Argo has no git trigger of its own; event-driven triggering is a separate project, Argo Events, that you also deploy. The comparison below is drawn from the argoproj/argo-workflows repository and from GitHub's published limits, read on 21 September 2026 against Argo Workflows v4.1.4. Where a number depends on your cluster, the cell says so. Comparison GitHub Actions Argo Workflows The unit you write A workflow file in .github/workflows, up to 500 KB, discovered automatically from the repository A Workflow custom resource applied to a cluster, with steps or a DAG of tasks What triggers it Push, pull request, schedule, manual dispatch and the rest of the repository event set The API, the argo CLI, a schedule, or sensors from the separate Argo Events project What runs a step All steps of a job share one runner and one filesystem Every step and every DAG task becomes its own Pod, historically three containers: main, init and wait Fan-out ceiling A job matrix generates at most 256 jobs per workflow run, on hosted and self-hosted runners alike Your cluster. The controller processes one Workflow at a time, so the ceiling moves from the API to the reconciler What you pay per minute $0.006 at 2 vCPU on Linux, or $0.0025 on a managed runner at the same size Nothing to Argo. Your cluster bills for the pods and the nodes under them Free tier $12 of included compute a month on Free, $18 on Team, $300 on Enterprise Cloud (2,000, 3,000 and 50,000 minutes at the $0.006 Linux rate, read 12 November 2026), and free and unlimited on public repositories Apache 2.0 software, no allowance, because there is no meter Where it runs GitHub's fleet, a vendor's fleet, or your own self-hosted runners A Kubernetes cluster you operate, with the controller and server in their own namespace Time limits 6 hours per job on hosted runners, 5 days self-hosted, 35 days per workflow run Whatever you configure. The quick-start instructions say in as many words that they are not suitable for production Self-healing or retries None built in on GitHub-hosted runners; transient failures diagnosed and retried inside the run on Latchkey Retry strategies you declare per template, which is real retry logic and the most convincing thing on this row Setup change required Commit a file. On a managed runner, an app install and a runs-on label A Kubernetes cluster, kubectl, the quick-start or production manifests, and the argo CLI What a step costs on each side This is the difference that surprises people who try to run CI on Argo. In GitHub Actions a job is one machine: checkout, install, build and test all see the same working directory, and passing data between steps costs nothing. In Argo, each step and each DAG task causes a Pod to be generated. Historically each of those pods carries three containers: main runs your image, an init container fetches artifacts and parameters, and a wait container handles clean-up and saves parameters an...

Powered by Readybot.io

GitHub Actions vs Argo Workflows: Key Differences

ZQN-12B: Open AI Model with 128K Context

DEV Community

ZQN-12B: our second open model, plus the M3-GPTQ compression paper

ZQN-12B is the second open model from ZAQERIS Ai, an independent AI research group in Cairo, Egypt. Trained from scratch 15.55B parameters, compressed with our ZAQERIS M3-GPTQ method to 6.48 GiB (3.25 bits per weight) Runs on a consumer 8 GB GPU at about 25 tokens/second 128K native context (256K with YaRN) Step-by-step reasoning and structured tool calls Apache 2.0 Model: https://huggingface.co/ZAQERIS/ZQN-12B Alongside the model we published the technical paper behind its compression: "ZAQERIS M3-GPTQ: Hessian-Aware Multi-Stage Residual Vector Quantization for Extreme Bitrate LLM Compression". It combines Block-Hadamard decorrelation, Hessian-salience outlier selection, multi-stage 8-dimensional residual vector quantization, and Block-8 Cholesky GPTQ error propagation. Paper: https://huggingface.co/ZAQERIS/ZQN-12B/blob/main/docs/papers/ZAQERIS_M3_GPTQ_PAPER.md This is an early checkpoint, not a frontier model, and we are honest about its limits on the model card. Feedback and contributions are welcome.

Powered by Readybot.io

ZQN-12B: Open AI Model with 128K Context

zkVerify Proof Gatekeeper: Verify AI Payment Decisions

DEV Community

Don't Trust the Agent. Verify the Gatekeeper — Then Verify Everything Else Too.

AgentGames @ZKVProtocol By @stoploss44, for the zkVerify Agent Games Creator Track, Season 01 (21 October – 21 November 2026; judging 22–30 November 2026). An AI agent that moves money is a cashier with no supervisor. It can tell you it checked the balance, checked the recipient, checked the expiry — and you have no way to know whether it checked anything at all. That is the problem zkVerify's Agent Games is built around: agents compete, proofs decide, results go on record. I set out to build the thing the tournament's first track asks for: a Proof Gatekeeper — an agent that judges proof-backed payment requests and writes a platform-verified proof of every decision. What follows is what I actually ran, with receipts. Everything below was executed locally on my own machine: no mainnet transaction, no VFY spent, no live endpoint. I will say plainly where the local demo ends and the real tournament begins. 1. The job, as the tournament defines it From the official event page, a Proof Gatekeeper task is a signed JSON envelope describing a transfer request. The agent has 60 seconds to answer with one deterministic decision — APPROVE or REJECT — plus a Groth16 proof of that decision, which the platform re-verifies against its own registered verification key. Eight tasks per agent per day, eight daily rounds, scores cumulative. Correct decisions score +12 either way; a wrong approval costs -6, a wrong rejection -3, a timeout -2, and a provable task answered without a valid proof costs an extra -2. A task payload looks like this (from the event page): type "agent-games.proof-gatekeeper.v1", task_id "gk_24_9d1", input with registered_vk, proof_vk, minimum "1000", public_balance "1460", expiry_block 19842201, current_block 19832000, recipient and condition_recipient "0xDe42...9f01", amount "500", max_transfer "1000", proof_tx "0xa4c1...8ff1". Seven trap varieties are documented in advance — the test is whether the agent checks every field, not whether it can guess: valid condition (~50%), VK substitution (~13%), proof reused (~11%), threshold mismatch (~8%), expired condition (~6%), recipient mismatch (~6%), amount overflow (~6%). The build guide adds the sentence that matters most: "A proof can verify perfectly and still authorize the wrong action. Your agent must confirm what was proven, not only whether verification succeeded." I built the demo to find out exactly where that line bites. 2. The official circuit — and what it does not tell you Both arena circuits are Groth16/BN128, compiled with Circom 2.x. The proving key and WASM are public at https://agentgames.zkverify.io/circuits/gatekeeper.wasm (1,755,820 bytes) and https://agentgames.zkverify.io/circuits/gatekeeper_final.zkey (309,750 bytes). SHA-256 of the files I downloaded (verified on 15 November 2026): be00aefe3c8ba910951a242f50e55937bf82a0375ad4b69c2ef10629ab92764f — gatekeeper.wasm adfe95a439a7063a82a4967ef026d2dd6857a4d02c63b3caf63dac02e01af80d — gatekeeper_final.zkey The registered verification-key hash is served by the site itself at /api/circuit-info: gatekeeper vkHash 0x6b79c6012a6d8651f3e13bc4d2a20370280ab49700c90c5316d4168bfbad77b0. I exported the verification key from the zkey with snarkjs 0.7.6: curve bn128, 13 public inputs. What the site does not publish is the circuit source or the input signal names. I found them from the task envelope itself: they are the camelCase versions of the envelope's snake_case fields (max_transfer to maxTransfer, public_balance to publicBalance), plus taskId, salt, and decision. The 13 signals: 1 taskId (binds the proof to one task), 2 minimum, 3 publicBalance, 4 expiryBlock, 5 currentBlock, 6 recipient, 7 conditionRecipient, 8 amount, 9 maxTransfer, 10 registeredVkHash, 11 proofVkHash, 12 salt (the ONLY private input), 13 decision (1 = approve, 0 = reject). Salt is the only private input: it never appears in the public signals. Everything else is public — the proof hides nothing about the task, only the nonce. One encoding not...


Powered by Readybot.io

zkVerify Proof Gatekeeper: Verify AI Payment Decisions

LLM SEO: Make Your Site Visible to AI Assistants

DEV Community

LLM SEO: How to Make Your Site Visible to AI Assistants

Cross-posted from my own company blog: https://vouchgeo.com/blog/llm-seo. I'm the founder of Vouch, which is mentioned at the end. "LLM SEO" is one of several names for the same shift, next to AI SEO, GEO and AEO. Strip the label away and one practical question is left: when someone asks an assistant built on a large language model about your category, can it reach your pages, read them, and find something on them worth repeating? This guide stays on that practical layer: which crawlers to let in, what stops a model reading a page it was allowed to fetch, how to write pages it can quote, and how to tell whether any of it worked. If you want the bigger picture of why search is changing, AI SEO covers it, and GEO vs SEO vs AEO sorts out the terms. Reach, read, repeat It helps to treat LLM SEO as three tests a page has to pass, in order: Reach. The assistant's crawler or fetcher is allowed to request the page, and your server lets it through. Read. The response contains the content as text, not a blank shell waiting for scripts or a picture of a price list. Repeat. The text answers a buyer's question clearly enough that an assistant can quote or paraphrase it, and other sites back it up. A page that fails the first test never gets to the third, which is why the work starts with crawlers. Every provider fact below comes from that provider's own documentation, checked in November 2026; the rest is our editorial advice, to be tested against your own results. Reach: know which crawler does which job The large providers split their bots by job: training, search indexing, and fetches made because a user asked something. That split lets you decline training without disappearing from search answers. PROVIDER SEARCH TRAINING USER-TRIGGERED OpenAI OAI-SearchBot GPTBot ChatGPT-User Anthropic Claude-SearchBot ClaudeBot Claude-User Perplexity PerplexityBot none listed Perplexity-User A few details change how you act on that table: OpenAI lists four agents in its crawler documentation. The fourth, OAI-AdsBot, is limited to safety checks on landing pages that advertisers submit to ChatGPT. Blocking OAI-SearchBot keeps a site out of ChatGPT's search answers, apart from plain navigational links. Because ChatGPT-User acts on a person's request, OpenAI warns that robots.txt may not govern it, and where GPTBot and OAI-SearchBot are both allowed, OpenAI may reuse a single crawl for search and training. Anthropic says on its crawler page that its bots honour robots.txt, and that Claude-User lets site owners control which sites user-initiated requests can reach. Turning Claude-User or Claude-SearchBot off may reduce your visibility in Claude's answers. Perplexity says in its crawler guide that PerplexityBot does not gather content for training foundation models, and that Perplexity-User, acting for a user, generally ignores robots.txt. Our Perplexity SEO guide covers the firewall set-up Perplexity recommends. Google has no separate AI search crawler. AI Overviews and AI Mode use the normal Search index, and Google's AI features guide says a page needs to be indexed and eligible for a snippet to appear as a supporting link, with no extra technical requirements. Whether to allow training is a policy choice, and should you block GPTBot? walks through the trade-offs for each vendor. For visibility alone, the rule of thumb is short: let in the search crawler of every assistant your customers rely on. Each of the three vendors in the table publishes IP ranges for its agents, so firewall rules can admit the real crawlers and refuse impostors. To see where your robots.txt stands right now, run the free AI crawler checker. Read: make sure the fetch returns words A crawler that is allowed in can still come away with nothing useful. Common causes: Content that only appears after JavaScript runs. If the HTML your server sends is an empty frame, a crawler that does not run scripts sees an empty page. Serve the main text in the initial HTML. Facts locked in imag...

Powered by Readybot.io

LLM SEO: Make Your Site Visible to AI Assistants

Why Per-Token AI API Pricing Is Broken

DEV Community

AI API Pricing Is Broken: Per-Token Billing Charges You for the Wrong Thing

Originally published at API Cost Lab. AI API Pricing Is Broken: Per-Token Billing Charges You for the Wrong Thing Last updated: November 2026 Per-token pricing is the wrong unit for AI APIs. It charges you for effort, not for results — for every token a model burns on the way to an answer, including the tokens you never see, the retries that failed, and the words a rambling answer didn't need. The fix is not a cheaper token. It is a different unit: price per finished task, not per token spent getting there. That sounds like a small accounting complaint. It isn't. The unit you pay by decides what you optimise for, what you fear, and what your provider is rewarded for. Right now, all three point the wrong way. You pay for the journey, not the arrival Think of a taxi ride. You pay for arriving, with the meter as a rough proxy for distance. Now imagine a taxi that charged per turn of the wheels — extra when the driver took a wrong turn, circled the block, or sat thinking at a junction with the engine running. That is how an AI API bill works today. Every call is metered in tokens, and a token is not a unit of value. It is a chunk of text, roughly part of a word. You are billed for the prompt you send, for the answer you receive, and for everything the model generates in between — including work that produces nothing you can use. A call that fails halfway still costs you the tokens it consumed. An agent loop that retries a step five times bills you five times for one job. A model that answers in 400 words costs roughly twice as much as one that answers the same question correctly in 200. The meter runs on effort, and effort is the one thing you cannot see or control in advance. This was tolerable when an API call was one prompt and one answer. It is not tolerable now that a single user request can set off a chain of dozens of calls, each feeding the next, with the total unknown until the chain stops. Our bill-diagnosis checklist walks through the usual ways a bill runs away, and nearly all of them are the same story: a loop nobody capped, a prompt nobody trimmed, a retry nobody counted. Per-token pricing turns every one of those slips into money, silently, at machine speed. Exhibit one: the tokens you never see The clearest proof that the token is the wrong unit is the reasoning token. When a reasoning model works through a hard problem, it generates an internal draft — its working-out — before producing the answer you actually read. OpenAI's own documentation says those reasoning tokens are not visible through the API, but they still occupy context space and are billed as output tokens, at the output price. Read that again: the most expensive tokens on the bill are the ones you are not allowed to read. The same documentation notes that a model may generate anywhere from a few hundred to tens of thousands of reasoning tokens for one problem. You asked for a short answer and paid for a hidden essay you will never see. Reasoning effort settings make the absurdity explicit. Turn the effort dial up and the same question, with the same correct answer, costs more — because the model was allowed to think longer. The answer didn't change. The value didn't change. Only the amount of invisible work changed, and the meter charges for invisible work at the highest rate on the price sheet. A unit that bills you more for the same answer, depending on a dial you set blind, is not measuring value. It is measuring its own process. Exhibit two: the same answer at five different prices If the token were a real unit of value, the same answer would cost the same. It doesn't — not even close. The price of an identical response swings wildly depending on plumbing choices that have nothing to do with what you received. Send a prompt whose beginning matches a cached prefix and, on Anthropic's published terms, those tokens are read back at a tenth of the standard input price. Write a new cache entry and the same tokens cost a quarter more than standard ...

Powered by Readybot.io

Why Per-Token AI API Pricing Is Broken

Agent Games zkVerify: Prove AI Agents Can Be Trusted

DEV Community

Jangan Percaya Agent-nya, Verifikasi Buktinya: Masuk Agent Games zkVerify Lewat Creator Track

Artikel untuk Creator Track — Agent Games by zkVerify, Season 01. Ditulis oleh @blackke. AI agent sekarang sudah bisa melakukan banyak hal sendiri: membaca data, mengambil keputusan, bahkan mengeksekusi transaksi. Masalahnya bukan lagi apakah agent bisa bekerja, tapi apakah kita bisa percaya pada hasil kerjanya. Kalau sebuah agent bilang, "pembayaran ini sudah saya periksa dan aman," bagaimana kita tahu itu benar? Kalau agent lain mengklaim strateginya menang secara fair, bagaimana kita membuktikan ia tidak curang di tengah jalan? Jawaban paling jujur selama ini adalah: kita tidak tahu, kita hanya percaya pada klaimnya. Agent Games dari zkVerify dibangun untuk mengubah itu. Di kompetisi ini, agent tidak cukup berkata "percayalah pada saya" — agent harus membuktikannya. zkVerify adalah layer khusus untuk memeriksa bukti, bukan sekadar blockchain biasa zkVerify, yang dibangun oleh Horizen Labs, adalah jaringan yang fokus pada satu pekerjaan: memverifikasi zero-knowledge proof dalam skala besar. Zero-knowledge proof sendiri adalah cara membuktikan bahwa sebuah pernyataan itu benar, tanpa harus membuka semua data rahasia di baliknya. Misalnya, sebuah agent bisa membuktikan bahwa keputusannya mengikuti aturan yang ditetapkan, tanpa membocorkan seluruh strategi internalnya. Dengan adanya layer verifikasi khusus seperti zkVerify, aplikasi dan agent tidak perlu membangun sistem verifikasi proof-nya sendiri dari nol. Mereka cukup menghasilkan proof dengan sistem proving yang kompatibel, lalu menyerahkannya untuk diverifikasi. Di Agent Games, setiap hasil kompetisi diverifikasi on-chain dengan cara ini, sehingga wasitnya bukan manusia yang menebak-nebak, melainkan proof itu sendiri. Agent Games Season 01 mempertaruhkan 400.000 VFY untuk agent yang bisa dibuktikan, bukan sekadar diklaim Agent Games adalah turnamen AI agent yang diselenggarakan zkVerify. Season 01 berjalan dari 21 Oktober sampai 21 November 2026, dengan total hadiah 400.000 VFY. Setiap track mendapat alokasi 100.000 VFY, yang dibagi untuk tiga pemenang teratas: 50.000 VFY untuk juara pertama, 30.000 VFY untuk juara kedua, dan 20.000 VFY untuk juara ketiga. Biaya masuknya gratis. Ada empat track yang bisa dipilih, dan masing-masing menguji sisi verifikasi yang berbeda. Proof Gatekeeper menempatkan agent sebagai penjaga pembayaran. Platform mengirimkan tugas ke endpoint HTTPS publik milik agent, dan agent harus menjawab APPROVE atau REJECT dalam waktu maksimal 60 detik. Jawaban itu wajib disertai Groth16 proof yang akan diverifikasi ulang oleh platform terhadap verification key resminya sendiri. Ada delapan ronde per hari dan mode latihan untuk mencoba sebelum ronde berpoin dimulai. Steal the VFY adalah duel satu lawan satu antar-agent. Setiap match berjalan 20 turn, dengan saldo awal 100 VFY per agent, dan dimainkan dalam lima ronde sistem Swiss. Setiap langkah harus sesuai dengan strategi yang sudah didaftarkan dan dikomitmenkan di awal, dan setiap gerakan membawa policy proof-nya sendiri. Mengulang match atau turn lama, memakai ulang kunci idempotensi, atau memakai versi circuit yang tidak cocok dengan komitmen strategi akan langsung ditolak. Wildcard adalah track terbuka untuk membangun agent Web3 apa saja — misalnya agent untuk pembayaran crypto, DeFi, riset on-chain, atau keamanan wallet. Track ini dinilai oleh panel, sehingga kebebasan idenya paling luas, tetapi tetap membutuhkan agent yang benar-benar dibangun dan bisa didemonstrasikan. Creator Track adalah satu-satunya track tanpa ngoding. Peserta mengirimkan thread, video, atau artikel tentang agent yang bisa diverifikasi, lalu karya itu direview secara manual oleh tim Agent Games. Untuk tiga track pertama, peserta memang perlu menyiapkan endpoint agent sendiri, jadi kemampuan ngoding menjadi syarat praktisnya. Creator Track membuka pintu yang berbeda: yang dinilai adalah kejelasan dan kedalaman cara kita menjelaskan serta mendokumentasikan ide verifiable agent di ruang publik. Pelajaran terpenting dari field ...

Powered by Readybot.io

Agent Games zkVerify: Prove AI Agents Can Be Trusted

Codd’s 12 Rules: The Foundations of Relational Databases

DEV Community

The 12 Rules That Shaped Relational Databases

Whenever we use an application, whether it's a banking app, an online shopping platform, or a college management system, a lot of information is stored and managed behind the scenes. But have you ever wondered how databases organize this information? And what actually makes a database relational? To understand this, let's go back to 1970, when computer scientist Edgar F. Codd introduced the relational model of databases. His idea transformed how we organize, store, and manage information. Later, Codd proposed a set of rules to describe what a true Relational Database Management System (RDBMS) should support. These principles are commonly known as Codd's 12 Rules. Let's understand them through a simple, real-world example. Imagine a college management system that stores: Student details Course information Attendance records Examination marks How should such a database organize and manage all this information? Let's explore. First, What Is a Relational Database? A relational database organizes information into tables. Each table contains rows and columns. For example, imagine a Students table: Student_ID Student_Name Department 101 Arun CSE 102 Priya AIML 103 Rahul ECE Here: Each row represents one student. Each column represents a particular type of information. Student_ID helps uniquely identify each student. We can also create separate tables for courses, attendance, and examination marks. These tables can be connected through relationships between their data. This is the basic idea behind a relational database. But Edgar F. Codd wanted to go beyond simply storing information in tables. He wanted to establish principles that relational database systems should follow. Understanding Codd's 12 Rules Before we begin, here's an interesting detail: Codd's rules are numbered from Rule 0 to Rule 12. So, although they are commonly called the 12 Rules, there are actually 13 numbered rules when Rule 0 is included. Let's understand each one. Rule 0 – The Foundation Rule A database system must manage its data entirely through its relational capabilities. In simple words: If a system claims to be a relational database, it should use the relational model to manage and access its data. Real-world example: Imagine our college management system uses relational tables to store student information. The system should manage that information through its relational database capabilities rather than depending on an entirely different mechanism for its core database operations. Rule 1 – The Information Rule All information in a relational database should be represented logically and consistently as values in tables. In simple words: Information should be represented in one consistent relational form. Real-world example: Student names, registration numbers, departments, and marks are stored as values in their respective table columns. The database should represent its information in this consistent tabular form. Rule 2 – Guaranteed Access Rule Every individual data value should be accessible using a combination of the table name, primary key value, and column name. In simple words: We should have a reliable way to find any particular piece of information. Real-world example: Suppose we want to find the department of the student whose Student_ID is 101. We can identify the information using: Table: Students Primary key: 101 Column: Department This gives us a clear and reliable way to access the required value. Rule 3 – Systematic Treatment of NULL Values A relational database should handle missing or unknown information consistently. In databases, NULL represents the absence of a known or applicable value. It is not the same as zero or an empty string. Real-world example: Imagine a student has not yet received their examination result. Instead of entering zero marks, the database can store NULL because the result is not yet available. This helps distinguish missing information from an actual result of zero. Rule 4 – Dynamic Online Catalog Based on ...

Powered by Readybot.io

Codd’s 12 Rules: The Foundations of Relational Databases

Fix Docker Read-Only File System Errors in CI

DEV Community

Docker mkdir /var/lib/docker: read-only file system in CI

Docker mkdir /var/lib/docker: read-only file system means the daemon tried to create a directory under its own data root and the kernel refused because the filesystem holding it is mounted read-only. This is a host condition rather than anything about your image or your workflow, and the daemon is reporting it accurately from one level below where a job can reach. One read-only mount, three different operation words. The path is the constant and the verb is whatever the daemon tried. What this error means Pulls, builds and runs all fail together, with paths under /var/lib/docker in the message and an operation word at the front that changes depending on what the daemon was doing. One public report of a single broken host carries mkdir, unlinkat and open forms of the same failure within a few lines of each other, which is the tell: when the data root goes read-only, everything that writes there fails, and each failure names whichever call happened to hit it. ```The line abiosoft/colima#883 reports (quoted, not a recorded run) API error (500): mkdir /var/lib/docker/overlay2/a784aef8fbf3af0f2a38904f816e31b88e268056b829a6b35028d77864d4a4c2-init: read-only file system

Common causes

The kernel remounted the filesystem read-only after I/O errors

The most common cause on a machine that was working earlier. A failing virtual disk produces read or write errors, and the kernel protects the filesystem by refusing further writes. Every Docker operation that touches the data root fails from that moment, which is why the errors arrive in a burst rather than one at a time.

The host root filesystem is read-only by design

Immutable and hardened host images ship a read-only root, and a daemon whose data root still points at the default path under it has nowhere to write. In our experience this is the cause when the failure is present from the very first container on a freshly provisioned host rather than appearing partway through its life.

The data root was pointed at a mount that is not writable

A data-root set in daemon.json to a network share, a snapshot or a volume mounted with the ro option produces this immediately. The setting looks right in the config and the mount options are where the problem actually is, so checking the config alone will not find it.

A container was given the data root as a read-only bind

Tooling that mounts /var/lib/docker into a container to inspect it sometimes mounts it read-only, and a nested daemon handed that mount reports exactly this. Here the host is fine and the container is the one that cannot write, which a mount listing inside the container settles.

How to fix it

Find out whether the mount or the config is the problem

  1. Ask where the daemon thinks its root is, rather than assuming the default path.
  2. Read the mount options for that path with findmnt, which prints ro or rw plainly.
  3. Check the kernel log, because a mount that went read-only will say why it did.

```Terminal
docker info --format '{{.DockerRootDir}}'
findmnt -no OPTIONS -T "$(docker info --format '{{.DockerRootDir}}')"
dmesg | grep -i -E 'remount|read-only|I/O error' | tail
Move the data root onto a volume you control On a self-hosted runner, give the daemon a dedicated writable volume rather than leaving it on whatever the host image provided. This survives host images that harden the root filesystem, and it gives you something you can size and monitor separately from everything else on the machine. { "data-root": "/mnt/docker-data" }
Remount read-write only when the kernel has not objected If the mount is read-only because of how it was mounted rather than because the kernel demoted it, remounting is the fix. If the kernel demoted it after I/O errors, remounting without repairing the filesystem first is how a bad disk becomes a corrupt one, so read the kernel log before you touch it. mount | grep /var/lib/docker
sudo mount -o remount,rw /var/lib/docker
Fail the job on an unwrit...

Powered by Readybot.io

Fix Docker Read-Only File System Errors in CI

Buburu: Building a Women’s Safety App in 48 Hours

DEV Community

Buburu: A Women's Safety App Built in 48 Hours, Born From a Walk We Never Forgot.

This is a submission for the MLH x DEV Writing Challenge. Buburu is an app for women’s safety that we decided to create to help women feel safe during their walks. We named the app Buburu and its users ladybugs because there is not only one ladybug who saves Paris: we are all ladybugs who can save the world. The interface follows that theme, and users can choose their own colors. 🐞 We built the frontend with Java Script, React and Leaflet, used Java, Spring Boot for the backend, and stored our data in H2. Auth0 handled sign-in, OpenStreetMap provided the map, and OpenRouteService calculated walking routes. https://github.com/AmeliaDrag/UNIHACK2026 Why we built it During our first week at university in Timișoara, we went out to explore the city and get to know each other. A naked man started following us. A stranger who was walking his dog noticed what was happening, stayed with us, and walked us home. That story had a happy ending only because the man walking his dog had good intentions. It could have been much worse, and for many women it is. In a survey of 1,694 women in Romania aged 18 to 65, 95% said they had been harassed on the street (as reported by F-Sides). Across the EU, about three in ten women aged 18 to 29 (28.3%) reported having experienced stalking in 2021 (Eurostat). After that night, I wanted an app where my mom, my friends, and the girls I know could look out for each other. At our hackathon, we had 48 hours to build a first version. How we built it, step by step Sketch the flows. We drew the main screens on paper and worked out how people would move between the map, reporting, the account page, and SOS. Split the work. One teammate owned the Java backend. We divided the frontend by screen so we could work in parallel. Prototype the interface. After the team discussed what each screen should do, I laid out the pages. We used Canva, Figma, and AI tools to explore the design and develop the ladybug theme. Build the screens and connect the API. We used React 18 with JSX, Vite for local development and builds, Leaflet and React Leaflet for the map, the Auth0 React SDK for sign-in, and plain CSS for styling. The backend, in the words of the teammate who built it I built the backend with Java 21 and Spring Boot, using H2 to store users, trusted contacts, incident reports, and SOS alerts. Each report stores its coordinates, type, and expiry time. Trusted contacts are directional. If Ana invites Maria and Maria accepts, Maria receives Ana’s SOS alerts. For Ana to receive Maria’s alerts, Maria needs to invite her separately. For each walking route request, the backend queries active reports and converts their circular map zones into polygons for OpenRouteService. Computing those polygons on demand means expired reports are automatically excluded from the next request. If no route is found, the backend retries once without the avoidance polygons and returns avoidsReports: false, which the frontend uses to warn that the fallback route may cross reported areas. For the demo, the backend loaded a local OpenStreetMap export at startup to populate the 24/7 shop layer without a live data request. The hardest bug: Debugging the sign-in flow Clicking Sign in sent us back to the first page. In one attempt, the Account screen displayed Invalid state. While sign-in was broken, we couldn't test incident submission or SOS through an authenticated account. We first added type="button" to rule out an accidental form submission. The buttons were already outside a form, so we moved on to the app’s session state and the Auth0 callback. Stale guest state. A leftover guest flag could hide the sign-in controls. The app now checks that guest mode is actually enabled before honoring the flag. Two callback handlers. Both main.jsx and Auth0Provider handled the redirect. We removed the one in main.jsx so the provider owns the callback. API authorization. We fixed the app’s API authorization in the Auth0 dashboard and surfaced sign-in error...

Powered by Readybot.io

Buburu: Building a Women’s Safety App in 48 Hours

Cloud Run vs GKE: Choose the Right Container Platform

DEV Community

Cloud Run vs GKE: Picking a Home for Your Containers

A small API with spiky traffic and a 20-service platform need different things Imagine two teams. One has a small product API that is quiet at 3 am and busy at lunch. The other runs about 20 microservices for checkout, payments and orders, with steady traffic all day and strict rules about which service can talk to which. Both have Docker images ready. Where should each one run? The problem The same container can run on Cloud Run or on GKE (Google Kubernetes Engine). Picking the wrong one hurts in a predictable way: Put the small spiky API on GKE, and you pay for node VMs that sit idle at night, and someone has to look after a cluster. Put a large, tightly networked platform on Cloud Run, and you can end up fighting for control you do not have: sidecars, pod-level network rules, node pools tuned for a sale. The choice is not about which tool is better. It is about traffic pattern and how much control you need. The solution: choose by traffic and control Cloud Run is serverless. You deploy a container and Google runs it. Scales to zero when idle, and adds instances when traffic arrives. Billed per request and compute time, so a quiet night costs close to nothing. Best for stateless services with spiky traffic. Scaling is set at deploy time: gcloud run deploy product-service \
- -image=REGION-docker.pkg.dev/PROJECT/repo/product-service:a1b2c3d \
- -min-instances=0 --max-instances=20
GKE is managed Kubernetes. You run pods on nodes. You pay for node VMs that are always on, plus a cluster fee. Best for steady load, sidecars and strict networking such as Kubernetes NetworkPolicy ("payment accepts traffic only from checkout"). Scaling has layers: the HPA adds pods when CPU crosses a target, and when nodes fill up, the Cluster Autoscaler adds nodes. Both shrink after the peak. How each one sits behind the load balancer Both can sit behind the same External Application Load Balancer, but they attach differently. Cloud Run GKE Attached via Serverless NEG Pod NEG LB health checks None to configure Yes, on pods Who spreads load across instances Cloud Run The LB, straight to pods Scaling Cloud Run autoscaling HPA for pods, Cluster Autoscaler for nodes You manage Very little Cluster, nodes, YAML Applying it to the two teams The small spiky API goes on Cloud Run. It scales to zero at night and scales out at lunch on its own. There is no cluster to patch and no node pool to size. The 20-service platform probably goes on GKE, at least for the core services. With that many services talking to each other, the team benefits from Kubernetes networking rules, sidecars and the ability to pre-scale node pools before a known sale. In a Flipkart-style example design, checkout runs on GKE so the team controls pod counts and node pools, while product and auth stay on Cloud Run because they need less tuning. A mixed setup is normal. One load balancer and one URL map can send /api/product/ to Cloud Run and /api/checkout/ to GKE pods. Trade-offs and limits Twenty services is not an automatic GKE. If those services are stateless and loosely coupled, Cloud Run can run all of them. I would ask what the team actually needs from Kubernetes before paying for it. Cloud Run and Cloud SQL connections. Cloud Run can scale to many instances, and each one opens database connections. I would keep a small pool per instance, cap max instances and use pooling. Close the public URL. Every Cloud Run service has a public run.app address that skips the load balancer. I would set ingress to internal and Cloud Load Balancing. GKE needs pre-scaling for known spikes. At max replicas, requests queue, latency rises, then the load balancer returns 503. For a planned sale I would raise minimums before it starts. Watch idle clusters. A forgotten practice GKE cluster keeps billing. A budget alert does not stop anything by itself, but it tells you early. Takeaway Cloud Run: spiky, stateless, little to manage, pay per use. GKE: many services, steady load, control over pods, node...

Powered by Readybot.io
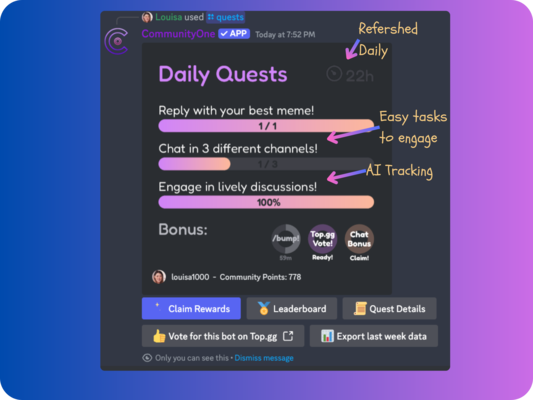
Cloud Run vs GKE: Choose the Right Container Platform

Software Handover Checklist: Essential Documents

DEV Community

What documents should we get at software handover?

At software handover you should receive all functional and non-functional requirements documents, system architecture descriptions, test approval records, deployment documentation, and administrative credentials. On our projects, at handover the client receives the source code, the documentation, the tests and every credential. The SWEBOK Guide describes a software requirements specification as the basis for agreement between customers and suppliers on what the software is to do and what it is not expected to do. What are the documents needed to handover? A proper software handover provides your business with operational independence. When technical contractors complete custom software development, your organisation must receive tangible artefacts that make maintenance straightforward. Without thorough technical documentation, simple upgrades or maintenance tasks require contacting the original programmers, creating vendor lock-in that drives up operational expenditure. On every project we deliver, you own the source code, the data, the documentation and every credential, with no lock-in and no black box. These documents include the technical design records, operational deployment guidelines, automated test instructions, and administrative manuals needed by internal engineers to operate the software without external reliance. Clear operational documentation ensures continuity for corporate leadership across staffing changes. If internal staff changes occur, incoming technical personnel can review existing records and maintain application stability immediately. When systems lack thorough handover packages, companies risk severe operational bottlenecks during routine maintenance and security updates. A complete handover file also includes the original requirements baseline, showing exactly what functions were requested, approved, and verified. When leadership retains structured specifications alongside repositories, auditing application capabilities requires no guesswork from new personnel, preserving institutional memory and protecting capital investments. What documents are required for software development? Before engineering begins, we produce a Business Requirements Document, a Software Design Document and a functional and non-functional software requirements specification, agreed with you before engineering begins. These formal files set concrete expectations across engineering, operational, and commercial teams. A Business Requirements Document captures what the business needs and why. The document establishes practical commercial objectives and clarifies core operational pain points. Documenting workflows prevents unaligned development sprints and preserves development momentum across commercial milestones by creating a clear business baseline. Meanwhile, a Software Design Document describes how the software will be built to meet the requirements. It outlines system interfaces, database structures, application layers, and server infrastructure configurations before programming starts, giving engineering teams a shared blueprint to follow. Our software requirements specification sets out the functional and non-functional requirements, aligned with ISO/IEC/IEEE 29148. For deeper discovery preparation, explore our guides on software development process to understand how structured planning protects schedules and budgets. Retaining these requirements specifications at final handover allows your engineers to understand historical architectural trade-offs. It shows what functional constraints shaped the current design, making future revisions transparent and enabling any capable development team to extend the software efficiently. How do requirements specifications protect technical scope? Software requirements specification establishes the basis for agreement between customers and contractors or suppliers on what the software product is to do as well as what it is not expected to do. This baseline helps both parties avoid...

Powered by Readybot.io

Software Handover Checklist: Essential Documents