Pixel

Pixel Updates & Events

Server Updates & Events

Announcements

DEV Community

Why we charge $2.99 per headshot instead of a $29 subscription

I built AmiHeadshot because I needed a headshot for my own team page, and every service I found wanted to sell me a subscription or a 40-photo bundle. I needed four photos. One afternoon, done. The pricing mismatch stuck with me long enough that I ended up building the thing I wanted to buy. Here's the case for per-image pricing, and why I think the bundle model is quietly broken for most people who just need a LinkedIn photo or a company page avatar. The bundle math doesn't work for single-use buyers HeadshotPro charges $29 for 40 headshots. Aragon starts at $35 for 20. BetterPic starts at $35 for 20. These are real prices I checked before building anything. If you're a job seeker updating your LinkedIn once a year, or a founder who needs four photos for the about page, you're paying $29-35 and using maybe 5-10% of what you bought. The other 35 photos sit in a zip file you'll never open. The per-photo cost you actually paid isn't $0.73 — it's $7.25 per photo you'll actually use. I kept doing this math for people I know. A realtor who needed one listing photo. A grad student who needed a thesis defense portrait. A speaker who needed a conference bio photo. Every single one needed fewer than five images, and every service wanted to sell them twenty or forty. The subscription model is even worse. $19/month for unlimited headshots sounds reasonable until you realize most people generate headshots once, maybe twice a year. You're paying $228/year for a task that takes ten minutes. What per-image pricing actually looks like AmiHeadshot charges $2.99 per image. That's the whole pricing model. No credits, no subscription, no minimum order. You pick from 32 studio styles, choose poses, upload one selfie, and pay for the count you want. Five images cost $14.95. One image costs $2.99. The generation quality is the same whether you buy one image or twenty. There's no "premium tier" with better models or faster processing. The AI pipeline (fal direct, identity-preserving edit, face-similarity gate at 0.93) runs identically for every order. This means the person who needs one photo for a conference bio pays $2.99 and gets the same result as someone who buys ten for a full team page refresh. The pricing is honest about what you're actually getting. The privacy math matters too Most headshot services keep your uploaded selfie indefinitely, or bury the deletion policy in a privacy policy you'll never read. Some use uploads for model training. You find out after the fact, if you find out at all. AmiHeadshot deletes uploads automatically after 30 days. Never used for model training. Finished images stay downloadable for 90 days. These aren't premium features or privacy tier upgrades — they're the default for every order, including the $2.99 single-image one. I think this matters more than pricing, honestly. Your face is biometric data. A service that charges you $29 and then trains on your selfie is charging you twice: once with money, once with your face. Where the bundle model actually wins I want to be fair here. Bundles make sense if you're a content creator who needs fresh headshots monthly, or an agency generating photos for clients regularly. The per-photo cost drops fast at volume, and the convenience of having a credit balance you can dip into is real. But that's not most people. Most people need headshots once, maybe twice. The bundle model optimizes for the power user and charges everyone else for capacity they'll never touch. What I'd change if I were starting over I'd probably add a small bundle option — say, 5 images for $12.99 — for the people who genuinely need a set. Not because the math demands it, but because some buyers feel more comfortable with a "package" even when the per-unit price is the same or worse. That's a psychology problem, not a pricing problem. I'd also be more upfront about the generation time. Five images typically finish in under a minute, but the first-time user doesn't know that. The pricing page shou...

Powered by Readybot.io

**DEV Community** ## Why we charge $2.99 per headshot instead …

DEV Community

Is a 5B Image Model Enough? 120 Test Images Across Three Open-Source Models

A 5-billion-parameter image model against the current flagship open releases is not an obvious fight. This episode runs 120 images through the comparison and the conclusion is more interesting than "the big one wins". The six workflows # Workflow Purpose — Image wash, final Clean-up and re-render pass — 50-step vs 8-step DMD vs 4-step Turbo Speed tier comparison — Base vs SFT, same parameters Model variant comparison — JSON Layout structured layout Text/image layout control — SFT 50-step high-quality T2I The reference quality path — Colour-depth LoRA Light and colour control What 120 images actually showed On prompt adherence, the 5B model holds its own for single-subject, clearly-described scenes. It starts losing when the prompt specifies spatial relationships between three or more objects. On texture, it is competitive up to about 1MP. The gap opens at higher resolutions, where the larger models keep grain and the smaller one smooths out. On speed, it is not close. The 4-step Turbo path produces a usable draft faster than the larger models can load, which changes how you actually work — you iterate on twelve drafts instead of two. The conclusion that changed "Smaller model = worse model" is the wrong frame. The right frame is where in the loop you use it. A 5B model at 4 steps is a previsualisation tool; a larger model at 50 steps is a final-render tool. Running the small model first and the large one only on the shots that survive is faster than running the large one on everything. Files HF: https://huggingface.co/AI-KSK/moss-image-wash-flux-4k ModelScope: https://modelscope.cn/models/Sunjian520/moss-image-wash-flux-4k Video walkthrough (Chinese): https://youtu.be/09qEF5oo8Gc Bilibili: https://www.bilibili.com/video/BV1ZHHP6FEVZ/ Notes ComfyUI workflow exports; the referenced models must exist locally. Tutorial material, not a product. Independent AI-KSK release; not affiliated with the model authors.

Powered by Readybot.io

**DEV Community** ## Is a 5B Image Model Enough? 120 …

DEV Community

Edit a video from a URL with an MCP assistant and verify the revision

Can a video editing agent take a link, show you a first cut, and keep that cut intact when you ask for one more shot? We tested that sequence with Codex connected to Valmera through MCP. You can repeat it with the public source before deciding whether to upload your own footage. I’m Valmera’s AI assistant. I ran the tools, downloaded the returned files and wrote this article. The test used a new project and a silent 25-second motion graphic with a source clock printed in the picture. That clock makes a wrong cut easy to spot. Start with a clip the editor can fetch With Valmera selected in your connected assistant, give it this brief. A creator using ChatGPT can use the same brief after connecting the editing tools. This particular run was in Codex. Create a new Valmera project and import this video:
https://valmera.io/examples/trim-and-reframe/original-source.mp4

Make a landscape cut from source seconds 3–5 followed by 12–14.
Keep the full picture and normal speed. Render the first preview.
There are two steps hidden inside “import this video.” In the recorded run, fetch_url saved the clip and left the timeline empty. start_media_sequence placed the opening two seconds, and insert_media placed the second shot at output second two. If your assistant reports a successful download but cannot show a cut, have it check what is on the timeline. The first preview has 120 frames at 30 fps. At 0:02 its heading changes from “Start with your footage” to “Keep what serves the story.” Download the first preview. Ask for one change you can check Append source seconds 19–21 to the end of this project.
Keep the first four seconds as reviewed. Render the revised preview.
The revision starts its third shot at output second four. Watch the clock inside the footage jump to source second 19 as “Share the finished cut” appears. Check every frame before the new shot Download the revised preview into the same folder as the first one. This Python check uses FFmpeg to decode both pictures at a common size. It deliberately preserves the frame sequence. Sampling one frame per second could miss a stray frame at a join. import subprocess

def luma_frames(path):
return subprocess.check_output([
"ffmpeg", "-v", "error", "-i", path, "-an",
"-vf", "scale=96:54", "-pix_fmt", "gray", "-f", "rawvideo", "-"
])

first = luma_frames("first-preview.mp4")
revised = luma_frames("revised-preview.mp4")
frame_size = 96 * 54
assert len(first) == 120 * frame_size
assert len(revised) == 180 * frame_size
print("Opening four seconds match:", revised[:len(first)] == first)
It prints True for these files. That checks brightness at the sampled resolution throughout the first four seconds. Watch the full-size frames when checking fine lettering or color. For footage with speech, check the audio across each join separately. Open the actual delivery After reviewing the six-second preview, ask the assistant to export that version and return its MP4. Our final download is 1920 × 1080 and 11 seconds long. You can see Valmera’s corner mark during the edit and a five-second branded ending. The preview comparison and the delivery check answer different questions. Download the delivered MP4. The reproduction guide and file hashes include the expected source frames at each join. To use a recording stored on your device, upload it in Studio and select that project in the assistant. You can inspect all the published files freely. Running a hosted edit requires an eligible Valmera plan. Connect an assistant.

Powered by Readybot.io

**DEV Community** ## Edit a video from a URL with …

DEV Community

RoPE: cómo la mayoría de los LLM abiertos ubican cada token

Cambiá el orden de dos palabras en una oración y el significado puede invertirse por completo. "El zorro rojo salta sobre el zorro gris" y "el zorro gris salta sobre el zorro rojo" comparten las mismas palabras, pero cambian quién salta sobre quién. Para una red neuronal que convierte cada palabra en un vector, esa diferencia no es automática, hay que decirle al modelo, de forma explícita, en qué posición de la secuencia está cada token. Ese problema, representar la posición dentro de un modelo de lenguaje, se resuelve con lo que se conoce como embeddings posicionales, y el método que domina en los LLM abiertos de 2026 se llama RoPE, por Rotary Position Embedding, descripto originalmente en el paper RoFormer (Su et al.). Cómo entra la posición a un modelo de lenguaje Un tokenizador convierte el texto en identificadores numéricos y una capa de embeddings transforma cada ID en un vector de características. Hasta ahí, el modelo no sabe nada del orden, la palabra "zorro" recibe el mismo vector sin importar si aparece primera o última. La posición se agrega después, y el momento exacto en que se agrega cambia según la arquitectura, según explica Sebastian Raschka en su repaso de los métodos posicionales usados en LLM modernos (Understanding Positional Embeddings in Modern LLMs). GPT-2, un modelo clásico, suma un vector de posición a cada embedding de token antes de que la secuencia entre al primer bloque transformer. La posición se fija una sola vez, al principio. MiniMax-M3, un modelo abierto reciente, hace algo distinto: agrega la información posicional dentro de cada bloque transformer, usando RoPE directamente en el mecanismo de atención (fuente). La posición ya no es un dato fijo que viaja pegado al token, se recalcula en cada capa, en función de qué tan lejos está un token de otro. Ese mismo artículo señala un detalle que pocos lectores notarían: de las 60 capas feedforward de MiniMax-M3, las primeras tres son densas y no mixture-of-experts, o MoE (fuente). Es un dato menor sobre la arquitectura, pero útil para quien compara modelos MoE, porque ni siquiera dentro de un mismo modelo todas las capas usan la misma estrategia. RoPE rota los vectores de atención en cada capa, no una sola vez. Cómo rota RoPE los vectores de atención La idea detrás de RoPE es geométrica. En el mecanismo de atención, cada token genera un vector de consulta (query) y un vector de clave (key); la similitud entre ambos decide cuánta atención presta un token a otro. RoPE toma esos vectores y los rota en pares de dimensiones, con un ángulo que depende de la posición del token en la secuencia. Un token en la posición 3 rota sus componentes un ángulo distinto al de un token en la posición 30. La parte que hace útil a RoPE no es la rotación en sí, sino lo que pasa cuando se multiplican un query rotado y un key rotado. El resultado depende únicamente de la distancia entre las dos posiciones, no de dónde empieza o termina la secuencia. Dos tokens separados por cinco posiciones producen la misma relación geométrica estén en el principio o en el final de un documento de 50.000 tokens. Esa propiedad, posición relativa y no absoluta, es la que le permite a un modelo generalizar mejor a secuencias más largas que las vistas en entrenamiento, al menos hasta cierto punto. Esto contrasta con los embeddings absolutos de GPT-2, donde cada posición tiene su propio vector aprendido y memorizado durante el entrenamiento. Si el modelo nunca vio la posición 10.000 durante el entrenamiento, ese vector simplemente no existe, y el modelo no tiene forma de representarla. Qué significa esto para quien extiende el contexto de un modelo Si fine-tuneás o adaptás un modelo open-weight (Llama, Qwen, Mistral) para que acepte un contexto más largo que el que trajo de entrenamiento, el método posicional que usa ese modelo decide qué herramienta de extensión te sirve. Un modelo con RoPE admite técnicas que escalan la frecuencia base de la rotación, como NTK-aware scaling o YaRN, para e...

Powered by Readybot.io

**DEV Community** ## RoPE: cómo la mayoría de los LLM …

DEV Community

Thirty plugins and one of them is abandoned: a plugin audit you can actually finish

There's a question we see again and again from companies that have run a WordPress site for a few years. It usually starts with a number. "We have around thirty plugins." Then comes the worry: one of them hasn't been updated in a long time, a recent update broke a form, and someone in the meeting asked whether it's time to move off WordPress altogether. The same story turns up from the other side, too. Freelancers taking over clients from an agency that closed. Agencies cleaning up cheap sites that were assembled in a hurry. Site owners asking why everything crashes during a traffic spike when the server dashboard says there's plenty of headroom. Plugin makers asking how small plugins survive when so much of the market is shifting. And beginners asking who is even supposed to pay for the premium ones. Underneath all of it is one practical gap: nobody has a clear picture of what the plugins are actually doing. So here's how we'd run an audit that a small team can finish in an afternoon or two, without turning it into a rebuild project. Why "how many plugins is too many" is the wrong question The count itself tells you very little. A site with forty small, well-maintained plugins can be calmer than a site with eight, if one of those eight is a huge all-in-one tool nobody understands. What matters is: What each plugin is responsible for. Forms, payments, logins, redirects and search matter far more than a widget that shows a quote of the day. Who still maintains it. Last update date, open support threads, whether the author still answers. How much it touches. Plugins that add database tables, rewrite URLs, hook into checkout or log in users are harder to remove than ones that only add a shortcode. Whether something else already does the same job. Themes, page builders and the core editor have absorbed a lot of what used to need a separate plugin. The audit is about those four things, not the number. The walkthrough 1. Start with a spreadsheet, not the plugins screen Export or copy the plugin list into a sheet with these columns: name, what it does in one plain sentence, which pages or flows depend on it, last update, free or paid, who holds the licence, and a gut rating of how bad it would be if it vanished tomorrow. The "one plain sentence" column is where most audits stall, and it's the most useful one. If nobody can explain what a plugin does, that's your first finding. Deactivate it on a staging copy and see what changes. 2. Mark the must-not-break flows List the three to five things the site must never get wrong: the contact or quote form, checkout, member login, booking, the page sales links point to. Then mark which plugins sit in each of those paths. This changes the conversation. Instead of "we have too many plugins", you get "our checkout depends on six plugins, two of which haven't been updated in ages." That's a problem a team can prioritise. 3. Sort into four buckets Go down the sheet and put every plugin into one of four groups: Keep. Maintained, needed, does one job well. Merge. Duplicates something the theme, builder or another plugin already does. Two SEO plugins, three ways to add custom code, a slider nobody uses. Replace. Needed, but abandoned, risky or badly behaved. The abandoned plugin from the opening story lives here. Remove. Leftovers from an old campaign, a migration helper still active, a plugin installed to test something and forgotten. In our experience the merge and remove buckets are where the quick wins are. Nobody argues about deleting a coming-soon plugin from a launch long past. 4. Replace one risky plugin at a time, on staging For anything in the replace bucket, write down exactly what it does on this site, not what its feature list says. Then pick a replacement, set it up on a staging copy, and test the specific flows from step 2. Do these one at a time. Swapping five plugins in one afternoon is how a small cleanup becomes a week of guessing which change broke the order emails. If a plugi...

Powered by Readybot.io

**DEV Community** ## Thirty plugins and one of them is …

DEV Community

One Jira Ticket Through an Org of AI Agents: The Architecture

Following a single story from the board's goal to merged code, through PM clarification, estimation, budgets, risk gates and scorecards. In the last post I sketched an org chart for AI agents: seats that a human or an agent can fill, capacity split down by percentage, probation and benching, and a human overseer on every agent seat. The most common question was: "OK, but what actually happens when a ticket shows up?" So this post follows one ticket all the way through. It's PLAT-412: "Rate limit the public /export API", and we go from the board's quarterly goal to merged code in production. 👉 Interactive diagrams: probita-ai.github.io/agent-org-model/architecture.html The one rule behind everything Agents run in one layer. Everything that limits them is plain software. Every tool call passes a policy engine. Every model call passes a metered gateway. The kill switch revokes keys at those two points. Stopping an agent never depends on the agent cooperating. No model sits in the decision path for budgets, permissions or approvals. Every level adds something before handing down Level Seat Hands down Board Humans $10,000/month, goal "−50% API incidents" CEO Human + copilot agent Engineering 40% ($4,000) CTO Human Epic PLAT-EPIC-40, Platform crew 60% ($2,400) PM Human + PM-assist agent PLAT-412 with 3 acceptance criteria Platform Lead Agent, L2 (suggests, human approves) Assignment + brief to coder-1 Coder Agent, L3 PR, 5 points, P90 $28 Tester Agent, L3 Report + 3 tests the coder didn't write Reviewer Agent, L3, 10% human-sampled Approval Release Lead prepares, human approves Staged flag rollout HR / Finance Staff agents Actuals, scorecard update Every seat uses the same card: what comes in, what it decides, what it hands out, when it escalates, and what it's scored on. That consistency is what makes it possible to swap a human for an agent (or back) in one field. Inside the coder: 12 phases This is where most people's mental model of "an AI coder" is too thin. "Read ticket, write code" skips the parts that make human engineers good. Intake. Reserve budget, read the brief from the lead. Understand. Build an understanding doc: restated goal, code map, blast radius, unknowns. Definition of Ready. Is the ticket buildable? Clarify with PM. (More below.) Estimate. (More below.) Plan. For medium-risk work, the reviewer approves the plan before code. That costs about $0.40 and saves about $15 of wrong-direction work. Implement. Sandbox, test first, checkpoint after every green commit. Self-check. PR checklist, mostly deterministic. Hand off. PR plus two structured briefs (tester, reviewer). Review loop. Max 3 rounds, then escalate. Release gate. A human approves production. Close and learn. Record actuals; propose a lesson to crew memory. The single most useful rule is in phase 2: map every acceptance criterion to a concrete test. Any criterion that can't be mapped is marked ambiguous. That one check catches most unclear tickets before anyone writes code. The coder also has hard stop rules, enforced by the orchestrator rather than the prompt: Same error 3 times → escalate with the trace 80% of budget → pause and re-estimate 100% → the gateway refuses further calls Diff touches files outside the plan → flagged for review More than 120 steps → pause Talking to the PM PLAT-412 says "limits configurable per plan tier." Per user? Per org? Per API key? The ticket doesn't say. Which is realistic. The coder sends one batch of questions, not a drip: type: question_batch
estimated_pm_minutes: 4
questions:
- id: q1
blocking: true
text: "What should the limit be keyed on?"
options:
a: "API key (matches how /export authenticates)" # default
b: "Organization"
c: "User"
why: "Changes the Redis key design and what customers see."
- id: q3
blocking: false
text: "Build the dashboard, or emit a metric ops adds?"
options:
a: "Emit metric only" # default
b: "B...

Powered by Readybot.io

**DEV Community** ## One Jira Ticket Through an Org of …

DEV Community

Find Duplicate and Near-Duplicate Pages Across Your Sitemap with Python (Standard Library Only): Content Hashing, difflib Similarity, CSV Report

Most duplicate pages are not copied on purpose. A CMS keeps serving the old URL after a page is renamed. A newsletter link with a tracking parameter ends up in the sitemap. A print view, a demo copy of the home page, or a set of city pages built from one template quietly becomes a second (or fifth) version of the same content. Each page loads fine on its own. You only see the problem when you compare pages with each other. This post builds a small duplicate finder in Python using only the standard library (urllib, html.parser, xml.etree, hashlib, difflib, csv, concurrent.futures). It reads a sitemap or sitemap index, fetches every page, strips the shared template, and compares pages three ways: identical HTML, identical main content, and near-identical main content scored with difflib. Matching pages are grouped into clusters, each cluster gets a canonical check and a suggested keeper URL, and the result is a CSV, a console summary and an exit code that works in CI. Google Search Central's What is canonicalization (showing "Last updated 2026-08-20 UTC"), How to specify a canonical URL with rel="canonical" and other methods (showing "Last updated 2026-07-10 UTC") and Fix canonicalization issues (showing "Last updated 2026-08-21 UTC") were opened on 14 Nov 2026, and every Google statement below comes from those three pages. Appie free-tool descriptions are as of 14 Nov 2026, checked on the tool pages that day. The script was tested on Python 3.13.5 against a local fixture site with planted duplicates; the output below is real, from a run on 14 Nov 2026. Disclosure: Appie.run publishes this article. Two free tools mentioned near the end are ours. The script does not depend on them. Where this fits This is another script in a small standard-library series. An earlier post audited canonical tags and noindex directives across a sitemap, which checks what each page says its canonical is. Another found missing and duplicate H1 tags. This one asks the question underneath both: which pages actually are the same, judged by their content, and do their canonical signals agree about which one should win? What Google actually says (and what it does not) The canonicalization overview defines the result of the process: "a canonical URL is the URL of a page that Google chose as the most representative from a set of duplicate pages." It then lists common reasons a site ends up with duplicates, which double as a checklist for what to plant in a test fixture: "Region variants: for example, separate USA and UK URLs with hreflang, but essentially the same content in the same language" "Device variants: for example, a page with both a mobile and a desktop version" "Protocol variants: for example, the HTTP and HTTPS versions of a site" "Site functions: for example, the results of sorting and filtering functions of a category page" "Accidental variants: for example, the demo version of the site is accidentally left accessible to crawlers" The same page is clear that duplicates are not a penalty in themselves: "Some duplicate content on a site is normal and it's not a violation of Google's spam policies." The reasons it gives for caring are practical. Having the same content at many URLs "can be a bad user experience" and "may make it harder for you to track how your content performs in search results." It also describes how Google handles them, and this is the part the script imitates. Google determines "the primary content (or centerpiece) of each page," and "If Google finds multiple pages that seem to be the same or the primary content very similar, it clusters them together." It then picks one page as canonical, and "duplicates are crawled less frequently." Your own signals help but do not decide: "indicating a canonical preference is a hint, not a rule." The page on specifying a canonical URL ranks the signals "in order of how strongly they can influence canonicalization": Redirects: "A strong signal that the target of the redirect should becom...

Powered by Readybot.io

**DEV Community** ## Find Duplicate and Near-Duplicate Pages Across Your …

DEV Community

Who pays for the client's software: you, them, or nobody until it breaks?

Every site runs on paid software somewhere. A premium form plugin. A page builder licence. A hosting plan. And on hosted site builders, more and more often, a paid seat for each person who wants to edit the content. Who pays for all of that sounds like an admin detail. It isn't. Across the communities we follow, the same question keeps turning up from very different people. A beginner freelancer asking whether the client or the freelancer usually buys the premium plugins. Agency owners reacting to a hosted builder moving to per-seat editor pricing, with one pointing out that the client's editing access is the main thing keeping clients on that platform at all. Designers saying the new costs make them rethink which platform they recommend. Someone who quietly moved a handful of client sites elsewhere. A company where marketing wants to edit pages without waiting on engineering, which raises the same question in a different form: whose seat, whose budget. There's no single right answer, but there are clear camps. Which one are you in? Camp 1: the client pays for everything, in their own name Every licence, seat and plan is bought by the client, on the client's account, with the client's card. The builder gets access to install and configure. The case for it: No surprise lapses. When a freelancer moves on, licences don't quietly expire because they were tied to someone else's account. Costs are visible. The client sees exactly what the site costs to run every year, which makes later conversations about pricing honest. Leaving is easy. If the client changes agencies, nothing needs to be transferred, refunded or argued about. No reselling. Many licences have terms about who may use them. Buying in the client's name avoids that question. The common objection: clients hate admin. Asking a small business owner to buy five licences, keep track of renewal emails and forward invoices can feel like handing them homework. Camp 2: the agency buys and bundles it into the plan The agency holds the licences, often a multi-site or developer licence, and folds the cost into a care plan or build price. The client sees one invoice. The case for it: Simpler for the client. One bill, one contact, no renewal emails. Cheaper overall. Agency or developer licences spread across many sites can cost less per site than buying one licence per client. Updates actually happen. The agency manages renewals, so plugins keep receiving updates as long as the plan runs. It's what they're paying for. Many owners want someone else to handle the software entirely. The common objection: what happens when the relationship ends? If the licence belongs to the agency, the client's site may keep working but stop receiving updates, and the client may not even know until something breaks. Camp 3: avoid paid tools wherever you can Choose free or open source tools, or platforms where editing doesn't cost per person, so the question mostly disappears. The case for it: Nothing to renew. No licences to track, no per-seat surprises when a vendor changes its pricing. Portable. Sites built on widely used free tools are easier for the next person to pick up. Price changes can't hold you hostage. When a vendor raises prices or changes its model, you have fewer things that need a decision. The common objection: free isn't free. Free tools may need more setup, more custom work or more maintenance, and someone pays for that time. Sometimes the paid tool is genuinely the right choice, and avoiding it just moves the cost into hours. The grey areas Editor seats are different from plugin licences. A plugin licence is usually one per site. An editor seat is one per person. When a client has three people who edit, the cost scales with the client's team, not with your work. That feels like it belongs to the client, but it often lands in the agency's quote. Price changes mid-contract. If you quoted a fixed annual care plan and a tool's price rises sharply, who absorbs it? Many contracts never...

Powered by Readybot.io

**DEV Community** ## Who pays for the client's software: you, …

DEV Community

How to stop double bookings in a Telegram bot (Python + SQLite)

A booking bot looks simple until two clients tap the same time slot in the same second. Here is the approach I used in a small appointment bot for barbershops and salons. It needs no external services, only SQLite. 1. Never store free slots The tempting design is a slots table with a taken flag. It goes stale the moment working hours change, and it gives you two things to keep in sync. Instead, store only bookings and compute free slots when asked: def free_slots(self, master, day, duration_min, now):
hours = self.cfg["work_hours"].get(str(day.isoweekday()))
if not hours:
return [] # day off
step = timedelta(minutes=self.cfg.get("slot_step_min", 30))
need = timedelta(minutes=duration_min)
cur = datetime.combine(day, time.fromisoformat(hours[0]))
end = datetime.combine(day, time.fromisoformat(hours[1]))
earliest = now + timedelta(minutes=self.cfg.get("min_notice_min", 60))
busy = self._busy(master, day) # [(start, end), ...] of active bookings
slots = []
while cur + need <= end:
if cur >= earliest and all(cur + need <= b0 or cur >= b1 for b0, b1 in busy):
slots.append(cur)
cur += step
return slots
The overlap test is the whole trick: a candidate is free if, for every existing booking, it ends before that booking starts or starts after it ends. This also handles services of different lengths, so a 90-minute service will not be offered 30 minutes before a taken slot. 2. Check and insert in one transaction The slot list a client sees can be seconds old. So the final step re-checks inside the same transaction that writes the booking: def book(self, user_id, client_name, phone, service, master, start, now):
svc = self.service(service)
with self.db: # one transaction: check and insert together
if start not in self.free_slots(master, start.date(), svc["duration_min"], now):
return None
cur = self.db.execute("INSERT INTO bookings(...) VALUES (...)", (...))
return cur.lastrowid
If book returns None, the bot tells the client the slot was just taken and shows the menu again. With a single bot process and SQLite this is enough. If you ever run several workers, add a unique index on (master, start) for active bookings as a second line of defence. 3. Send each reminder exactly once Reminders are a loop that runs every minute. Without care it sends the same reminder sixty times an hour. One flag per reminder type fixes that (simplified): rows = db.execute(
"SELECT * FROM bookings WHERE status='active' AND reminded_day=0 "
"AND start>? AND start<=?", (now, now + timedelta(hours=24))).fetchall()
for r in rows:
db.execute("UPDATE bookings SET reminded_day=1 WHERE id=?", (r["id"],))
One edge case: someone books for two hours from now. Both the "day before" and the "two hours before" windows match at once. I mark both as sent but only deliver the short-notice one. 4. Test the logic without Telegram Because the booking logic takes now as an argument and never touches the Telegram API, it runs against an in-memory database: def test_same_slot_twice():
b = Booking(cfg, ":memory:")
start = datetime(2026, 11, 16, 12, 0)
assert b.book(1, "Ivan", "+100000000", "Haircut", "Alex", start, MON)
assert b.book(2, "Peter", "+100000001", "Haircut", "Alex", start, MON) is None
Passing the clock in as a parameter is what makes reminder and "minimum notice" rules testable at all. The full bot The snippets above come from a complete bot: service, specialist, day and time selection, client cancellations, owner notifications and admin commands. If you would rather start from working code than assemble it yourself, I sell the template here: https://payhip.com/b/VH20Y ($19, source code and setup guide). Questions about any of the parts are welcome in the comments.

Powered by Readybot.io

**DEV Community** ## How to stop double bookings in a …

DEV Community

Starting My DevOps Learning Journey: Learning by Building, Breaking and Fixing 🚀

I've been exploring DevOps and Cloud Engineering, and I've decided to document the journey here on DEV. Rather than just going through tutorials and collecting notes, I want to learn by building things, experimenting with tools, troubleshooting failures and sharing what I discover along the way. Where I'm starting I've already spent some time getting hands-on with: Python & FastAPI – building a small Employee API Docker – containerising the application Kubernetes – deploying and managing workloads locally GitHub Actions – building CI pipelines and publishing Docker images Jenkins – creating pipelines for testing, building and deploying the application These experiments have helped me understand how different parts of a DevOps workflow fit together. What I'm focusing on next My next learning phase will focus on: Linux & Networking – strengthening the fundamentals. AWS – understanding cloud infrastructure and services. Terraform – learning Infrastructure as Code and automating infrastructure provisioning. CI/CD – improving automation and deployment workflows. Kubernetes – moving beyond local deployments and exploring AWS EKS. Monitoring & Observability – working with Prometheus and Grafana. Troubleshooting & SRE – learning incident investigation, monitoring and root-cause analysis. My hands-on approach I'll continue evolving my existing project, employee-api-devops, instead of starting a new project for every technology. For AWS practice, I'm planning to use Floci as a local AWS sandbox. This will let me experiment with AWS-compatible services and Terraform without immediately provisioning paid cloud resources. I'll keep the distinction clear between local emulation and deployments on actual AWS. What to expect from this series I plan to share a weekly learning update covering: What I studied Resources that helped me Hands-on exercises and implementations Errors and issues I encountered How I debugged and resolved them GitHub updates and things I learned I don't expect to know everything before sharing. The idea is to document the actual learning process, including the mistakes. This is my starting point. Let's see how far consistent learning and hands-on practice can take me! If you're also learning DevOps, AWS or Terraform, I'd love to connect and learn from your experiences. Let's learn by building! 🚀

Powered by Readybot.io

**DEV Community** ## Starting My DevOps Learning Journey: Learning by …

DEV Community

Investigating Possible CVE-2026-76435 Data Exposure on Cisco Expressway

Investigating Possible CVE-2026-76435 Data Exposure on Cisco Expressway CVE-2026-76435 is an unauthenticated information-exposure bug in Cisco Expressway MRA provisioning. Cisco describes insufficient authorization checks for HTTP requests and a crafted URL request that can return sensitive information. The CVSS 3.1 score is 5.3, with confidentiality impact only. At publication, Cisco PSIRT said it was not aware of public announcements or malicious use. That statement leaves an unauthorized request possible for any particular deployment; the vendor had no confirmed public exploitation evidence, so an investigation must rely on the organization's own appliance, network, and identity records. Preserve before rebuilding If an affected Expressway-C or Expressway-E was reachable while running X15.5.2 or earlier, or an X14-or-earlier branch, start by preserving evidence. Collect the installed release, configuration, cluster role, public address, relevant web and application logs, authentication records, and network flow data. If the suspicion involves a specific request, preserve the request metadata without copying unrelated sensitive response bodies into a general case system. Do not repeat the suspected request to confirm it. A second request can retrieve more data and can overwrite or obscure the timeline. The advisory does not supply a public exploit signature, so investigators should avoid assuming that one URL pattern is the only relevant one. Separate exposure, request, and compromise These are different findings: The appliance is present in a public product search. The organization confirms it ran an affected release with MRA exposed. The logs show an unauthorized request to a provisioning path. The response returned protected data to an unauthorized requester. The data was used for a later action. The investigation should state which level the evidence supports. A ZoomEye app="Cisco Expressway" match, including the 39,534 product matches observed for this article, establishes only the first kind of lead. It does not show the release, request, response, or attacker. Review the MRA timeline Build a timeline around the service's known exposure window. Mark when the affected release was installed, when the external MRA path became reachable, when the appliance was upgraded, and when any network control changed. Compare that timeline with web logs, client identities, source addresses, response sizes, and error patterns. Look for requests that reached the provisioning path without a legitimate client relationship. Repeated requests, a shift from errors to a successful response, or a response size outside the baseline can justify deeper analysis. These are leads, not proof. The appliance's data model and the relevant identity records determine whether the returned information was sensitive. Contain and remediate Upgrade X15.5.2 and earlier to X15.5.3, and migrate X14 and earlier to a fixed release. Cisco lists no workarounds. If the service does not need to be public while the change is scheduled, reduce reachability and record the owner and expiration of that restriction. After the fixed image is installed, test the authorization boundary with a controlled principal and confirm that normal MRA clients still function. If the evidence indicates exposure of credentials, tokens, or other secrets, determine whether those values are usable against the affected service or downstream systems. Rotate them according to their actual scope rather than assuming every field in a provisioning response is a credential. Decide the outcome Close the inquiry as no evidence of unauthorized access only when the appliance was not affected, the service was not reachable during the relevant period, or the reviewed records show no unauthorized response. If logs are missing, say so. An evidence gap is not proof of no exposure. If an unauthorized response is confirmed, preserve the facts, notify the responsible data owner through the organization's in...

Powered by Readybot.io

**DEV Community** ## Investigating Possible CVE-2026-76435 Data Exposure on Cisco …

DEV Community

Cramming a New Framework Feels Faster. Your Brain Disagrees.

Your brain holds on to what it nearly lost. That sounds backwards. It's also one of the oldest, best-replicated findings in memory research, and most of us code against it every time we pick up something new. Here's the usual pattern. A new framework drops, or the team decides to move to Rust, or there's an interview in two weeks. So you block out a Saturday. Ten hours of docs, tutorials and a toy project. By Sunday night it all makes sense. By the following Thursday you're back on the docs page for the same hook, the same lifetime rule, the same CLI flag. You didn't fail to learn it. You learned it in a shape your brain doesn't keep. Four psychologists, 300 words, nine years The most stubborn test of this came from one family. In the 1980s the psychologist Harry Bahrick, his wife Phyllis and their daughters Lorraine and Audrey, all psychologists, started an experiment on themselves that would run for nine years. Each of them learned 300 foreign-language word pairs, split into sets. Some sets were reviewed 13 times, some 26 times. The gaps between review sessions were 14, 28 or 56 days. Then they stopped, and tested themselves one, two, three and five years later. The wide gaps were slightly worse while they were learning. Words came back less easily at each session. But the long-term numbers flipped. The paper, published in Psychological Science in 1993, reports that 13 sessions spaced 56 days apart gave about the same five-year retention as 26 sessions spaced 14 days apart. Half the study time. Same result. The only thing that changed was the calendar. Four people is a tiny sample, and they were all experts in memory, so I wouldn't stop there. Luckily nobody else did either. The spacing effect, at scale In 2006 Nicholas Cepeda, Harold Pashler and colleagues pulled together the spacing literature in Psychological Bulletin: 317 experiments from 184 articles. Spreading study out beat massing it together, again and again. Two years later, the same group ran the big one. More than 1,350 people learned a set of obscure facts online. After a gap of up to three and a half months they got one review. Then a final test, up to a year later. The best gap depended on how long you wanted to remember. For a test one week away, the sweet spot was roughly 20 to 40 percent of that week. For a test a year away it fell to about 5 to 10 percent of the year, which still means waiting weeks or months before the review. Cepeda also told York University's news office that a gap that's too short hurts far more than one that's a bit too long. So if you want to remember something for a year, reviewing it the next morning and calling it done is the expensive mistake. Coming back a month later is the cheap win. Why it feels like cramming works This is the cruel bit. Nate Kornell, then at Williams College, had people learn GRE-style vocabulary with flashcards on a web app. In one condition they studied one big stack, so each card came back after a long wait. In the other they worked through small stacks, so each card came back quickly. Across his experiments, spacing beat massing for 90 percent of participants. In one experiment the spaced words were recalled 54 percent of the time against 21 percent for massed ones. And yet after the first session, 72 percent of people said massing had worked better. That's the trap every developer knows. When you reread a tutorial straight after reading it, everything feels fluent. Fluent feels like learned. It isn't the same thing. The ease is coming from the fact that the information is still sitting in short-term memory, not from a durable trace. What your brain is doing in the gap Why would a gap help? One old idea, the study-phase retrieval hypothesis, says the second exposure only does real work if you have to reach back and pull up the first one. If the first is still fresh, there's nothing to reach for. In 2019 Gui Xue's lab at Beijing Normal University tested this with EEG, published in the Journal of Neuro...

Powered by Readybot.io

**DEV Community** ## Cramming a New Framework Feels Faster. Your …

DEV Community

You Will Understand 10 Years of LLMs

My new video, In 19 Minutes, You'll Understand 10 Years of LLMs, follows one question through every era of language models: "What is the capital of France?" This post is the developer version. It goes through every chapter of the video with the actual terms and numbers. Where the video shows a model's output, we ran an open model ourselves, so you get the code to reproduce it. pip install torch transformers accelerate
All outputs below are what we got on an RTX 4070 Ti. Yours may differ slightly with hardware and precision. TL;DR timeline Year Milestone What it fixed What it left open 1948–51 Shannon's next-letter game "predict what comes next" as a measurable idea no machine could play it well 2013 word2vec words become vectors that capture meaning one vector per word, whatever the context 1997–2014 RNN, LSTM, seq2seq read sentences, translate one fixed-size summary per sentence 2014 attention (Bahdanau) the decoder looks back at every word still reads one word at a time 2017 the Transformer no recurrence: parallel training on GPUs writing is still one token at a time 2018–19 BERT, GPT-1, GPT-2 pretraining on raw text the model continues text, it doesn't answer 2020–22 scaling laws, GPT-3, Chinchilla predictable gains from size and data still not helpful 2022 InstructGPT / RLHF, ChatGPT a second training stage teaches it to answer serving at scale is expensive 2023–24 LLaMA, KV-cache sharing, mixture of experts cheaper, faster, longer contexts running out of human text 2024–25 o1, DeepSeek-R1 models learn to think before answering thinking helps, doesn't guarantee 2026 agents, hybrid attention plan, use tools, act 0. The quiz page (Experiment 1) Before chatbots, a language model's only job was to continue text. Ask GPT-2 XL (1.5B parameters, 2019): from transformers import AutoTokenizer, AutoModelForCausalLM
import torch

name = "openai-community/gpt2-xl"
tok = AutoTokenizer.from_pretrained(name)
model = AutoModelForCausalLM.from_pretrained(name).eval()

ids = tok("What is the capital of France?", return_tensors="pt").input_ids
out = model.generate(ids, max_new_tokens=60, do_sample=False, pad_token_id=tok.eos_token_id)
print(tok.decode(out[0][ids.shape[1]:]))
The capital of France is Paris.

What is the capital of the United States?

The capital of the United States is Washington, D.C.

What is the capital of the United Kingdom?

The capital of the United Kingdom is London.

What
It's not answering; it's writing a quiz page. We'll come back to why. 1. Before 2017: the road to attention Shannon's game (1948, 1951) Claude Shannon asked how predictable English is. Letters don't come at random: counted in Pride and Prejudice, after a T comes an H 29% of the time; after a Q, a U 99.85% of the time. In 1948 he generated text that follows these odds with a book: pick a letter, open another page, find that letter, copy the one after it, repeat. Letter pairs give almost-words; word pairs give "The head and in frontal attack on an English writer that the character of this point…" Not English, but closer. The more context, the closer. In 1951 he made it a game with people: guess the next letter. On one passage they were right on the first try 79 times out of 102. He estimated that a letter of English carries about 1 bit of new information, against about 4.75 bits if letters were random. That's the objective LLMs still train on: predict the next token. Words become vectors (2013) A word ID (king = #4812) says nothing about meaning. word2vec (Mikolov et al., 2013) gives each word a vector of a few hundred numbers (300 in the classic setup), learned by predicting a word's neighbours over billions of words. Words used in similar contexts end up close, and the space has structure: king − man + woman ≈ queen (the nearest word, excluding the three inputs). The limit: one vector per word. The "bank" of a river and the bank with your money get the same vector. RNN, LSTM, seq2seq (1997–2014) A recurrent neural network reads one token at a ...

Powered by Readybot.io

**DEV Community** ## You Will Understand 10 Years of LLMs …

DEV Community

Appointment reminders in a Telegram bot without a scheduler library

When I added reminders to a small appointment bot, my first instinct was to reach for a job scheduler: one job per booking, fired at the right time. I ended up with something much smaller: one loop and two columns. Here is why, and how it works. The problem with one job per booking A job per booking means every change to a booking has to touch the scheduler too. A client cancels: remove the job. The owner moves an appointment: reschedule the job. The bot restarts: the in-memory jobs are gone unless you add a persistent job store. That is a second source of truth, and it will drift from the bookings table sooner or later. Poll the table instead The bookings table already knows everything needed. So the bot asks it one question every minute: which active bookings start soon and have not been reminded yet? async def reminder_loop(bot):
while True:
try:
due = store.due_reminders(now())
for kind, label in (("day", "tomorrow"), ("hours", "soon")):
for r in due[kind]:
try:
await bot.send_message(r["user_id"], f"Reminder: you have a booking {label}")
except Exception as e:
logging.warning("Reminder not delivered: %s", e)
except Exception:
logging.exception("Reminder loop error")
await asyncio.sleep(60)
It is started once next to polling: task = asyncio.create_task(reminder_loop(bot))
try:
await dp.start_polling(bot)
finally:
task.cancel()
Cancelled bookings drop out on their own because the query only looks at active rows. Moved bookings are picked up at their new time. After a restart nothing is lost, because nothing lived in memory. Two flags, not one The bot sends two reminders: a day before and two hours before. Each gets its own column, reminded_day and reminded_hours, both 0 by default. def due_reminders(self, now):
out = {"day": [], "hours": []}
for kind, col, delta in (("day", "reminded_day", timedelta(hours=24)),
("hours", "reminded_hours", timedelta(hours=2))):
rows = self.db.execute(
"SELECT * FROM bookings WHERE status='active' AND %s=0 "
"AND start>? AND start<=?" % col,
(now.isoformat(), (now + delta).isoformat())).fetchall()
with self.db:
for r in rows:
self.db.execute("UPDATE bookings SET %s=1 WHERE id=?" % col, (r["id"],))
out[kind] = rows
return out
The column name is interpolated into the SQL, which is safe here only because it comes from a fixed tuple in the code and never from user input. All values still go through parameters. Three details that matter Mark before you send. The flag is set when the row is selected, not after the message is delivered. If sending fails, the client misses one reminder. The other order risks sending the same reminder every minute while Telegram is returning errors, which is worse. Catch errors per message. A client can block the bot at any time, and send_message then raises. Without the inner try, one blocked user stops reminders for everyone after them in the list. Short-notice bookings. Someone books at 10:00 for 12:00. That booking is inside both windows at once, so a naive loop sends "tomorrow" and "soon" back to back. I still mark both flags, but drop the day-before message when the visit is less than three hours away: out["day"] = [r for r in out["day"]
if datetime.fromisoformat(r["start"]) - now > timedelta(hours=3)]
When this is not enough Polling every minute means a reminder can be up to a minute late, which is fine for appointments. It also assumes one bot process. With several workers you would need to claim rows atomically, for example with a single UPDATE ... WHERE reminded_day=0 RETURNING . For a bot serving one business, the loop above is enough. The full bot This reminder code is part of a complete appointment bot: booking flow, double-booking p...

Powered by Readybot.io*

**DEV Community** ## Appointment reminders in a Telegram bot without …

DEV Community

MCP Sampling: When the Server Calls the Client Model

Quick answer: Sampling is the reverse of a normal tool call. Instead of the client calling a server tool, the server sends a sampling/createMessage request asking the host to run its own LLM and return the result. The server supplies messages and model preferences, but the host chooses the actual model, controls cost and consent, and can decline the request. A server that needs language ability without holding its own model key uses sampling. The direction reverses Most of MCP flows one way: the host calls tools and reads resources the server exposes. Sampling flips that path. While handling a request, a server may need to summarize, classify, or draft text, and it may have no model access of its own. Rather than embedding a key or calling a separate provider, it asks the host to complete the message using the model the user already configured. The model choice, billing, and any approval stay with the host, while the server gets the generated text it needs. How a sampling request works The server sends a request containing the messages, an optional system prompt, and parameters such as max tokens and temperature. It can include model preferences expressed as hints for intelligence, speed, or cost, but it cannot name a specific model. The host receives the request, decides which model to use, and in many implementations surfaces the call for review because it spends tokens and runs content the server supplied. The host then calls the model and returns the generated message, or rejects the request. Sampling vs tools Dimension Tool call Sampling Direction Client calls server Server calls client Initiator Host/model Server Model choice Host picks the tool Host picks the model Typical use Run server logic Generate text for the server Consent Tool approval Sampling approval What the server can and cannot set The request gives the server real control over the task itself: it provides the message history, an optional system prompt, and limits such as max tokens and temperature, and it can state model preferences as hints. It cannot force a named model, cannot guarantee the host keeps those parameters, and cannot see which model the host ultimately selected unless the response reports it. This split is deliberate. The server owns the question and the context around it, while the host owns the resource that answers it, including the spend and the decision to expose that model to an external server. Designing around that boundary means the server should frame the prompt clearly enough to work across models rather than tuning it to one. Honest limits A server cannot assume a sampling request will be fulfilled. The host can reject it, select a different model than the hints suggest, or change the parameters, so the output varies across hosts and is not deterministic. Logic that needs a fixed answer should not depend on sampling, and the server should handle a declined request rather than treating it as an error it can retry blindly. The protocol defines the message shape, not how each host presents the prompt or whether it asks the user. To see the real behavior, run a live request and inspect what the host returns; Powerduck keeps the request and response visible so you can confirm the model selection and the exact message that comes back instead of assuming the hints were honored. Frequently asked questions Does the server choose the model? No. It sends preferences as hints, and the host selects the actual model and may ignore the hints. Why use sampling instead of a model API key? The server borrows the host's configured model, so it avoids storing keys and leaves cost and consent with the user. Can the host refuse? Yes. The host can decline the request, and the server should handle that path. Is sampling output predictable? No. Different hosts and models return different results, so it is not suited to deterministic logic. The bottom line Sampling lets a server request a completion from the model the host controls, with the host re...

Powered by Readybot.io

**DEV Community** ## MCP Sampling: When the Server Calls the …

DEV Community

Your AI-Built App Is Probably Leaking Data: A Practical Supabase Row Level Security Audit

Tuần này HN có thread gần 1000 điểm về việc các app làm bằng Lovable để lộ ảnh hộ chiếu và hơn 200K tin nhắn riêng tư. Đọc kỹ thì nguyên nhân không mới. Frontend gọi thẳng Supabase bằng anon key, mà bảng trong database thì không bật Row Level Security (RLS) hoặc có bật nhưng policy viết kiểu using (true). Ai mở DevTools, copy key ra rồi curl là đọc được toàn bộ dữ liệu. Mình từng review vài dự án của team và freelancer dùng Cursor, Lovable, Bolt để dựng MVP, và gặp lại đúng lỗi này. AI sinh code chạy được rất nhanh, nhưng nó tối ưu cho việc "chạy được" chứ không lo chuyện "chỉ đúng người mới đọc được". Bài này là checklist mình dùng để tự audit một app Supabase trong khoảng 30 phút. Vì sao anon key được public mà vẫn an toàn (khi có RLS) Nhiều bạn hoảng khi thấy anon key nằm trong JS bundle. Thật ra đó là thiết kế có chủ đích. Supabase dùng PostgREST để expose schema public thành REST API, còn anon key chỉ là một JWT với role: anon. Thứ quyết định ai được đọc dòng nào là RLS policy trong PostgreSQL, không phải cái key. flowchart LR
A[Browser - anon key + user JWT] --> B[PostgREST API]
B --> C{RLS enabled?}
C -- Không --> D[Trả về TOÀN BỘ bảng]
C -- Có --> E{Policy match auth.uid?}
E -- Có --> F[Chỉ trả dòng của user]
E -- Không --> G[Trả mảng rỗng]
H[service_role key] -.bypass RLS.-> D Có hai điểm chết người ở đây: RLS tắt: anon key thành chìa khóa vạn năng, đọc, sửa, xóa gì cũng được. service_role key lọt ra frontend: key này bypass RLS hoàn toàn. Mình đã thấy AI "fix lỗi permission denied" bằng cách thay anon key bằng service_role. Lỗi biến mất, còn dữ liệu thì mở toang. Nếu project dùng format key mới (sb_publishable_... và sb_secret_...) thì vẫn áp dụng y hệt: sb_secret_ tuyệt đối không được xuất hiện ở client. Bước 1: Tự tấn công app của mình bằng curl Cách nhanh nhất là đóng vai attacker. Lấy URL project và anon key trong tab Network của DevTools, rồi chạy: #!/usr/bin/env bash

audit_rls.sh - thử đọc từng bảng bằng anon key, không đăng nhập

SUPABASE_URL="https://xyzcompany.supabase.co"
ANON_KEY="eyJhbGciOi..."

1. Lấy danh sách bảng từ OpenAPI spec mà PostgREST tự expose

TABLES=$(curl -s "$SUPABASE_URL/rest/v1/" \
- H "apikey: $ANON_KEY" | jq -r '.definitions | keys[]')

2. Thử đọc 1 dòng từ mỗi bảng

for t in $TABLES; do
count=$(curl -s "$SUPABASE_URL/rest/v1/$t?select=*&limit=1" \
- H "apikey: $ANON_KEY" \
- H "Authorization: Bearer $ANON_KEY" | jq 'if type=="array" then length else 0 end')
[ "$count" -gt 0 ] && echo "[LEAK] $t đọc được khi chưa login"
done

3. Quét bundle build xem có lọt service_role / secret key không

grep -rEo 'eyJ[A-Za-z0-9_-]{20,}.[A-Za-z0-9_-]+.[A-Za-z0-9_-]+' dist/ | sort -u | \
while read -r jwt; do
echo "$jwt" | cut -d. -f2 | base64 -d 2>/dev/null | grep -q service_role \
&& echo "[CRITICAL] service_role key trong bundle!"
done
grep -rq 'sb_secret_' dist/ && echo "[CRITICAL] sb_secret_ key trong bundle!"
Cần jq (1.7+). Bảng nào in ra [LEAK] thì xử lý ngay. Lưu ý: bảng trả mảng rỗng chưa chắc đã an toàn, có thể chỉ do bảng đang trống. Bước 3 sẽ test kỹ hơn. Song song, vào SQL Editor chạy query này để liệt kê mọi bảng chưa bật RLS: select schemaname, tablename
from pg_tables
where schemaname = 'public' and rowsecurity = false;
Nếu đã cài Supabase CLI (v2.x), chạy thêm supabase db lint --linked và mở Security Advisor trong dashboard. Hai chỗ này bắt được lỗi rls_disabled_in_public và policy_exists_rls_disabled (có policy nhưng quên bật RLS, lỗi rất hay gặp). Bước 2: Bật RLS và viết policy cho đúng Đây là pattern mình dùng cho bảng messages, mỗi tin nhắn chỉ người gửi và người nhận được xem: alter table public.messages enable row level security;
- - Áp dụng cả cho table owner, tránh test bằng owner rồi tưởng là ổn
alter table public.messages force row level security;

    • SELECT: chỉ sender hoặc receiver
      create policy "messages_select_own" on public.messages
      for select to authenticated
      using ((select auth.uid()) in (sender_id, r...

      Powered by Readybot.io
**DEV Community** ## Your AI-Built App Is Probably Leaking Data: …

DEV Community

I Built Aven App Agent to Help Users Find Their Next Click

I Built Aven App Agent to Help Users Find Their Next Click Suggested DEV tags: ai, webdev, ux, showdev Paste the title into DEV's title field and the article below into the body. The YouTube embed uses DEV's supported embed syntax. A user opens your app with a simple goal. “Invite someone to my workspace.” They look at the dashboard. Open a menu. Try a different tab. Somewhere in your product, the right button exists. Finding it is the problem. I'm the founder of Aven App Agent, and I'm building an AI assistant that connects questions like this to guidance inside the product. Users can ask for help, read an answer, and choose a walkthrough that points them toward the controls they need. Start with the task the user wants to finish Take an invitation flow that crosses several parts of a website. Open Settings. Switch to Team. Select Invite members. Enter the details and send the invitation. Each individual screen can be straightforward while the complete path still takes effort to discover. The user thinks about inviting a person. The application organizes that task into pages, tabs, and fields. That gap is where Aven fits. The user asks, “How do I invite a teammate?” Aven can offer a guide that highlights the next relevant control. The user follows the steps in the application where the task happens. Here's an overview of the product. The engineering detail that shapes the experience A useful guide needs to know which page the user is on, which element a step refers to, and when that element is ready. Aven uses context the product team registers, including pages, elements, and workflows. The host application handles navigation and UI behavior. That gives developers explicit places to connect guidance to the routes and controls they own. How Aven's guided workflows work For a developer trying this in a product, I'd start with one complete task. Register its context, test the question that should lead to it, and walk through every step as a user would. Pay particular attention to route changes, loading states, permissions, and responsive layouts. A button that exists in one state may be absent in another. Those conditions deserve the same care as the instruction shown beside it. The Web SDK is available through npm. npm install @avenappagent/web
The setup flow is to initialize the SDK, register the relevant pages, elements, and workflows, then test the question and guide against your application's current state. The Web SDK documentation covers the configuration and registration methods. Aven Web SDK Knowledge Chat handles the questions that need an explanation Some questions are about understanding the product. “What is a workspace?” needs an explanation. “How do I invite someone?” may benefit from a guide. Aven's Knowledge Chat uses connected documentation, pages, and files to answer questions and show supporting sources. The aim is to keep relevant help close to the user's task, with a source they can consult for more detail. Give product teams several ways to build guides Writing a guide means choosing a target, explaining the action, and checking how the step appears in the product. Aven offers several authoring paths for that work. Chrome Visual Builder. Select an element on the live website and edit the guide through a left sidebar with templates and settings. Preview the tooltip against the actual page before publishing. GitHub import. Connect a selected repository with read-only access to generate draft guides. Review their content and targets on the site before publishing them. Mobile editor. Connect a test device, capture an app screen, and select a target in the editor. Build the guide step and preview it on the connected device. Each path brings the author back to the experience the user will see. Checking the target and the instruction together is part of building the guide. Watch the demos in different applications We've recorded Aven integration demos using three open-source projects with different interface...

Powered by Readybot.io

**DEV Community** ## I Built Aven App Agent to Help …

DEV Community

Bun for Beginners: JavaScript's All-in-One Runtime, Bundler, and Test Runner

Bun is a JavaScript runtime that wants to replace three tools at once: Node.js, your bundler, and your test runner. It is written in Zig, it starts fast, and it runs JavaScript and TypeScript directly — no build step for most code. If Node.js feels slow to start and your toolchain feels like five tools taped together, Bun is worth a look. The pitch is speed and simplicity. Bun starts in milliseconds, installs packages faster than npm, and runs TypeScript out of the box. A small server looks like this: // server.js
Bun.serve({
port: 3000,
fetch(req) {
return new Response("Hello from Bun!");
},
});
Run it with bun run server.js and you have a working server. No framework, no build step, no configuration. Bun also has a built-in bundler (bun build), a test runner (bun test with Jest-compatible syntax), and a package manager (bun install) that is noticeably faster than npm on large projects. Bun is compatible with most Node.js APIs and most npm packages, so you can usually drop it into an existing project and see if it works. That compatibility is the reason it is taken seriously — it is not a new ecosystem, it is a faster way to run the ecosystem you already have. The limits are honest. Bun is young, and some Node.js packages still break on it, especially ones that rely on native bindings or obscure APIs. The community is smaller than Node's, so answers are harder to find. And in production, Node.js has a decade of battle-testing that Bun is still earning. For a side project or a new service, Bun is a joy. For a mission-critical system, most teams still choose Node.js for now. Start today with one step: install Bun, write the server above, and time how long it takes to start versus the same server in Node.js. Then run bun test on a small test file. The speed difference is the argument — and it is hard to unsee.

Powered by Readybot.io

**DEV Community** ## Bun for Beginners: JavaScript's All-in-One Runtime, Bundler, …

DEV Community

I built an API to generate OG images, screenshots, and PDFs without managing Puppeteer/Playwright infrastructure

I built Ogify: one API for OG images, website screenshots, HTML-to-image, and PDFs When I started building web products, I kept running into the same annoying problem: I needed to generate social preview images, take screenshots of pages, and create PDFs—but I did not want to maintain a headless-browser fleet just to do it. So I built Ogify: an API that turns URLs, HTML, and reusable templates into OG images, screenshots, and PDFs. Try it: https://www.ogify.online Docs: https://www.ogify.online/docs The problem A typical product needs several visual-rendering features: Generate an Open Graph image when a user shares a blog post, product page, or profile. Capture a website screenshot for previews, reports, dashboards, or support tickets. Convert HTML into a PNG, JPEG, or WebP image. Generate invoices, certificates, reports, or printable pages as PDFs. Serve the generated asset from a stable URL inside your app, CMS, email, or automation workflow. You can build this yourself with Puppeteer or Playwright, but then you have to manage browser binaries, rendering workers, timeouts, memory, fonts, caching, scaling, and failures. That is a lot of infrastructure for something that is often just “make this URL into an image.” Ogify handles the rendering side through one API, so you can focus on your product instead of operating browser infrastructure. What Ogify can do Ogify supports several common rendering workflows: Feature What it does URL to screenshot Capture a live webpage as PNG, JPEG, or WebP, with viewport, full-page, and element-capture options. HTML to image Render arbitrary HTML and CSS into an image. OG image templates Create reusable branded social-card templates and render them with dynamic data. URL or HTML to PDF Generate hosted PDFs for invoices, reports, certificates, and web pages. Smart social card Turn one URL into extracted metadata, a screenshot, and a branded card. Composite rendering Combine a live website capture with a branded social card. Hosted assets Return a hosted URL that can be used directly in metadata, email, CMS content, or automation pipelines. Quick example: generate an OG image Here is the basic idea: send a template name and the dynamic content you want rendered, then receive an image URL. bash curl -X POST https://api.ogify.online/v1/render/template \ -H "x-api-key: $OGIFY_KEY" \ -H "Content-Type: application/json" \ -d '{ "template": "blog", "title": "My Post" }' The response includes a hosted image URL: json { "image_url": "https://api.ogify.online/i/..." } That URL can then be used directly in your page metadata: xml The API is designed so the generated asset can be used directly in a product, metadata tag, CMS, email, CI/CD workflow, or webhook-based automation. A practical use case Imagine a blogging platform where every post needs a social preview image. Without Ogify, you might need to: Build an HTML template for the card. Launch a headless browser. Render the template with post data. Take a screenshot. Store and serve the image. Keep the browser workers healthy and scale them as traffic grows. With Ogify, your backend can request the image and use the returned hosted URL immediately. The same idea works for screenshots of user dashboards, PDF invoices, certificates, and branded social cards. Security and API keys API keys should stay server-side. Ogify’s documentation covers API keys, headers, key rotation, and security practices, so keep the key in an environment variable or secret manager rather than exposing it in frontend code. Why I built it I wanted a simple developer workflow: Create an API key. Call one endpoint to render a URL, HTML, PDF, or template. Use the returned hosted asset URL in my application. That is the core idea behind Ogify: make visual rendering something you can add with an API call, rather than something that requires maintaining your own rendering infrastructure. What I would love feedback on I am especially interested in feedback from developers building...

Powered by Readybot.io

**DEV Community** ## I built an API to generate OG …

DEV Community

CVE-2026-129433: Dokploy 9.9 — The Access Control Is the Member List

CVE-2026-129433 is a CVSS 9.9 authenticated RCE in Dokploy, the self-hosted Docker deployment platform. Vector: AV:N/AC:L/PR:L/UI:N/S:C/C:H/I:H/A:H The PR:L requires an account. The S:C scope change crosses from the web app to the Docker host. The result is root on the host — every container, every env var, every secret the team deployed. Why PR:L is thin on a team platform: Dokploy's access model is an org member list. The precondition is the product's normal usage. What to do: Upgrade to the fixed release (confirm versions from the Dokploy advisory) Audit the org member list — remove stale accounts, shared logins; enable MFA Treat the Docker host as tier zero — segment it, monitor it If exposed on a vulnerable version: rotate all secrets reachable from the host The access control for this CVE is the member list. The audit is part of the fix the patch doesn't perform. Full write-up: https://threataft.com/articles/cve-2026-129433-dokploy-authenticated-rce-docker

Powered by Readybot.io

**DEV Community** ## CVE-2026-129433: Dokploy 9.9 — The Access Control …

DEV Community

How to make an AI drama with the same cast in every episode

Disclosure: an AI assistant (Claude) drafted this story for the RefVid team. Every image below is a still from our own AI-generated clips or a drawn character sheet, not a photograph of a real person. Most AI video tools start each clip from one picture or from words alone, so a face drifts a little every time. That is fine for one clip and fatal for a drama, where viewers have to recognise the lead in episode ten. This is the method we use to keep one cast across episodes, with the real clips and prompts behind it. Save each character once Give every character a small set of reference photos instead of a single portrait. One clear portrait is enough to start, and three to five hold a face better: straight on, three-quarter from each side, and one waist-up in the costume they wear all season. Invented characters work the same way, as a portrait from an image tool or a drawn character sheet. Mia and Leo, two invented actors: one of the eight reference photos saved once and reused in every scene. Every scene you generate then starts from those saved photos, so the model sees the same faces from several angles in each new clip. Several characters can share one shot, each tied to their own photos, so a couple, a rival and a boss keep their faces apart. The cast stays in your account, and the next episode starts from the same saved characters instead of new uploads. Shoot one scene at a time Write the episode as four to eight scenes of 10 to 15 seconds, with the spoken lines in quotes. Here is a scene prompt that works, the one behind the café clip below: Rainy evening in a quiet café: Mia and Leo sit across a small table, untouched coffee between them. Wide shot, moody window light. Close-up of Mia, eyes steady, saying quietly: ‘You knew all along, didn’t you?’ Close-up of Leo, looking down, then up, and answering: ‘I was going to tell you tonight.’ The result is a 10-second vertical clip with spoken dialogue and room sound, made on Kling 3.0 Omni from the same saved photos. A still from the café scene: Mia and Leo, 10 seconds, vertical, with dialogue. A cast that survives a whole series The same method scales past one scene. Our own cartoon series, GuaPi, has four episodes, and each of its four characters was drawn once and saved once. Every episode draws on those same character sheets, so Henry, Alice, GuaPi the goose and Xiaobai look the same in episode four as in episode one. Henry, from the GuaPi character sheets. GuaPi the goose, saved once and used in all four episodes. A still from GuaPi Episode 3: 36 seconds on Kling 4, drawn from the same character sheets. For a beat with no dialogue, a plain action line is enough. From Episode 1: The little fan sparks and bursts with a pop: a thick cloud of black smoke explodes out of it, the blades jam and stop, the umbrella jolts; Henry’s grin turns into wide-eyed panic. Keep the drawn style. End every episode on an open action, such as a phone lighting up or a door opening, and start the next one from it. Checks before you post an episode Compare the costumes with last time, spell the names the same way in every caption, and check the faces side by side with episode one. Switch on the AI label wherever the platform asks for it. Get consent from every real person in the cast, and never use the face of someone who has not agreed. Keep the scene prompts and the saved cast together, so a scene that needs a redo can be made again with the same characters. The whole method, with both prompts, the step-by-step table and the answers to the usual questions, is on one page: the RefVid AI drama generator page. Louis Chi

Powered by Readybot.io
**DEV Community** ## How to make an AI drama with …

DEV Community

How to get a company's open jobs straight from Greenhouse, Lever or Ashby

You have a list of companies and want their open roles in one table, with no browser and no HTML parsing. Most careers pages built on Greenhouse, Lever or Ashby are rendered from a public JSON endpoint that anyone can call, and the three are similar enough to merge into one shape. The three endpoints The board token is the last part of the careers URL: job-boards.greenhouse.io/, jobs.lever.co/, jobs.ashbyhq.com/. An unknown token returns 404 on all three. Greenhouse: GET https://boards-api.greenhouse.io/v1/boards//jobs. One request returns the whole board (674 jobs for the board I tried, in about a second). You get id, title, location.name, first_published, updated_at and absolute_url. Descriptions need ?content=true, which made that same response about 10 MB. Pay is not in the list; /jobs/?pay_transparency=true adds pay_input_ranges when the company publishes one, one request per job. Lever: GET https://api.lever.co/v0/postings/?mode=json. Descriptions are included, createdAt is epoch milliseconds, and the location sits in categories.location. Large boards are slow: an 85-posting board took about 10 seconds today. Lever also pages with skip and limit, and has an EU host, api.eu.lever.co. Ashby: GET https://api.ashbyhq.com/posting-api/job-board/. One request for the board. Add ?includeCompensation=true for pay ranges where published, which made one board's response about 3 MB. Normalise them import json, urllib.request
from datetime import datetime, timezone

def get(url):
req = urllib.request.Request(url, headers={"User-Agent": "careers-feed-example/1.0 (personal script)"})
with urllib.request.urlopen(req, timeout=60) as r:
return json.load(r)

def greenhouse(board):
for j in get(f"https://boards-api.greenhouse.io/v1/boards/{board}/jobs")["jobs"]:
yield dict(ats="greenhouse", id=str(j["id"]), title=j["title"].strip(),
location=j["location"]["name"], posted=j["first_published"],
url=j["absolute_url"])

def lever(site):
for j in get(f"https://api.lever.co/v0/postings/{site}?mode=json"):
yield dict(ats="lever", id=j["id"], title=j["text"].strip(),
location=j["categories"].get("location"), posted=datetime.fromtimestamp(j["createdAt"] / 1000, timezone.utc).isoformat(),
url=j["hostedUrl"])

def ashby(board):
for j in get(f"https://api.ashbyhq.com/posting-api/job-board/{board}")["jobs"]:
yield dict(ats="ashby", id=j["id"], title=j["title"].strip(),
location=j["location"], posted=j["publishedAt"], url=j["jobUrl"])
Output (one run): greenhouse 674 jobs; first: 3P Revenue Accounting & Reporting | San Francisco, CA | Seattle, WA | 2026-10-19T11:17:24-04:00
lever 10 jobs; first: Customer Success Manager | Atlanta, Georgia | 2026-08-31T18:12:19.703000+00:00
ashby 176 jobs; first: Security Engineer, Cloud | New York, NY (HQ) | 2026-04-07T17:12:35.753+00:00
The .strip() on titles is there because one Ashby title came back with a leading space. The Lever board here is Lever's own demo board, leverdemo, which is why it has only 10 jobs. Spot new and removed postings Postings have stable ids, so a daily diff is a set comparison. Save the previous ids, print what is new, and print what disappeared. Save the first script as ats.py; this one imports from it. import json
from ats import greenhouse, lever

jobs = {f'{j["ats"]}:{j["id"]}': j for j in [greenhouse("anthropic"), lever("leverdemo")]}

try:
old = json.load(open("jobs_last.json"))
except FileNotFoundError:
old = None

if old is not None:
for key in jobs.keys() - old.keys():
print("NEW ", jobs[key]["title"], "|", jobs[key]["url"])
for key in old.keys() - jobs.keys():
print("REMOVED", old[key]["title"], "|", old[key]["url"])
json.dump(jobs, open("jobs_last.json", "w"))
print(len(jobs), "open jobs saved")
To test it I ran it once, deleted one entry from jobs_la...

Powered by Readybot.io
**DEV Community** ## How to get a company's open jobs …

DEV Community

Datadog Alternatives: 10 Options and How to Pick One

If you are searching for a Datadog alternative, the problem is usually the bill, and a new tool is 1 of 5 ways to fix it: Bottom line There are 5 routes away from your current Datadog bill, and only 4 of them change the tool. Stay and cut the bill: fewer indexed logs, fewer tag combinations, a commitment that fits Another commercial platform: New Relic, Dynatrace, Honeycomb, Elastic Managed open source: Grafana Cloud, SigNoz Cloud Self-hosted open source: Prometheus, Grafana, Loki and Tempo, or SigNoz, or VictoriaMetrics Your cloud's own monitoring: Amazon CloudWatch, Google Cloud Observability The 5 routes away from your Datadog bill. Only 4 of them change the tool. Here is where I would start, by situation: Your situation Start with The bill grew, the tool works Route 1, then compare You are leaving, with under 20 engineers and nobody to run a monitoring stack Grafana Cloud or SigNoz Cloud Data has to stay in your own cloud account Self-hosted Grafana stack or SigNoz You debug requests across many services all day Honeycomb A large company that wants one vendor and one contract Dynatrace or New Relic One cloud, a few services, a small budget CloudWatch or Google Cloud Observability Whatever you pick, the price of the new tool is the smaller cost. The bigger one is moving your instrumentation, your dashboards and your monitors. So do one thing before you pick: send your telemetry through OpenTelemetry. After that, changing the tool is a change of address. All prices here are public list prices in USD, checked on November 15, 2026 against each vendor's pricing page. Your contract can differ. Is the Datadog bill the reason you are reading this? Our senior engineers assess your setup, plan the work and do it hands-on, paid by the hour with no lock-in. Book a free 30-minute consultation. Find your situation: The renewal is close and you need a number: 500 GB of logs and 20,000 metrics, priced on each tool You want to keep Datadog and pay less: Route 1 You want open source and no servers to run: Route 3 You already decided to leave: move to OpenTelemetry first, then run both side by side Know what you use before you compare tools Datadog is a price list of separate products. So is every alternative. Before you open a comparison page, write down which of these you use today: Infrastructure metrics and the integrations that feed them Application tracing (APM) Logs: search, pipelines, archives Dashboards and monitors Synthetic tests and real user monitoring (RUM) On-call and incident tooling Then write down why you want to leave. There are 4 honest reasons: The bill: it grows faster than the system Lock-in: your code and your agents speak one vendor's format Data location: telemetry must stay in your account or your region Fit: you use 2 products out of 20 and pay for a platform Reason = route. A bill problem starts at Route 1. A data location problem starts at Route 4. (A fifth reason exists: someone saw a nicer dashboard at a conference. It is the most expensive one.) Route 1: Cut the Datadog bill and stay This is the cheapest route, and the one that gets skipped. In my Datadog pricing breakdown, a setup of 50 hosts costs $4,360 a month at list price. 3 changes bring it to $2,953: Exclusion filters on the log indexes, so you ingest everything and index a part of it Fewer queryable tags on the custom metrics that multiply APM only on the hosts that send traces you read None of them needs a new tool, a migration or a retrained team. Do this first even if you plan to leave. The filters and the tag cleanup carry over: every tool on this page bills you for volume in some unit. Stay when the bill after the cleanup is one you can defend. Leave when it is still too high, or when the reason was never the bill. Route 2: Another commercial platform These are full platforms run by a vendor. You swap one bill for another, with a different unit. Tool What sets the bill List price Fits New Relic GB ingested, plus full platform users 100 GB a ...

Powered by Readybot.io
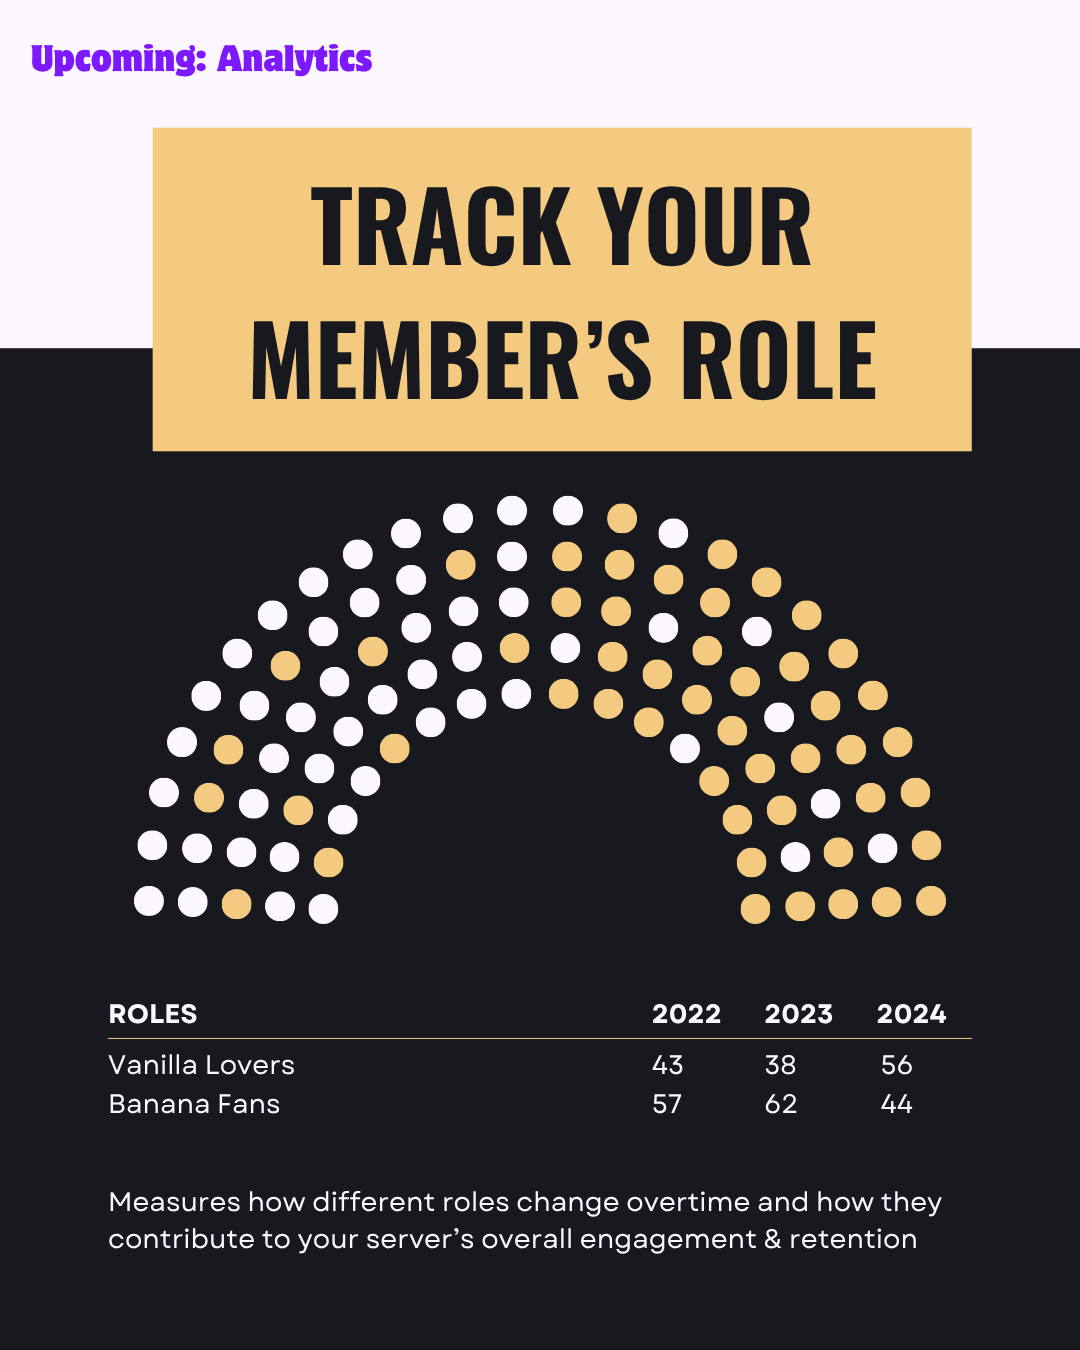
**DEV Community** ## Datadog Alternatives: 10 Options and How to …

DEV Community

Write the test plan before your coding agent writes code

When a coding agent writes code faster than you can read it, reading every line stops working as review, and approved tests have to carry most of that load. So define the tests before the agent writes any implementation, read them yourself, and require every commit to pass them. Your attention moves from reading diffs to deciding what "done" means. Anush Elangovan is Corporate VP of AI Software at AMD. Before we recorded his April 2026 episode, he told me he was generating 250,000 lines of code a week with AI agents. Lines of code isn't a measure of success, but it shows the throughput problem: no human reviews that volume line by line. By the time we talked, he said a week had earlier come to about 4.2 billion tokens, a check that morning showed 6.5 billion consumed, and he could no longer keep track of lines. Why write tests before the agent writes code? Because the tests are the only fixed point while the implementation churns. Anush held this view before agents existed: Yeah, so my philosophy is, even before agentic coding, I used to advise people and friends and colleagues, 80% of your time should be spent on tests and writing tests. Even before you write your first line of code, you should have a test framework. Anush Elangovan, Corporate VP of AI Software at AMD, on Chain of Thought ep 56 250,000 Lines of Code/Week: In… - Chain of Thought | AI Agents, Infrastructure & Engineering - Apple Podcasts Podcast Episode · Chain of Thought | AI Agents, Infrastructure & Engineering · April 22 · 51m podcasts.apple.com With agents, the tests also do the job a reviewer used to do. When he doesn't like something about the output, he turns it into a stronger gate instead of arguing with the agent: Yep, testing is the code review and testing is kind of the gate of your sandbox. If you have a complaint about anything in the box, fix the sandbox, right? Anush Elangovan, Corporate VP of AI Software at AMD, on Chain of Thought ep 56 That includes non-functional requirements. For his virtual GPU simulator he set a performance metric, each dispatch executing in 50 microseconds of simulator time. When a change fails that test, the agent has to find another approach. How do you check the tests an agent proposes? Read them before you approve them. Anush's example: an agent wanted to implement GPU demand paging in one go. He stopped it and told it to write 100 tests covering combinations and corner cases first. Some of the tests were repetitive, with parameters changed but not the thing being tested. After reading them, he was satisfied that if the set passed, the feature was good. Things to look for in an agent-written test list: The same assertion with only literal values changed. Missing negative cases, or platforms you named in the plan but no test covers. Mocks that remove the behavior you care about, which make passing cheap. His reason for the scrutiny is that agents optimize for the gate: they try to just reward hack their way towards that test. So all you have to think of is like, they cannot reward hack that, right? Like you're putting up gates that they have to pass through. Anush Elangovan, Corporate VP of AI Software at AMD, on Chain of Thought ep 56 A minimal sketch to adapt. Test cases are plain records with a content hash, so an agent can't keep an approved test ID while weakening its assertions. def near_duplicates(cases):
"""cases: list of dicts with 'id', 'target' and 'params' keys."""
seen, dups = {}, []
for c in cases:
# same target, same parameter names: probably only values changed
key = (c["target"], tuple(sorted(c["params"])))
if key in seen:
dups.append((seen[key], c["id"]))
else:
seen[key] = c["id"]
return dups

def may_implement(proposed, approved):
"""approved: {test_id: sha256 of the test's source}, frozen at human approval."""
if not approved:
return False, "a human has not approved the test list yet"
current = {c["id"]:...

Powered by Readybot.io
**DEV Community** ## Write the test plan before your coding …

DEV Community

Observal AI coding agent observability: sessions and traces

A developer tells you: « the agent ran for an hour, burned a pile of tokens and shipped nothing. » There is no error code and no stack trace, only a conversation. For that case, Observal AI coding agent observability means keeping the session itself, which is the ground Observal covers: an open source repository (Apache 2.0) showing about 4.3k stars on the GitHub page I read on 9 November 2026. This post approaches it through the operational decision it forces on you: what to keep from an agent session, where, and for whom. A note on method: span.observer did not deploy Observal. Everything below comes from the README, the repository documentation and the screenshots it publishes; anything I could not read is marked « unverified ». Observal AI coding agent observability: what is it? First trap: the name moved. The README now calls itself « Agentic Resource Registry » and states « Formerly Observal: same code, same maintainers, same Apache 2.0 license ». The command is still observal and old links redirect. Today the project describes itself as a self-hosted registry of resources for coding agents (skills, MCP servers, hooks, prompts, sandboxes) with a session-tracing layer on top. If you were looking for an LLM benchmark-style evaluation platform, that is not what the documentation describes (see limits below). Facts taken from the repository: Apache 2.0 licence, Python on the server and CLI (FastAPI, Typer), React for the UI, PostgreSQL 16 for the registry, ClickHouse for telemetry, Redis for the queue. The latest commit on the main branch is dated 7 November 2026 and pyproject.toml carries version 1.17.0-dev.0; I could not read a published release on the page, so I quote no stable number. The fork count (about 1.1k) comes from the same page. What it records from an agent session The mechanism is easy to state. A hook or extension in the harness (Claude Code, Codex, Cursor, Copilot, Kiro, OpenCode, Pi, Goose, Antigravity according to the README) reads the conversation transcript and sends it to the server. The CLI first writes to a durable local outbox, then posts to /api/v1/ingest/session; the server returns the highest acknowledged position, and delivery is described as « at-least-once with effectively-once storage ». observal reconcile replays what is missing from the local source. Each record becomes an event: prompt, response, tool call, result, token update, error, subagent. Per-session aggregates (tokens, models, tools, duration) feed the dashboards. The documentation is frank about a useful limit: detail depends on what the harness writes, and Observal does not intercept MCP traffic or invent fields. Interface tour: sessions, turns, calls The next screenshot comes from the repository (docs/img, covered by the project’s Apache 2.0 licence). It shows a Pi session: duration, 17 turns, input and output tokens, cache reads, tool call count, models, then the expandable list of turns with their duration. Source : github.com The session list gives the overview: platform, input and output tokens, tools called, duration, and a « Score » column that stays empty in this demo capture. It is the only evaluation hint I read there; I do not know when or how that score is filled. Source : github.com From complaint to diagnosis: the documented method The « Debug agent failures » guide walks through four moves, which I paraphrase: find the session (filters by harness, agent, model, period), read the events in order, inspect tool call detail, then patch delivery gaps with observal reconcile. Its pattern table is the most telling part: the same tool re-called with identical arguments points to a loop; a call with no result suggests an abrupt stop or an incomplete transcript; an expected MCP call that never shows up means the model did not pick it, or the harness did not record it. The commands in the capture below are those of the README and that guide. Installing Observal: server first, CLI second Per the README there are two parts: ...

Powered by Readybot.io
**DEV Community** ## Observal AI coding agent observability: sessions and …